Movies, magazines, and survival books depict perfect-looking shelters, traps, and weapons. Those may be the only places such gear appears in pristine fashion. Whether or not they look as if they came out of a movie like First Blood or a museum display, what matters is that they work. And they work because of the way they are made and how they are used.
CROSSBOW
About two years ago, I attended a jungle survival class taught by the J.E.S.T. (Jungle Environment Survival Training) camp in Subic Bay in the Philippines. Many different types of traps and weapons were shown for the purposes of selfdefense and procuring food.
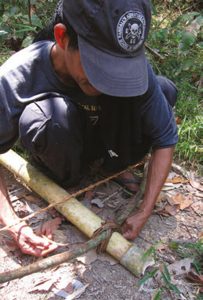
The J.E.S.T. camp got its start training U.S. soldiers who were headed for Vietnam in the late 1960s, so naturally jungle warfare tactics were taught. One weapon that stood out to me was a crossbow that could be used from a firing position or set up with a tripwire. It could be used on wild boar and people alike. It was first shown to me while walking on a trail in the jungle. My guide, Eduardo, stopped and put his pack down, then walked a few yards into the bush. Without a word, he began selecting the right vines and sapling for the project and never, at any time, said what he was making.
When he’d located the right vine, we both used our bolo knives to split it into long, thin strips for making cordage. The bow was made from a sapling between 4½ and five feet long. It also had to be green and flexible, just a little under wrist thickness. Once the cordage was produced and fixed to the green sapling via a constrictor knot, it was a good bow, but for the crossbow a few more steps were required.
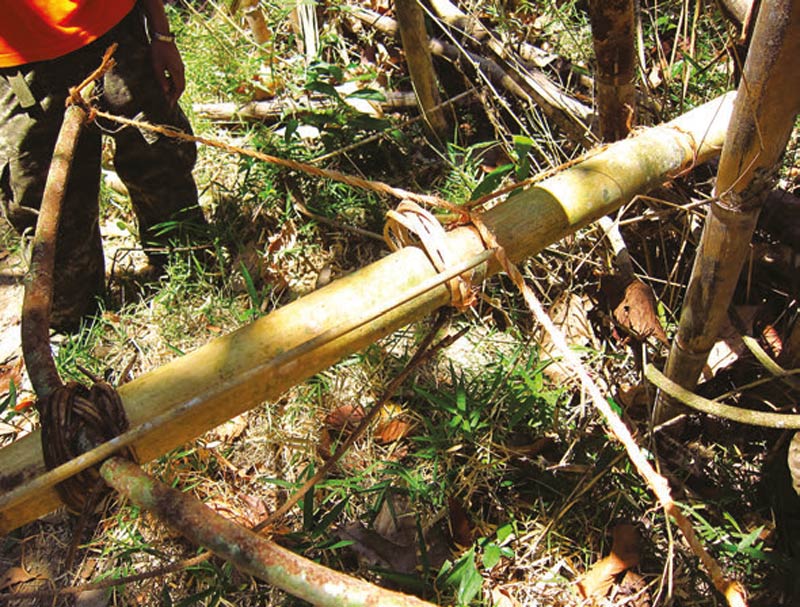
The bow was fixed to a larger, thicker piece of dried bamboo (about bicep thick) by chopping a notch for the bow to fit into perpendicular to the length of the bamboo. After that was done, the bow was put into the notch and held securely in place by thin vines. The lashings had to be tight because it’s under a great amount of pressure when set up.
When the bow was fixed to the length of bamboo, a shorter length of cordage or vine was used to attach the toggle stick to hold the bowstring under tension. The small toggle stick was held in place between a length of rattan that was woven together forming a reef-like shape and the tension of the bowstring. It was triggered by a person or animal stepping on the trip wire, or shall I say trip vine?
The arrow was a straight length of dried bamboo sharpened to a point sharp enough to penetrate the thick skin of a boar.
FROG SPEAR
When the subject of effective and easily made weapons arises, a spear is at the top of the list. Despite what many manufacturers would like us to believe, lashing a knife to the end of a long stick to make a spear is pretty much fantasy, especially if it’s your only knife in an emergency situation.
You may be thinking, “It worked for John Rambo.” The reality is that it’s better to use the tools at hand to make a spear and save your knife.
Making a spear can be as easy as sharpening the end of a stick with a knife and calling it done. This is great if you’re 12 years old. The frog spear has a few more steps than that, yet is still easy to make and effective.
If you’re a fan of the TV show Dual Survival, you may have seen this type of spear being made by Dave Canterbury. Don’t let the name fool you or limit its usefulness: Although called a frog spear, it can also be utilized as a fish spear.
Only a few materials are needed to make a frog spear: a sharp knife, some type of cordage (tree roots, vines, or 550 paracord), and a green sapling. Start by locating a green, springy, sixfoot sapling as straight as you can find. Do not use dry wood for this project, as it can easily crack upon impact with rocks, and if it does, the whole process must be repeated, so it’s best to do it right the first time.
The sapling can be willow, poplar, wild cherry, dogwood, etc, as long as it’s green and under wrist thickness. If a chopping tool such as a machete, tomahawk, or big knife is at hand, use it to make a rough tip by chopping one end of the sapling at a steep angle rather than a straight-on 90-degree cut.
If no chopping tool is available, use a baton along with a knife to make the rough tip by cross-grain batoning at a steep angle. By rough tip, I mean not super sharp. The prongs can be sharpened individually later.
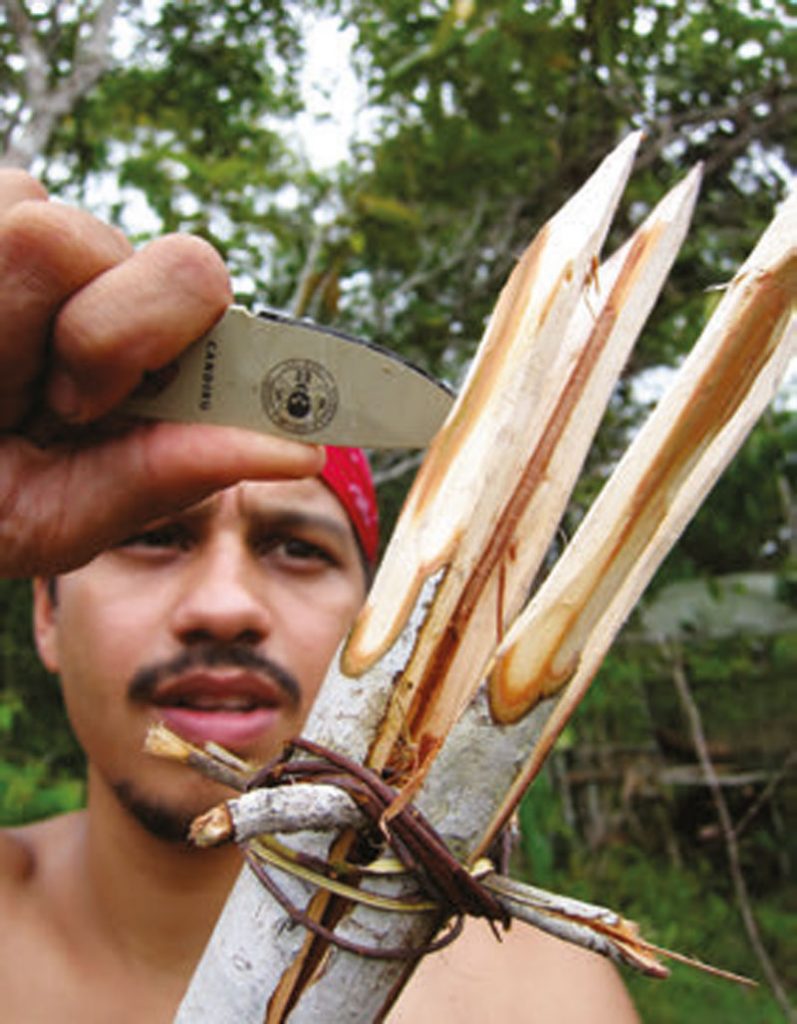
Once a rough tip has been established, stand the spear upright and place the blade of a knife on top of the sapling’s tip, which shouldn’t have a sharp point yet. The idea is to split the sapling (at the tip) two ways like a plus sign. This will make four pronounced prongs. Make sure the splits are as even as possible and that they go down at least four to five inches in length. A thin knife blade found on a Swiss Army-type knife works very well at this and doesn’t split the sapling too much like a thicker blade will. A thinner blade will also help when making the initial split and ensure that the splits are even.
Next, get two pencil-thick green sticks about two inches in length. Insert these green sticks into the two splits by rolling them down using your forefingers and thumbs. Make sure to do this slowly—don’t jam them down. Once they are both in place, the four prongs will be splayed out and can be further sharpened. The outer bark on the prongs should also be removed.
Lastly, add some cordage to secure the small green spreader sticks. Wrapping the cordage around a few times to keep the sticks in place will suffice. No fancy knots required if using a vine or tree root; a simple twist and tuck will secure it. For those made with paracord, a simple knot will do.
The idea behind using a frog spear is not necessarily to impale the frog, but to trap it. This way the prongs won’t rupture the guts, thus tainting the meat. One of the prongs entering the head, legs or feet is acceptable. This is partly why the prongs are splayed out, to keep the frog trapped in the middle so it can be retrieved.
PRACTICE MAKES PERFECT
Like all things pertaining to survival, one must practice making and using primitive weapons in order to be proficient with them.
Although I’ve only touched on two weapons, a few thousand probably exist, ranging from quickly thrown together weapons to extravagant wellengineered ones. Primitive weapons have been overshadowed by more modern bows, tomahawks, slingshots and guns—but constructed and employed properly, they can still be effective in a survival situation.