Table of Contents
800-Yard Dash
WE typically associate a patrol rifle with being used just beyond handgun ranges. But if you consider the wide variety of scenarios and locations where police may need to engage armed criminals, it’s clear that longerrange skills might come into play.
With active shooter situations being a consideration for the average patrol officer, just look at schools, malls and other spacious public and private buildings and it’s easy to see where shots stretching several hundred yards might be needed.
Thus when Spartan Tactical put together a special patrol rifle class, they did so with a nod toward longer ranges.
SPARTAN TACTICAL
Spartan Tactical is run by Jim Smith, a veteran with years of Special Forces experience, including the Army’s most elite unit in Mogadishu, where he served as a sniper and had his helicopter shot down. Assisting with this course was USMC veteran and North Texas peace officer John Jackson.
Spartan is better known in the military and law enforcement communities than the civilian world. That’s because the military and police often book entire classes with Spartan, taking up most of their training schedule. Their recently upgraded range complex is located in Jacksboro, Texas, about 70 miles northwest of the Dallas-Fort Worth Airport.
This was a unique training class because it was sponsored by DSG Arms, a Fort Worth based military and police supply company. DSG paid for the class in its entirety to provide training for their employees as well as over a dozen of their law enforcement friends ranging from the Dallas and Fort Worth Police Departments to the Texas Department of Public Safety and the Department of Homeland Security.
Most of the attending officers serve in a SWAT or training capacity back at their own departments. Thus there were no beginners in this course. Since the class included several department trainers, Jim made it a point to solicit their thoughts as to how they covered various aspects and what they taught to their department.
FORT WORTH DM PROGRAM
This class was especially relevant to the Fort Worth PD officers, since they were using it to help develop a designated marksman program for their patrol officers. Their goal is not to replace their patrol carbines, but supplement them with ARs sporting a low-power fixed or variable-power scope. This designated marksman capability would bridge the gap between patrol rifle armed officers and SWAT snipers, and distribute officers with this capability among patrol duties.
The Fort Worth officers were evaluating a variety of low-powered variable scopes to see how they performed and held zero to help determine which ones might be approved. Low variable power provides the most flexibility in this regard, Jim explained, because at the lowest setting it allows quick acquisition with both eyes open for close-range encounters, but lets the user dial it up when necessary for longer ranges or better target discrimination.
These optics would allow patrol designated marksmen to engage targets at greater distances, enhance target discrimination, and deal with partially obscured targets better than those with non-magnified optics. Even at closer ranges, in some situations it may not be possible to discern a target or positively identify hostiles without magnification.
OPTICS
Since the class was geared toward the designated marksman end of the spectrum, 15 of the 20 students ran their ARs with some type of scope, while two students ran a flip-up magnifier behind red dot sights.
For those running the flip-up magnifiers, Jim pointed out that using the magnifiers could change the point of impact that was zeroed up through the red dot electronic sight. So it was important to sight in the gun and use the magnifier’s windage and elevation controls to make sure the gun is properly zeroed when the magnifier is flipped up.
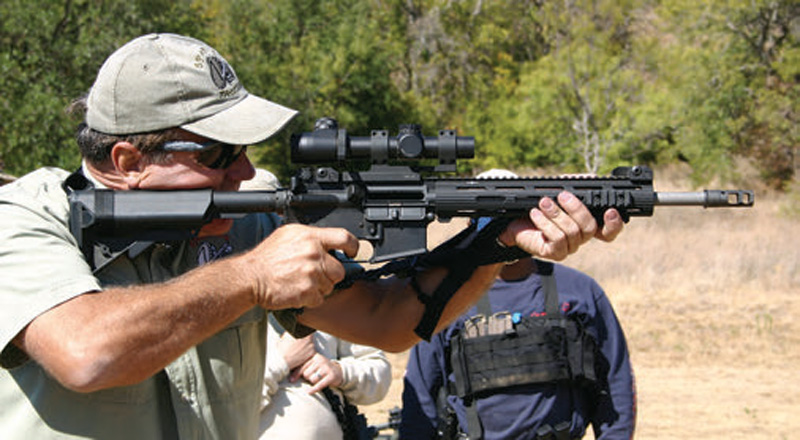
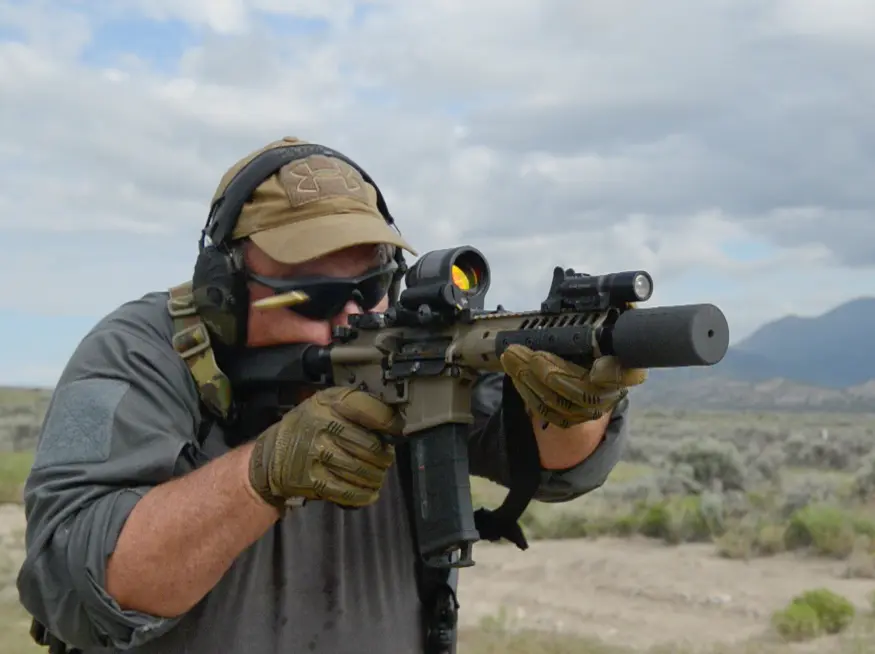
Only three students relied solely on a non-magnifying red dot optic—myself being one of them.
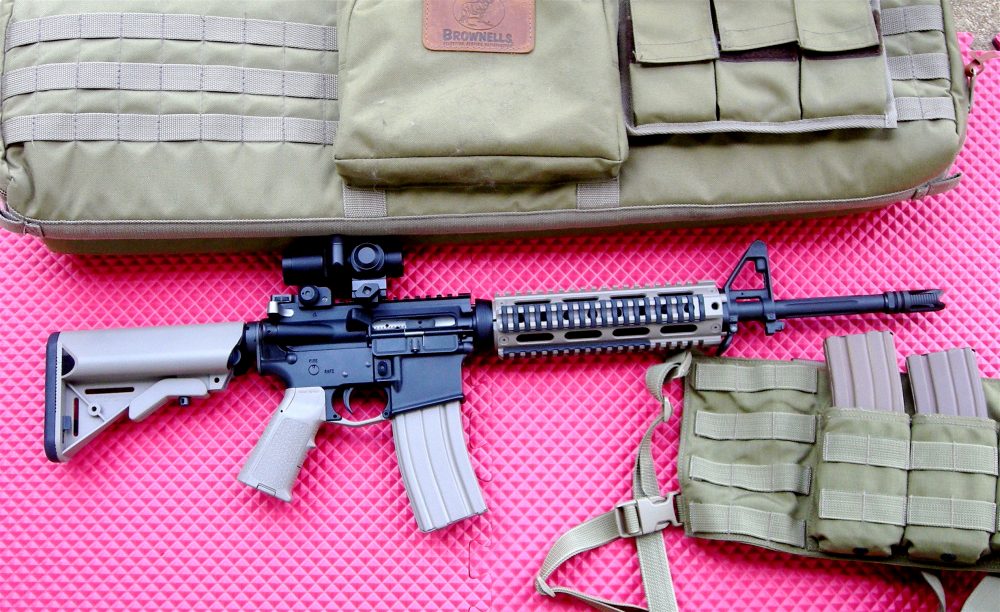
I decided to run this course with a carbine-length AR and Aimpoint optic because this is my normal setup. I wanted to see exactly how far I could effectively stretch this combination, and this class would certainly provide me the opportunity to do so.
The pros and cons of different optics, including magnified versus non-magnified, were covered in depth in Jim’s opening lecture. He went on to discuss night vision devices and thermal imaging, muzzle brakes, suppressors, slings, and everything involved in setting up a carbine for combat. He pointed out that anything you put on a rifle should increase its lethality.
Jim finished the first morning’s lecture with a discussion and demo of cleaning the AR, with attention to lubrication points and inspection of components, along with what problems are caused by issues with specific components.
HITTIN’ THE RANGE
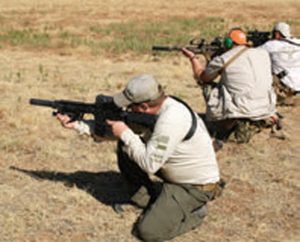
Then the class stepped onto the range, where Jim reviewed the basics of the prone position with assistant instructor John Jackson. Jim emphasized finding your natural point of aim (NPOA) whenever possible. NPOA means using your body alignment and position to hold the rifle on target as much as possible rather than your muscles. Jim explained that the more you practice NPOA, the more natural it becomes and the more quickly you can get into it. As distances increase and targets become smaller, NPOA becomes more critical.
He also stressed “shooting as much rifle as possible,” or holding the gun as far forward on the forend as possible with your support hand to maximize control and make transitioning among targets more efficient.
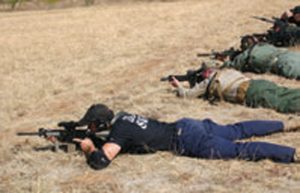
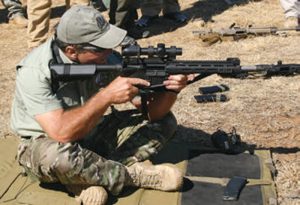
After reviewing the elements of prone, the class fired ten-round groups from that position at 100 yards to zero guns in at that distance. We checked targets, made adjustments and repeated this several times, squeezing as much accuracy as possible out of ourselves and our firearms. Then it was on to the seated position after an overview by the instructors.
Jim added a new element that he feels is essential to being a good shot whether on the range or in combat: being able to call your shots so you can self-correct and know if you have missed as soon as you pull the trigger. You achieve this by freezing a mental image of the sights in relation to the target when the shot breaks. This is a skill that takes time to build. As the course went on, Jim would often ask shooters where their sights were when the gun went off.
OUT TO 300
Once we were dialed in at 100 yards, we fired ten-round groups from prone at both 200 and 300 yards with instructions to hold for the center of the target so we could see exactly how far the shots dropped over the distances in our particular rifles. Jim is a big believer in having students quantify what their gun can do at different ranges rather than rely on ballistics tables. A key element of building success at longer ranges is gathering actual data of your gun’s performance.
While my Aimpoint’s 4 MOA dot centered perfectly in the target’s bull at 100 yards, by the time I got to 300 yards, the dot was almost covering the entire NRA 100-yard rifle target.
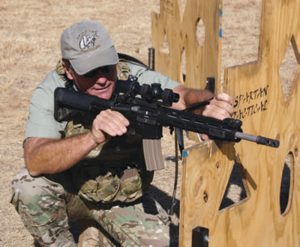
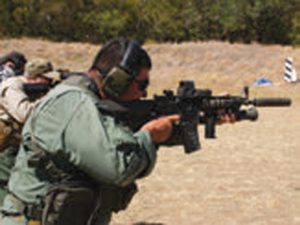
Then we set up the range to engage multiple steel targets—a combination of E-sized silhouettes and LaRue self-resetting targets—that approximated a silhouette’s head and shoulders. This allowed us to get immediate feedback on our hits. The multiple target drills reinforced the importance of having both eyes open to enhance situational awareness and make spotting and moving to the next target quicker and more efficient. We added barricades to the mix, and Jim went over alternate positions to use while shooting around cover.
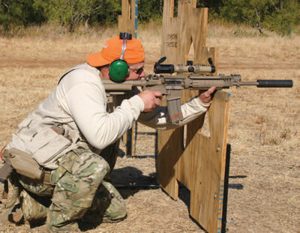
In most situations when employing cover, Jim advocates attaching yourself to it to allow quicker, more accurate hits on your target. He pointed out the advantage of free-float handguards in this regard, and warned against resting the barrel itself on cover, as this could cause as much as a 20 MOA change in impact.
We ended the day with a walk-back elimination drill firing offhand at the upper-body sized metallic silhouette. We started at 100 yards and proceeded back as far as the parking area, over 300 yards away.
TRAINING DAY 2
The second day of class began with a lecture about ballistics and elements related to longer range shooting, including wind and shooting at targets that are uphill or downhill and the effect that has on trajectory.
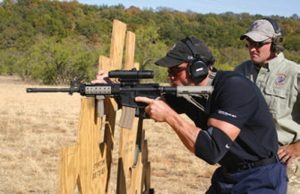
We began the shooting portion of TD2 with a three-position shoot, firing ten rounds from each position. We started at 300 yards for prone, moving to 200 yards for sitting, then advancing to 100 yards for standing. We moved on to shooting at steel from behind barricades, with Jim adding new elements of complexity that included limiting rounds in magazines to increase the number of reloads required to complete a course of fire.
Once we’d done a variety of drills, Jim added engaging moving targets to the mix. For this he used a remote Northern Lights Tactical robotic target carrier that he hardened against rifle fire to mount a steel silhouette. He had the target move back and forth, with stationary steel silhouettes in the background serving as no-shoots.
This was a shooting exercise, as Jim stressed that in real life only severe circumstances and exceptional shooting skills would justify taking such a shot. Jim covered two techniques for engaging moving targets: tracking and ambushing. With tracking, you move the gun along with the target. With ambushing, you aim the gun ahead of the moving target and fire as the target comes into your scope.
SPECKS AT 800 YARDS
Everything we had done previously served as warm-ups for engaging upper-body sized metallic targets at distances from 300 to 800 yards. This pushed the carbines to the limits of their capabilities and beyond.
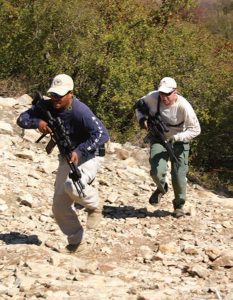
To reach this part of the range complex, we made our way up a several-story-high rocky slope with irregular ledges that served as steps, then found ourselves overlooking a vast field where metallic silhouettes stretched out from 300 to 800 yards. The black silhouettes appeared as specks to the naked eye at the longer distances, while those painted bright yellow all but disappeared against the background of dead grass.
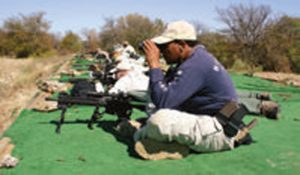
Under the guidance of Assistant Instructor John Jackson, the class split into two-man teams, with one man firing and the other man observing hits and helping the partner by calling hits and helping correct fire. We were not given the distance to the targets, but had to work with our partners to estimate the range and have them observe our shots through their optics and help us adjust fire.
My Aimpoint’s 4 MOA aiming dot completely blotted out many of the distant targets, which proved to be a real challenge even for those who had good magnifying optics. After five to ten minutes, the spotter and shooter switched roles. The students also engaged the targets individually.
While no one hit the farthest targets, a few people did manage to ding targets in the 500- to 600-yard range. Considering the target profiles and relatively limited time we had to work at this distance, we were doing pretty well.
COMPETITION TIME
Then it was time for some friendly competition. The two-man teams had to start from the bottom of the hill, run up and successfully engage targets against the clock.
Like the previous day, we ended this one with a walk-back elimination drill on the steel silhouettes from standing, starting at 100 yards. By the time we reached 300 yards, two shooters with unmagnified red dot optics were still in contention. Then we moved back a bit more and a shooter with a magnified optic won.
If I took the class again, I would use a three- or four-power fixed optic or a variable-power scope in the 1-4 or 1-6 power range. I would also use a Black Hills load optimized for the more extreme distances we shot. But for the most part, I did okay with the ammo and optic I came with until we got to the unknown distance targets beyond 300 yards.
Whether or not the students ever find themselves in a real-life situation where they need to engage at the distances covered in the course, practice at these distances requires greater skills and more precision. And this, the Spartan instructors explained, translates into greater confidence on the part of the shooter no matter how far the shot. If you can give a shooter confidence at 300 yards, think how much more confident they will be at 50 yards and in.
1 comment
I’m glad you mentioned zeroing. I have a hard time gauging the right distances. I’ll have to take a course for my pistols.