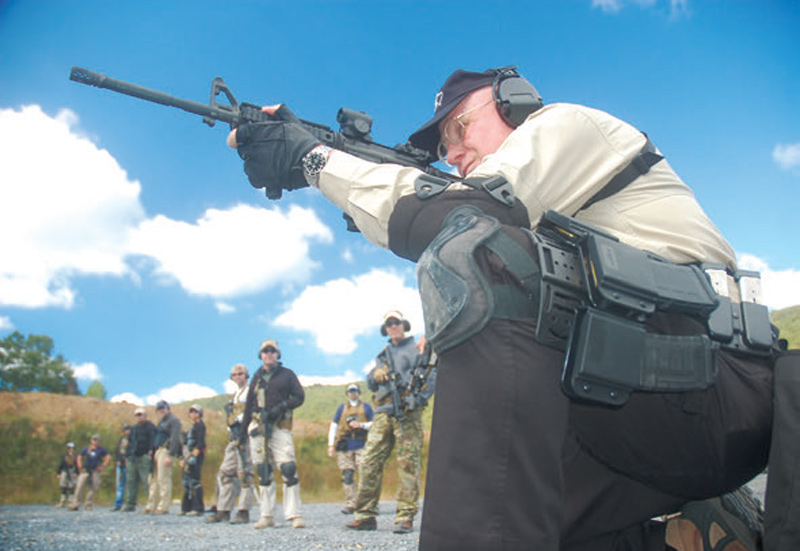
People who attend firearms schools may fall into different categories. These include military, private military contractors, cops, and average earth people. Each has gear that may be unique to their mission, while other occupations may share some equipment.
We see a lot of different equipment set ups, and some of them are excellent. Some are acceptable, and some flat suck, generally as a result of not having done this before or basing their choices on what they see on TV or YouTube.
What you need, wear or will use at class is determined by what you will be doing at class. Putting it another way, the mission drives the gear train. An example is, if you are to attend a basic CCW class, there would be no need to wear a tac vest, drop holster, and carry seven magazines.
But if you are attending a shoot house class, a helmet and body armor would be required.
What we’ll look at here is what would be required for carbine classes—from basic on up—based on my observations over a few decades. Bear in mind that other trainers may have differing requirements.
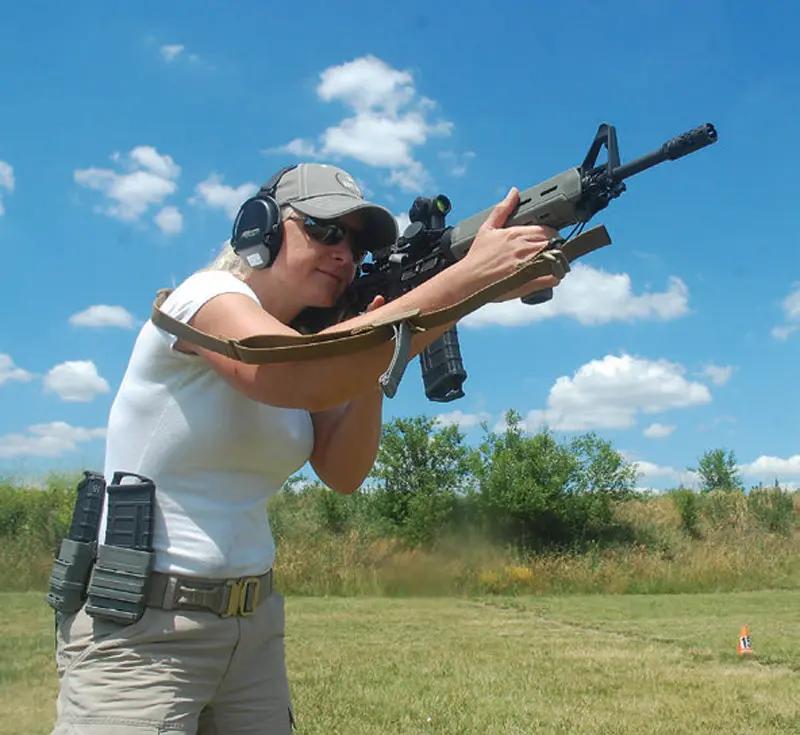
Table of Contents
IF YOU HAVE A QUESTION, CONTACT THE INSTRUCTOR
There should be no one more qualified to answer your question than he. He has the experience, knowledge and expertise to answer whatever questions you have. It is also likely that he has a gear list you can use.
The gear list suggests certain equipment that can be used at the class. Individual requirements, such as duty gear that must be worn, personal preference, and available resources all factor in.
LESS MAY WELL BE SUFFICIENT
A common error among duffers is to fill every available space with some kind of pouch. This is bad on many levels, but unfortunately few can see clearly enough to recognize the problem.
On multiple occasions at EAG Tactical, we have seen students so overloaded with equipment that they had difficulty moving, as well as difficulty accessing mission-essential equipment.
Take to class what you need, not what you might need.
ACQUIRE QUALITY GEAR
Less expensive is nowhere near as good as best value. A cheap initial investment that fails at class will leave you frustrated and will impact adversely on your performance.
There are a lot of quality gear makers out there, as well as a plethora of ones who are unscrupulous, make crappy gear, or steal from others the designs of everything they make. “It’s for the troops,” they wail, but they are just stealing someone else’s work for your money.
Do your homework on this.
LEARN TO USE THE GEAR BEFORE YOU GET TO CLASS
Anything that you add or subtract from your kit will absolutely affect something/everything else that you have on.
Put on your kit while at home. All of it. All of your magazines and any assorted gear you may have.
Add your (empty) weapons. Stand in it. Kneel in it. Go to prone in it. Move around in it. Access every item in every pouch from every position.
DON’T PUT ANYTHING ON THE REAR CENTERLINE OF YOUR WAR BELT
There are two very good reasons for this. The first is the potential for serious injury. A fall on your back—which is fairly common—can cause a career-changing injury. The second is access to that item. It will be difficult with either hand.
Another issue is this. In one recent carbine class, we had two students who had placed their dump pouches on the centerline of their war belts. Unfortunately for them, they had apparently never filled up their CamelBak reservoirs until they got to the range. And when they did, that hydration source entered into the dump pouch as if it were made to plug into it.
And neither knew about it until they tried to place a partially empty magazine into the dump pouch. (See Learn To Use the Gear above.)
KEEP YOUR STRONG SIDE AS CLEAR AS POSSIBLE
Ensure that you keep the access to your pistol clear. Anything you put on the strong side may impede access to the pistol. Additionally, placing your handheld light on the strong side means that you can run either your pistol or your light, but not both. At least not efficiently….
I’ll make recommendations for what to get. These are based on my use of the items or my observations of them in use by others. That does not necessarily mean that something else sucks—although it may mean that.
As always, caveat emptor applies.
There are 2.5 methods commonly available for carrying spare magazines and ancillary equipment. They are:
- war belt/sub load
- chest rig/plate carrier
- shoulder bag (the .5 thing)
WORKING FROM YOUR BELT
As a rule, if you are attending a basic course, you will need less carbine magazines/gear than you would for a Carbine Operators Course. For example, we require that you always have three magazines available in a Basic Carbine Course—two on your body and one in the gun—while in a Carbine Operators Course, we require five magazines: four on your body and one in the gun.
Working from your belt is one way to do it. Another plus is that many already work from a belt when carrying a pistol and such, so the transition may be easier.
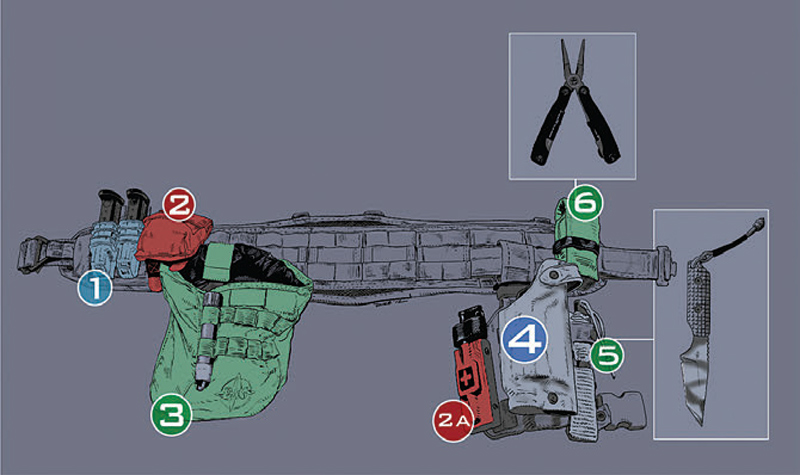
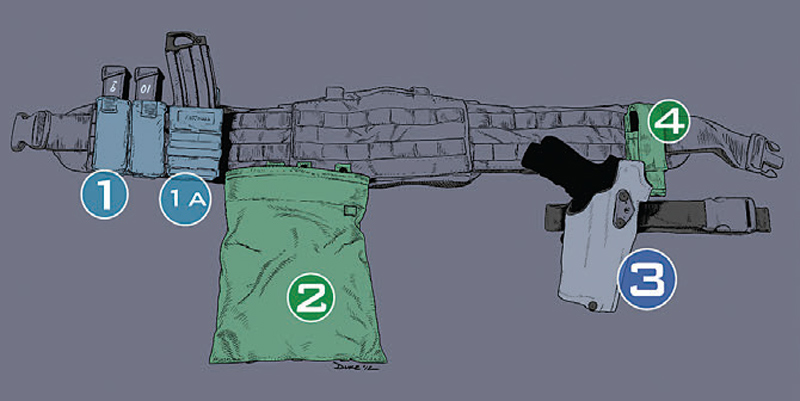
You need to understand what you need to carry on your belt before you do anything else. You may carry the following:
- Holster
- One or two pistol magazine pouches
- One or two carbine magazine pouches
- Dump pouch and handheld light pouch
- Small IFAK
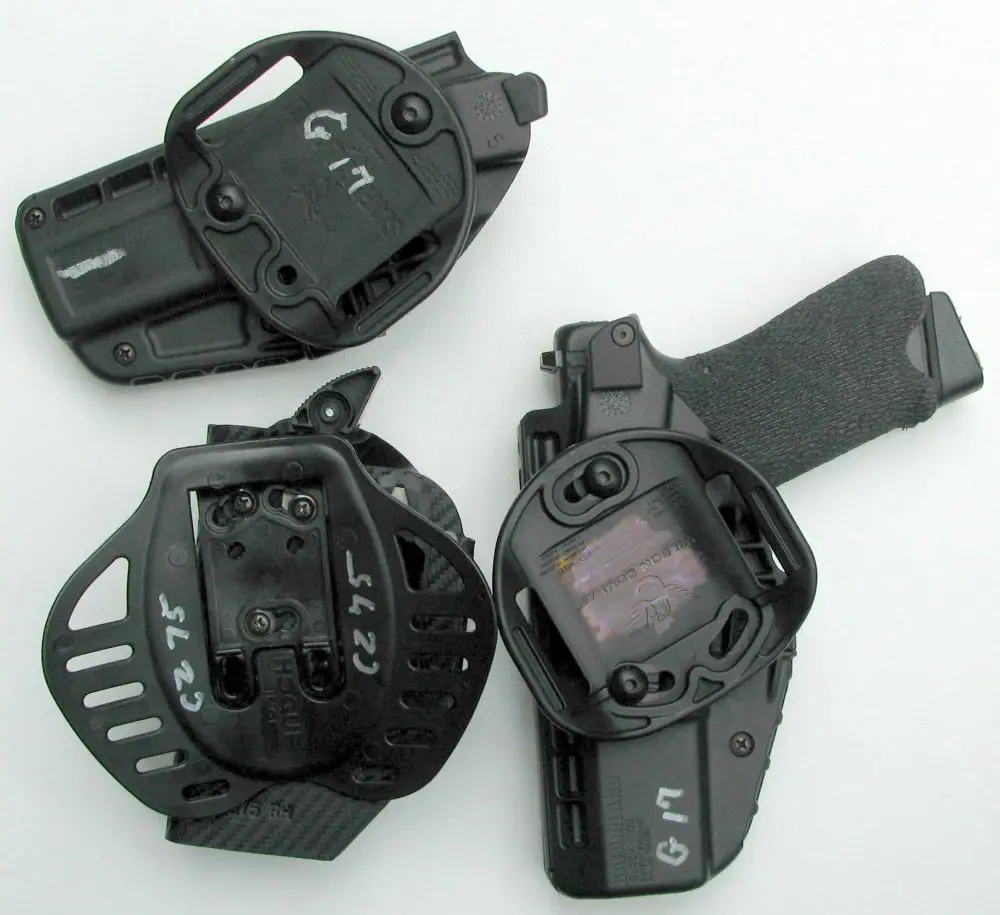
The pistol will always be on your strong side, and the holster needs to be sufficient for the purpose. As an example, an inside-the-waistband holster (IWB) would be contra-indicated at a carbine class. However, a duty-type holster would be appropriate.
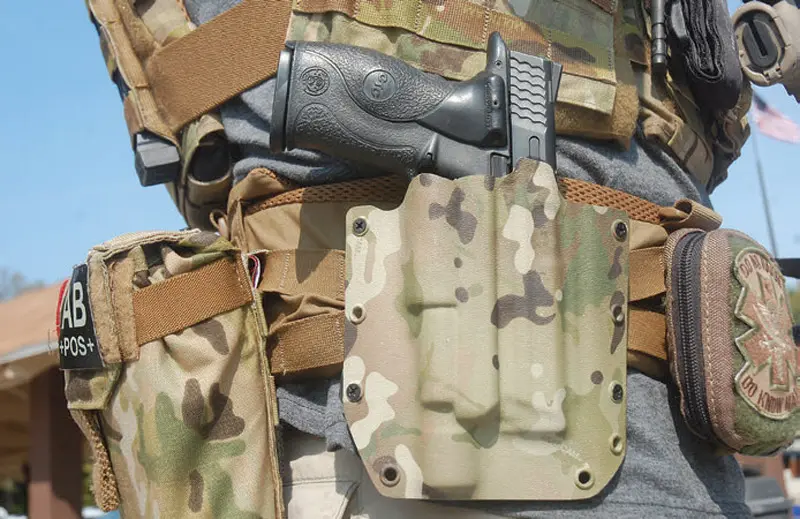
If not wearing a chest rig, a polymer high-ride holster like the Raven Concealment Systems Phantom is good to go. If you can avoid a drop-type tactical holster, consider that in its place. The drop-leg holster is necessary for those who are wearing armor and are short waisted. The armor will cover your gun if you wear a conventional holster.
If that is the case, please don’t be like the legions of assclowns who strut around with the holster down around the knee. Not only does it look stupid, it is also inefficient and very difficult to properly access the gun.
If you’re doing a duty- or tactical-type holster, the gold standards are made by Safariland. As I am Warrior sized, I do run a drop holster, and it’s been a Safariland 6004 for as long as it has been out.
BELTS
The belt you wear is another issue that deserves some thought. A simple trouser belt is not sufficiently strong to hold what you may need. You need a purpose-built belt, but there are options.
We are looking at trouser belts being a minimum of 1.75 inches wide. The trouser belt fits within the loops of your pants, and that means you have to thread your kit onto the belt.
Sturdy leather belts are still viable, but nylon belts are stronger and longer lasting. Rigger’s belts have been around for a decade or two and are very good to go.
Purpose-built gun belts can fall into two different categories—duty belts and war belts.
Duty belts can be leather/laminate or nylon. They are meant to be worn over a trouser belt and range from 2 to 2.25 inches wide.
War belts are generally padded, may have MOLLE attachments, and can be armored. They can carry more gear more comfortably than a duty belt.
START WITH THE HOLSTER
How and where do we attach the equipment? Start with the holster, as the pistol is your reserve parachute in the event your primary weapon goes down. Personal preference counts a lot here, but common sense has to rule.
If you’re running a high-rise holster on a trouser belt, it should be at or just behind your strong-side hip. If you’re wearing a duty or tactical holster, have it at about the hip, at 3 o’clock (if you only have a digital watch, Google that). Once again, if you’re rocking a drop holster, it should ride low enough to allow you to clear your armor, but not so low as to be a knee brace.
POUCHES
Pistol magazine pouches should be opposite the holster on your support side. There are a variety of pouches available, and they have two functions. One is to retain the magazine, and the other is to access the magazine.
Pistol magazine pouches may be nonrigid and made from fabric, soft polymer, or legacy dead animal hide, or they may be rigid and made from kydex and similar materials. All will suffice at a carbine class and may also be used for work.
Most fabric magazine pouches will need some type of restraining device— elastic, bungee cords or a flap. The excellent Blue Force Gear pouches are made of elastic and kill two birds with one fabric. The excellent but now unobtainable Eagle FBs had two levels of retention, with a kydex insert within a fabric pouch as well as a flap.
The excellent ITW Fast Mag pistol pouches are currently my favorite pouches. They provide both retention and accessibility.
Carbine magazine pouches are a whole other ball of wax. The magazines are bigger, which means they have to be worn with care. As I am short waisted, carrying carbine magazines on my belt is not something I do often, and I prefer a chest rig on the range.
Like pistol mag pouches, these can be made of fabric, kydex and rarely, dead animal flesh. They have the same requirements as pistol mag pouches— retention and accessibility.
They also need to be on the support side, so you can maintain a firing grip with your dominant hand.
SUB-LOADS
Because of the additional gear piling up on the support side, some opt for the so-called sub-load. This is a panel that hangs below the belt and may have a leg strap to stabilize it.
Sub-loads have their place, e.g. for a patrol cop who may not have sufficient real estate on his duty belt to carry everything he needs. The sub load can be attached when necessary and removed when it is not.
The biggest problem with sub-loads is that people tend to overload them. The sub-load works best with two or three M4 magazines in single mag pouches. Trying to move—run, walk, crawl, go through doors or over fences— becomes immediately problematic.
If you have the need and keep them loaded to a realistic level, the sub-load is a viable option. If not, you are wasting time and efficiency.
ADDITIONAL LIGHT
If you have a low-light component in your class, you need a handheld light. This is in addition to the weaponmounted light on your carbine and pistol. The tertiary light is used mostly for administrative tasks, but is also necessary if you do not have a light mounted on your pistol or if you bought a pistol light based on low price instead of best value. This light should also be mounted on your support side so it can be accessed with the non-dominant hand.
There is nothing more pitiful than a shooter who is trying to draw his pistol and backup light at the same time— with his dominant hand. It is not just pitiful to watch, it is also a safety violation, and flat stupid.
If the individual had put everything on and tried everything out at home, instead of spending hours figuring out where to put morale patches on his camo uniform, this situation would not have occurred.
IFAK
One item that is consistently overlooked is an Individual First Aid Kit (IFAK). While we require one for our shoot house classes, we also recommend it for all students attending all classes. There are ready-made kits available from a number of vendors. At a minimum, you should have a pressure bandage, gloves and tourniquet.
You can carry the bare minimum in a Blue Force Gear BooBoo Pouch, considerably more in a nut sack or fanny pack, and a full kit in a purpose-built pouch. This item is meant for you to apply selfaid, but also to be used by another on you in the event you are injured.
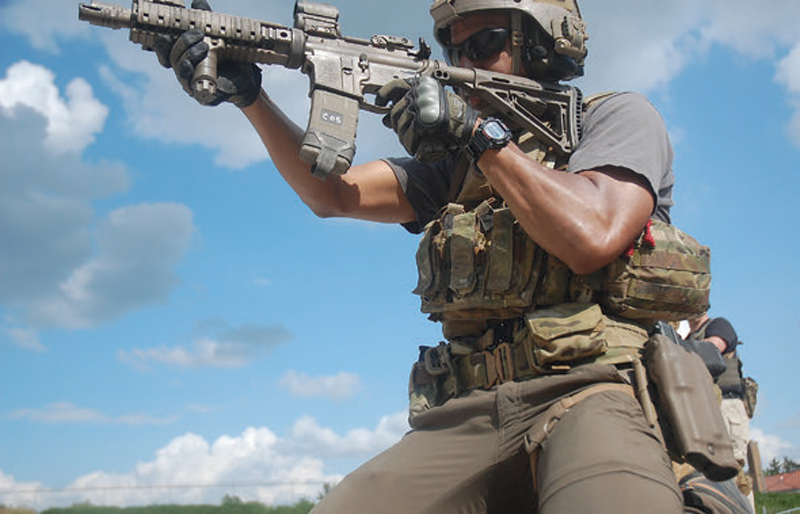
CLOTHING
The clothing you wear should be comfortable and sufficient for the climate and training conditions. In general I don’t care how people come dressed for class as long as the gear itself functions. However, I don’t like seeing shorts because it usually means the students aren’t prepared for the multiple kneeling and prone positions they’ll have to assume, but that is on them.
What we are seeing way too much of is average Joes with zero connection to the military attending class clad head to toe in the camo pattern du jour, replete with various accoutrements that would make a real guy envious. Meanwhile, a lot of real-deal guys dress in sport shirts, subdued and less “tactical” articles of clothing.
Weapons and tactics courses are not cosplay. If you want to frolic while playing “Escaped Convict and the Warden’s Wife,” do so in the privacy of your own home. In class, concentrate on learning, not styling.
No matter what you choose, you will soon find a reason to change, upgrade or multiply it. That is normal as we learn from experience, and only comes from actually doing it. The perfect gear setup exists only in your mind, not in reality.
In Part II we’ll take a look at using vests, chest rigs and bags.

1 comment