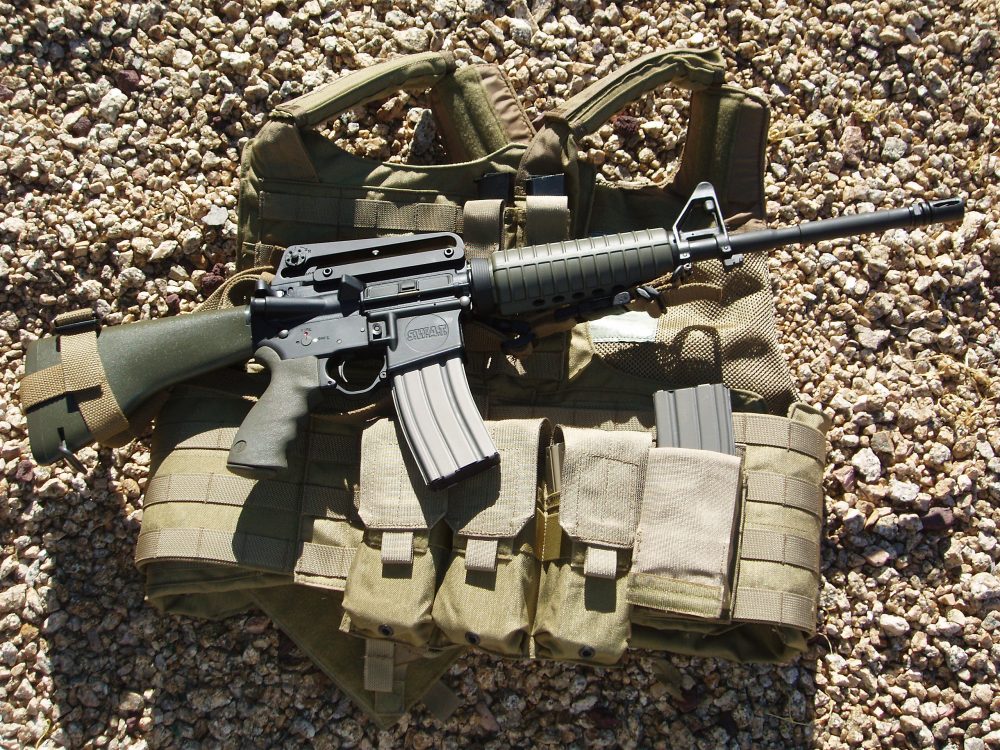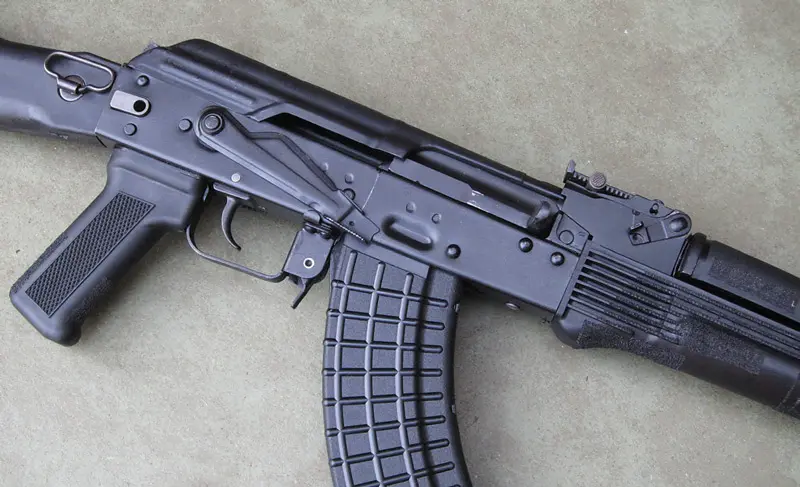
I recently purchased and started training with an Arsenal SLR 107F Bulgarian AK (MY FIRST KALASHNIKOV: Arsenal SLR-107F AK, December 2012 S.W.A.T.). The rifle is a highquality rendition of an AKM, but there are aspects of it that I, as a predominantly AR-spoiled shooter, couldn’t leave alone. In shooting drills, I felt there was a good bit of performance left untapped where I couldn’t get to it.
As things popped up that either frustrated me or challenged my normal shooting results, I took note and started looking for ways to overcome them. I had overspent my shooting allowance in getting the rifle and accessories to begin with, so it was a great way to look hard at inexpensive do-it-yourself options to tweak the Kalashnikov.
It is worth laying out up front that I am not a gunsmith. My normal success rate with any type of tinkering is abysmally low, so when I say that I took these on with no issues, the average guy should take heart. I make it a personal policy to have a “cooling off” period whenever I am tempted to alter anything on a serious weapon, and I revoked my Dremel tool privileges long ago.
Knowing my checkered past with any attempts at “fixing” my weapons, I intentionally kept my efforts to pieces of the gun that were A) easily obtained at low cost if I gooned them up or B) extremely low risk.
One of the first things I did, and I highly recommend, was to watch Jim Fuller’s AK Armorer’s Bench DVD (Panteao Productions). The AK is simple, but looking under the hood can still be a little intimidating. This DVD does an outstanding job of explaining how everything works and exactly how to get all the components apart and put them back together. Jim’s segments can give you a few ideas or help you better understand the weapon and boost your confidence if you decide to take on any of these projects.
I have several standing gripes about AKs and had developed a few specific to my SLR-107. Foremost, the sights are an insult to both rifle marksmanship and effective fighting. They had to be addressed. The safety on an AK isn’t ideal for rapid manipulation but can be manageable. The one on mine was overly stiff and slowing me down like a drag chute on presentations. The unique Arsenal two-stage trigger had solid potential but was simply too heavy and too slow to reset. The polymer furniture was slick—like lubed-dental-drills slick. I attacked each of these in turn.
Table of Contents
COMBAT SIGHT PICTURE MOD
Time required: 20 minutes
Tools: Micro file, paint pen/touch-up paint
Difficulty: Cooking pancakes
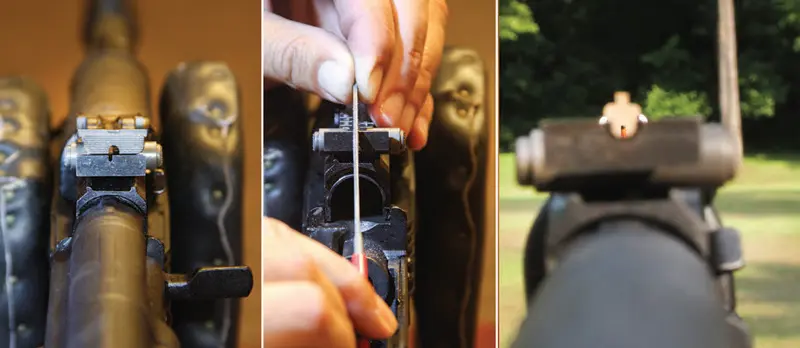
Using the AK sight is OK under ideal conditions with perfect light, a large, clearly visible target and no time pressure. The rear notch is incredibly narrow, while the front sight is too wide and has a round peg profile. It is really hard to make out anything smaller than eight inches at 100 yards under the sight, and the notch makes pushing speed to smaller targets inside of 50 yards a challenge. Forget using them at all in failing light—there simply isn’t enough space for light to come through the notch.
My priority was to open the notch to gain speed and regain some situational awareness of what is around the front sight.
I took a pistol rear sight as a template and marked off a similar gap with a pencil, in this case a .140-inch opening. Using a micro/jeweler’s file, I gradually deepened and widened the notch. It took maybe ten minutes, tops. I dressed up the lower corners with a round file to intentionally give a “U” profile to the bottom, and that was it. I suggest that you stop often and have a test target to reference to ensure you don’t go too wide.

I then took the flat micro file to the front sight and squared/thinned its round sides. (Ensure you are happy with the elevation on your zero before taking the front sight on, as I am not sure that the mod won’t affect the fit of some frontsight adjustment tools.)
The resulting sight picture lets me easily resolve down to four-inch targets at 100 yards and gives generous light around the front sight in close and in lower light. Precision-wise, the thinned front sight helped, but I may have gone just a hair too wide on the rear notch, so the end result improved group sizes only slightly, but greatly boosted speed and confidence in calling my shots.
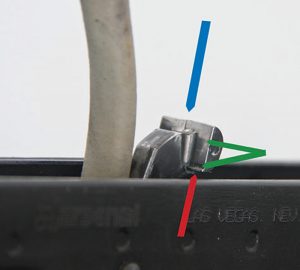
Part two of the sight mod accomplishes multiple things. The wings on the AK front sight housing are notoriously easy to mistake for the actual front sight under stress. Doing this even as close as 15 yards can cause a miss and will at ranges beyond that.
Painting their facing edges a contrasting color prevents this in all but the most strongly backlit target scenarios. I used gloss white automotive touch-up paint. The paint sticks really well and the white picks up light well in low-light conditions, allowing a rough sight picture with the wings over the rear sight bar even after the front sight is no longer visible. I also wanted the front sight to jump out to allow better speed up close, so I took a bright orange paint pen and painted all but the very tip of the front sight.
I have a distinct black sliver to align for precision and a prominent orange stripe to track in recoil or snapshots/ fast multiples, etc. The paint is durable enough to last many range sessions and a decent bit of rough handling, but it is not permanent. If using this tip for a service weapon, make inspection and touch-up part of premission checks.
SAFETY LEVER ENHANCEMENT
Time required: five minutes
Tools: Round file
Difficulty: Velcro shoes
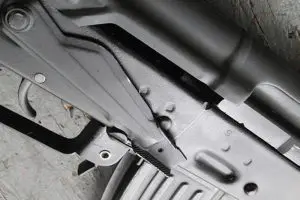
The AK safety lever functions off of tension from the lever itself bearing against the receiver and a stamped “nubbin” falling into a detent in the receiver at either end, with an additional detent in between on full-auto rifles. Every rifle is different, but most err on the side of too much tension, worsened by the lever being hard to reach and sweep as part of mounting the gun.
My particular rifle was pretty stiff, and there really is little breaking-in with the system that will help it. It was causing me to occasionally fumble disengaging it under time pressure, and adding time and effort under ideal swipes at it. Looking at the detent at the top of the receiver (“safe”), I noticed that it was rather deep and had a steep angle leading out of it. I simply removed the top cover and bolt carrier, then took a round file judiciously to the detent to reshape and decrease the slope and make a little runway out of the detent. Bingo! Took maybe ten or 12 strokes of the file, and I touched up the bare metal with a Sharpie marker.
The improvement was dramatic. My average time to first shot on a number of drills with the stiff safety was 1.25 seconds, but with the mod in place that immediately dropped to .90 second. Better still, there have been no fumbles whatsoever and I have been able to stop wasting mental effort concentrating on getting the safety off, allowing the mount to flow pretty naturally. Since the lever sits outboard and can rub on “stuff” while slung, be sure to keep enough resistance to meet your personal situation. Highly recommended!
GRIP ENHANCEMENT
Time required: 2.5 hours
Tools: Soldering iron
Difficulty: Edging the grass
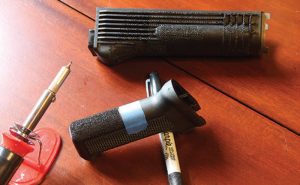
I seriously considered replacing the furniture, but wanted to try something to improve purchase while I shopped the aftermarket options. I was inspired by my Boresight Solutions custom M&P9 and decided to “attack the plastic” with a soldering iron.
I am thoroughly intimidated by the thought of doing a grip retexture on a polymer pistol, but figured this was extremely low risk, with replacement cost low if I totally blew it, but that I would as likely be able to sand it down somewhat and start over. I wasn’t too concerned with cosmetics, since the AK is pretty ugly to me anyway.
I penciled out all the areas my thumb and fingers were contacting in the normal ways that I grasp the handguard across standing and intermediate positions. I then took the soldering iron to them and tiny tip divot melt by divot melt created texture. It was tedious to attempt to form some type of pattern, but I can recommend it as somewhat therapeutic if you have the time.
On the pistol grip, the design wants to squirt out of my firing grip when I take the support hand off to run the bolt or reload. I ran the soldering iron down the back strap, creating the AK equivalent of a stippled mainspring housing on a 1911. It was turning out pretty well, so I added a textured front strap before calling it a day.
I was exceptionally pleased with the result. My hands now stick to the rifle whether gloved or bare. This has allowed me to keep the rifle a little flatter in recoil, and boost speed on follow-ups or transitions to other targets.
TRIGGER POLISH
Time required: 30 minutes
Tools: Dremel with felt polishing wheel, metal polish, diamond stone, grease
Difficulty: Installing a wireless router
The trigger was the most difficult and risky of the modifications. I have trigger-jobbed my way into unreliable weapons on several occasions and feel pretty strongly about leaving them alone or calling in trusted professional help. However, the design of the Arsenal trigger is so simple and easy to access that I had to try to correct the weak reset of the trigger, which had been unreliable for the first 100 rounds through the rifle and was still not as positive as I like.
Wedging the hammer into an upright position, the shelf that serves as the disconnector ledge was exposed. It was easy to take some metal polish and gently run the Dremel felt wheel over the ridge left over from manufacture until the ridge lost its hump and the metal had a mirror finish.
The first stage of the trigger had begun with nearly six pounds of weight—a combination of spring resistance and the trigger hook sliding down the runway to the ledge that serves as the sear. I ever so gently polished the runway leading into the sear while I had the Dremel out. This was definitely the “measure twice, cut once” portion of the polish.
I then took a diamond stone and, light as kitten whiskers, broke the edge of the sear itself. After cleaning out all the polish, I applied some Mobil 28, which is recommended by Geissele and supplied in all their trigger units. The results were surprising for so little effort—the trigger broke with less drag through the take up and reset more positively at two and a half pounds for the first stage and four and a half for the second, crisp. Total weight loss was nearly five pounds.
PUTTING IT ALL TOGETHER
The mods all contributed to some pretty significant gains. From the pistol grip to the front end of the gun, the tweaks worked together really well. Isolating which improvement measured which increase is somewhat hard to separate.
Speed to the first shot, which matters in any application of a fighting rifle, jumped by 28 percent. Situational awareness through the sights and the ability to call shots improved greatly, although harder to measure. Multiples came much more easily.
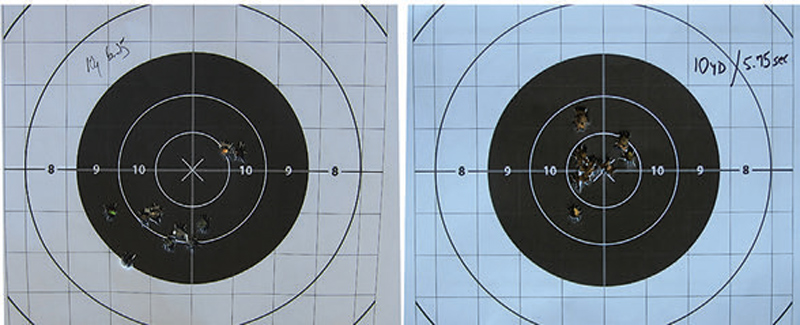
A telling example of the general improvement can be seen in one simple drill—ten shots from the ready at ten yards fired as rapidly as hits could be assured onto a B8 5.5-inch target center. The stock AKM posted a 6.25 to a reasonably centered group. The mods combined to allow the first attempt to register the hits in 5.75 seconds with a tightly centered X ring cluster, suggesting that even more speed was available for future groups with greater familiarity.
Shooting rapid-fire strings from kneeling to the same 5.5-inch bull at 50 yards, it was possible to break each shot an average of .3 second faster for the same quality of hits. In each drill recorded, there was at least a 10% boost from the enhanced rifle for the minimal investment in effort the mods took.
The AKM is still no AR, but the enhancements give me some confidence that the performance gap is narrowing compared to the past. I am fairly pleased and recommend the effort to the new AK-owning crowd that is forming.