With all the media reports about the government trying to take away our Second Amendment rights, interest in 80% lower (EPL) receivers has increased. The common thought behind the idea is if it is delivered without any Gun Control Act (GCA) paperwork, then no one knows you have it and it would not be subject to confiscation.
While this is in theory correct, who would want to live that way? Better we as citizens fight to keep our Second Amendment Rights, but that’s another story.
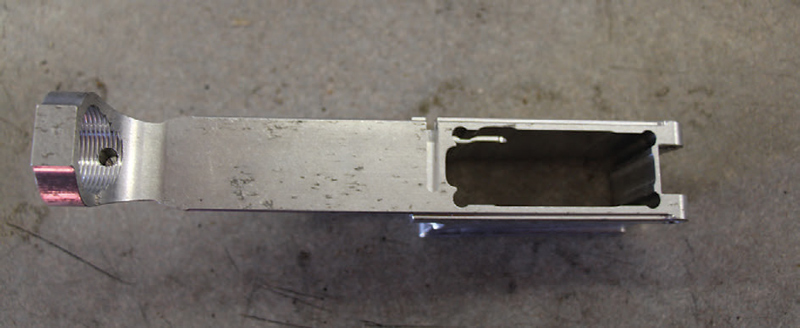
Table of Contents
WHAT THE ATF SAYS
As far as buying an EPL, here is a paragraph from the ATF’s website on the matter: Receiver blanks that do not meet the definition of a “firearm” are not subject to regulation under the GCA. The ATF has long held that items such as receiver blanks, “castings” or “machined bodies” in which the fire-control cavity area is completely solid and un-machined have not reached the “stage of manufacture” which would result in the classification of a firearm per the GCA.
A picture on the site says the fire control is solid and there are no dimples on the side where the trigger pins would be bored, as this would not be classified as a firearm by GCA rules and could be purchased without paperwork. They also emphasize completely solid and un-machined when describing the fire-control cavity. Some out there have a slit machined in the trigger cavity and would not be subject to the definition “receiver blank” even though much more machining would be necessary to accommodate the trigger group. These are classified a firearm!
I’d think anyone who produces EPLs in this fashion would be required to engrave a name and serial number, as it seems it would be classified as a firearm. If you have the blank delivered to your door without paperwork, is it legal to turn it into an operational receiver?
There was some controversy over a manufacturer making
blanks that the ATF did not consider blanks. They were composite material that was a different color in the trigger group category than the rest of the receiver. This would make it easier for the person to remove the trigger cavity area to fit the trigger group. The ATF’s position was the trigger cavity was manufactured but just filled in, so it was manufactured with a cavity and therefore it was a firearm. This is also where the dimpling of the trigger pin holes on the side of the receiver goes past the definition of a blank.
As a manufacturer, I like the 80% lower (EPL) to manufacture a firearm for a customer. Being blank, I can label it with my company information and a serial number. As a private citizen building a gun for his own use, I don’t see any rules that would require it to be marked as manufacturers must do. But once the cavity is machined out, it is considered a firearm. Any transfer from that point on would be subject to GCA regulation.
This is the regulation imposed on manufacturers: Receivers that meet the definition of a “firearm” must have markings, including a serial number. See 27 CFR § 478.92 (Firearm manufacturers marking requirements).
As with all ATF regulations, a thorough investigation of the rules pertaining to your particular purpose for the part is definitely something to consider. Hell, they could change their minds on this and interpret the whole thing differently someday. A person should also check their state and local regulations to make sure the finished firearm is legal there.
The downside is that restricted individuals with some machining skills could gain access to and build a firearm. The ATF has some documentation of altered EPLs found in possession of restricted individuals. There is already a law against this—collar them and throw away the key!

firearm by the ATF.
HOW HARD IS IT TO MAKE A RECEIVER FROM AN EPL?
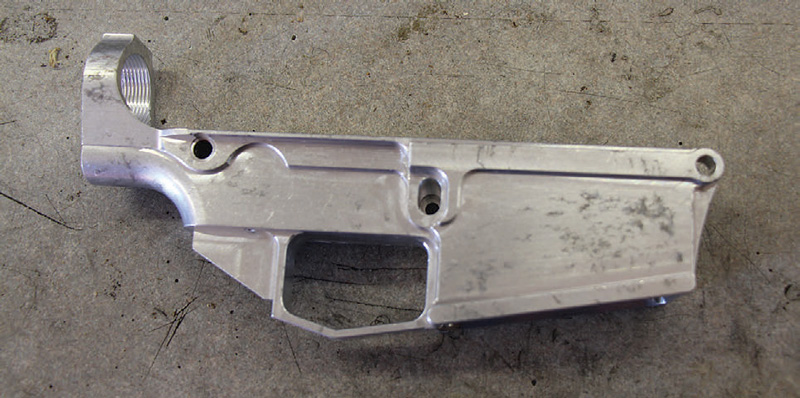
The real question is, how hard is it to make a functioning receiver out of one of these EPLs? It really isn’t that difficult with some simple tools. The next question is, is it worth the time and aggravation in relation to cost for what you get? If you are not a restricted person, you can get one to add parts to build your own version of an AR.
The .223 versions are relatively cheap, but if you decide to use a jig to help with precise placement of the pin holes and cavity, it will add up to $150 to the cost of the receiver. Also consider that the finished receiver is already anodized and finished with either black or some other color from the manufacturer. EPLs come in white and need a finish.
YouTube videos of what I call pipe wrench and hammer gunsmiths show it can be done with few tools—and I imagine it can—but the more sophisticated the tooling, the better the job will turn out. Some of the videos are done well, so select a good
one to follow. Remember if you make a mistake, you will most likely be buying another blank, and the first try will become a memento on your desk.
If you’re looking to build a .308 base AR, you will find that they are a little prouder of them than the .223 versions and can cost up to $200. The EPL has no selector markings on it. You have to stamp them in yourself.
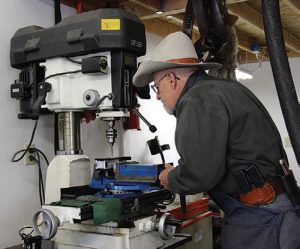
Some EPLs are very well thought-out for the non-machinist, and some require you to have some machining background. A drill press is my bare minimum, so the part can be held more precisely. The cavity can be cleaned out with a drill bit, but I’d prefer drilling pilot holes with the drill bit and finishing up with an end mill.
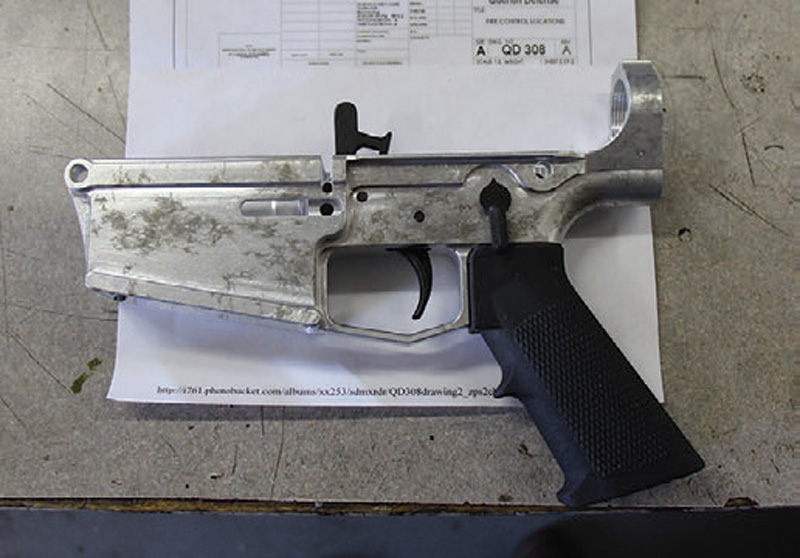
I wanted to machine one out just for the experience. I started with a .308. I got the blank and jig from Brownells. The EPL and jig were made by Tactical Machining and work with DPMS magazines. They also carry the other tools you need to complete the lower.
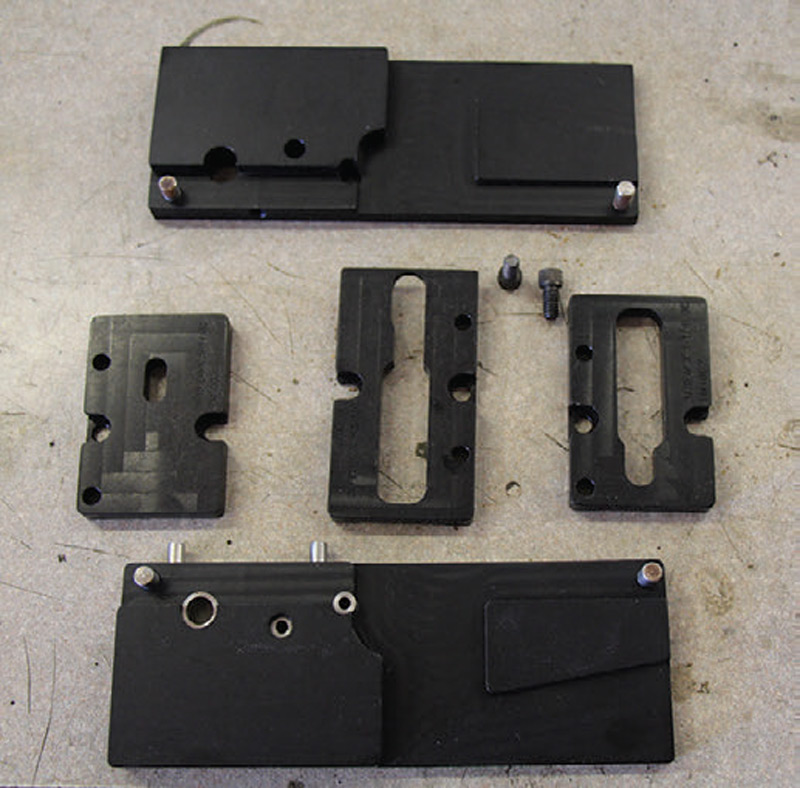
STUDY TWICE, CUT ONCE
One thing I recommend is to study the parts, blank, and tooling carefully before making any cuts and between cuts. If you cut too far or in the wrong place, it is seldom fixable. I downloaded schematics for the receivers with dimensions for the .308 receiver, as they are mostly the same as a .223, but some differences exist.
This is an example of what I mean by studying things. Most of the time in machining is setting up for the cut. The time to make the cut is very short, but once it’s made, it’s forever.

Among the tools required are a 3/8-inch end mill for the fire control pocket, 5/15-inch end mill for the trigger slot, 3/8-inch end mill for the selector hole, and 5/32-inch drill bit for the trigger and hammer holes.
The schematics I downloaded specify the depth of the fire control group be 1.250 inches—the same as a .223 lower, but the shelf behind the safety was to be .525 inch for the .308. This is the depth the upper will fit into. It’s a good idea to have the upper when machining this, to make for a tight fit.
STEP BY STEP
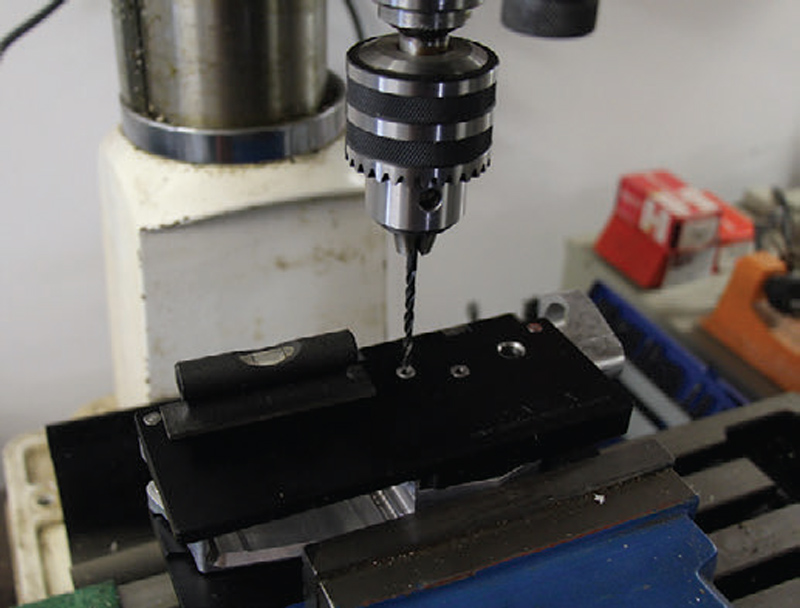
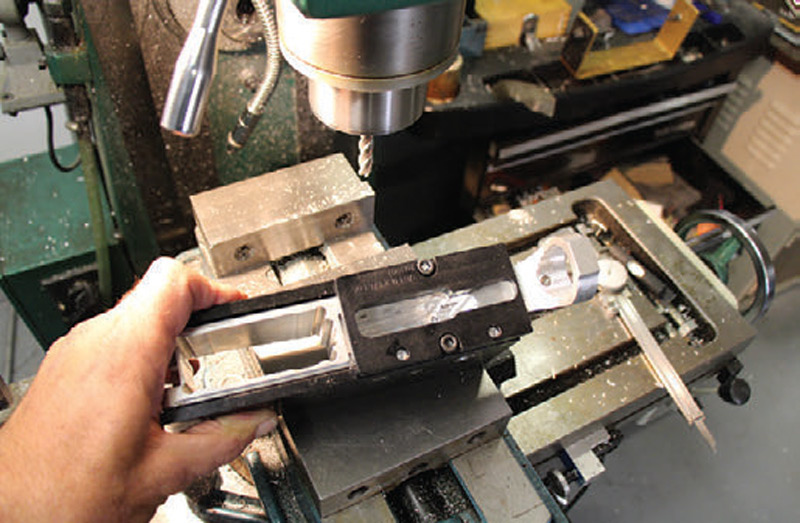
I started by drilling out the trigger group pin holes. Then turning the jig upright, I drilled some rough holes in the trigger cavity, keeping inside
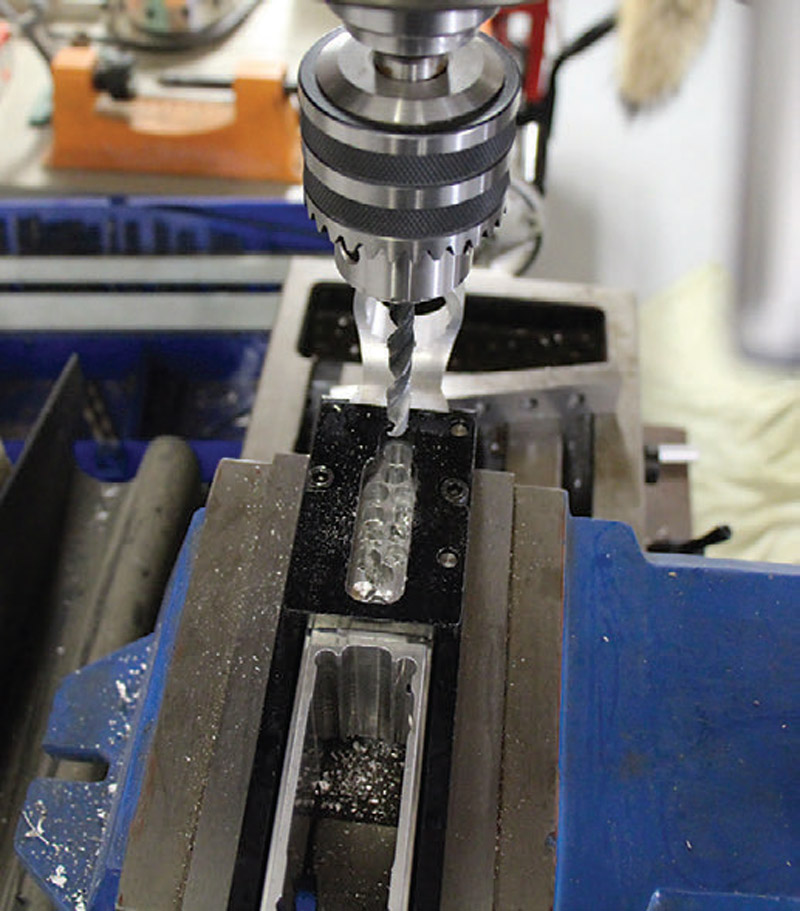
the jig. With the 3/8-inch drill bit, I drilled several holes close together to rough out as much material as possible. I figured I could bring it to the precise depth on the mill. This roughing out the cavity makes the milling easier and, when the holes are at depth, you can touch up the sides with the end mill. I stayed away from the edge of the jig until the last cut.
The next step is to replace the trigger cavity jig top with the rear shelf jig. I cut it the same, staying away from the edges until the last cut. The non-cutting edge of the mill will run along the jig without cutting it and, when making the final bottom cut, I ran it along the jig for a smooth wall at the correct size. The last cut is the trigger slot. It’s started with a 5/16-inch drill bit and cleaned up with an end mill.
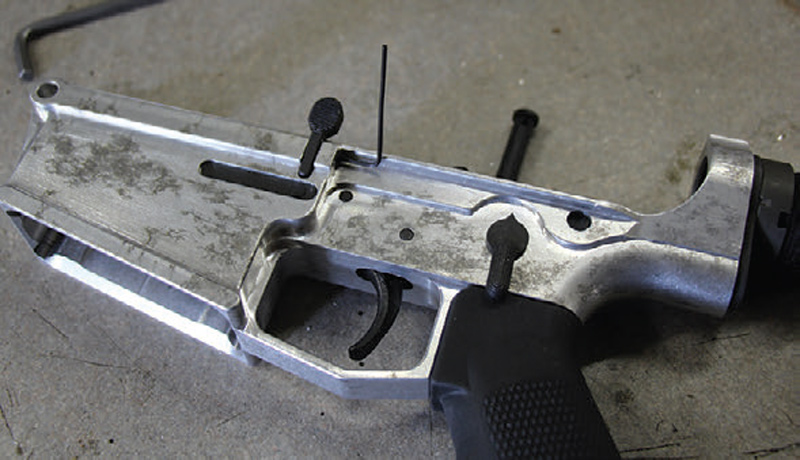
The trigger group can then be assembled as normal. If everything fits well, you’re ready to go. It’s a good idea to fit all the other parts into their respective spots and make sure they function before putting the finish on the lower. Some of these may require final fitting. There is modification for the detent that holds the rear takedown pin from falling out, but it was already machined into the Tactical Machining lower and came with the parts.
Basically the detent pin was the same as regular AR construction except instead of the spring being held in the tunnel by the stock system, subject to orbital evacuation from its home, it has a small hex-head threaded plug that holds the whole detent system in the tunnel.
The other small difference is the bolt release. It is basic AR design except the lower has been formed differently in the way the pin secures it. Instead of having two bumps in the receiver, so a pin can be inserted and removed by tapping it out with a punch, a small pin is inserted in a one-sided threaded tunnel for the release to swivel on. The pin is held in by another tiny threaded hex screw. These two changes are nice because the tension is adjustable with the screw. My lower needed some light fitting so the bolt release would move freely.
One very inexpensive but useful tool was a magazine block that holds the lower in a vise. I was able to hold the lower in any position necessary, which came in handy for putting in some of the tiny screws and springs. The block fits into the magazine well and clicks in place just like a magazine, so it won’t fall out when taking it out of the vise. Have Brownells throw one in when ordering your parts. It’s not absolutely necessary, but it makes the job much easier. I also use mine when I’m cleaning or working on ARs.
FINISHING TOUCHES
The lower is now ready to finish up. With the EPL containing a working trigger group, it is now a firearm by ATF standards, so I will stamp my company name and a serial number on Trigger group installed, lower is ready for engraving and finish. it. I will also cut in some indicators for the selector, and it will be ready for whatever kind of finish I want to put on it.
I like to finish with GunKote because it has a variety of colors to choose from. I have to bead blast it after all the engraving is done. GunKote requires a bead-blast finish to give the coating something to purchase to and keep the coating adhered to the metal. GunKote is a baked-on coating and must be treated in an oven at 300 degrees for one hour. Brownells carries GunKote in spray cans for the do-it-yourselfer, and it comes with instructions. A bead blast also gives a flat matte-type finish, which I prefer.
The EPL was easy enough to finish with common tools, but the mill made for more precise cuts and a cleaner finish. Whatever your reason for doing an EPL, you’ll find it a fun project and not so difficult as to require extensive machining skills. Take your time and be as precise as you can, and the result will be a finished gun you can hand down in the family with a special history.
I don’t think I saved much if any money doing the work, but I like having a gun with my name on it and knowing I was a little more involved in its construction.