Funny how new words for old technology appear when new technology is introduced. Maybe I’m a little slow, but who’d ever heard of direct gas impingement 15 years ago? I didn’t know the system had a name until the gas piston in AR rifles started appearing. At least we now have something to call the old cycling system of the AR. Although I never thought there was anything wrong with the direct impingement system of the AR rifles, the gas piston does have some beneficial features.
Even if we didn’t know what it was called, we did know that the gas impingement system leaked a little gas from the barrel though a port that traveled down a tube to a part called the bolt carrier key. This key had a tubular appearance, and the gas pushed the carrier back to cycle the action. It was really the pressure of the expanding gas in the barrel that drove the action.

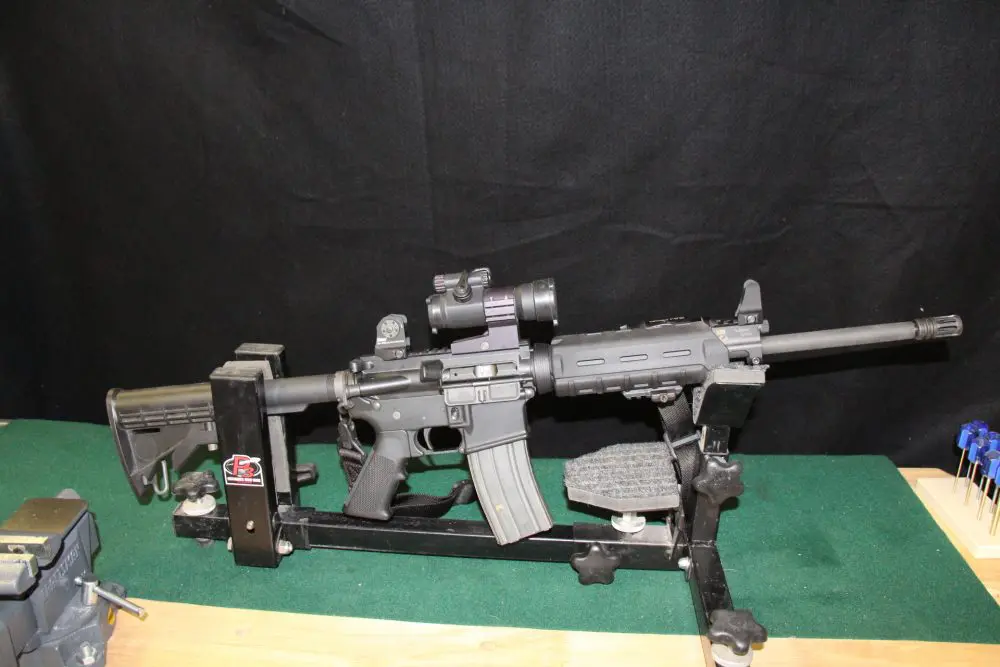
Completed rifle after converting from direct impingement to piston operated.
Either way, some of the fouling in the expanding gas was deposited on the bolt and carrier and in the upper receiver. The heat of the gas would also dry the lubricant out after a while.
Many autoloaders use barrel pressure to work the action of the gun, one of the more notable being the M1 Grand. The gas was taken from near the muzzle of the weapon and there were heavy pistons and parts to take up some of the force and keep the fouling out of the action.
The M1A is similar in design, and AK-style rifles also use barrel gas. They just don’t bring the gas all the way back to the bolt. So in bringing the AR up to specs with this old technology, we started producing guns with piston systems instead of direct impingement.
In the piston system, a piston near the gas port in the barrel takes the pressure of the expanding gas and sends it to the bolt carrier via a steel rod, which pushes it back, cycling the action. The carrier key is designed a little differently, in that it has a flat surface for the rod to push against.
The gas and fouling are captured in the piston area near the front of the rifle just back from the vent. The gas block has a knob on the front that facilitates easy removal of the piston and rod out the front for cleaning.

Shooting AR with Adams Arms Gas Piston System at close quarters.
Table of Contents
GAS PISTON CONVERSION KITS
Now the problem is that I have an old direct impingement style rifle and my buddy has a piston rifle, and I can’t live without one. This problem is compounded by the fact that the economy sucks and I have no extra money to buy another rifle. Never fear, Brownells is here, with three brands of gas piston conversion kits.
They carry Osprey Defense, CMMG, and Adams Arms conversion kits, and the prices are less than another rifle and even less than a piston upper. The beauty of this is it can be installed by just about anyone in an hour or so.
I decided to give the Adams Arms System a try. They make the system for carbine, mid-range, and rifle-length gas ports and also supply a set of replacement military-style handguards that facilitate the piston system. They also make four-rail handguards to go with the system if you need the accessory space. These systems can be added to your rifle build project or just used as a replacement for the gas tube in your rifle.
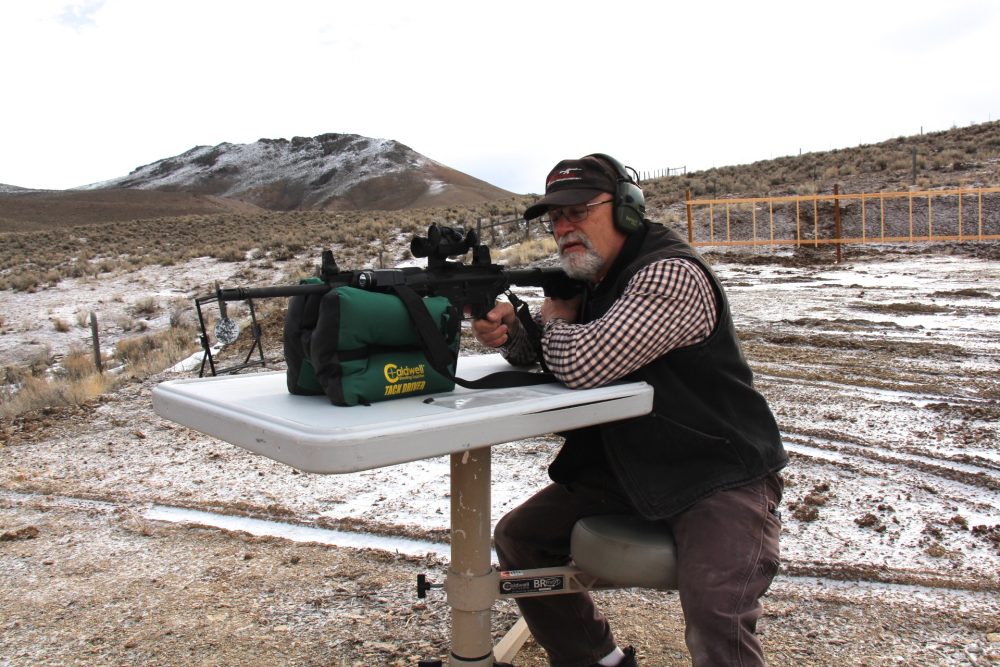
Sighting in rifle at 100 yards. Author likes his carbine sighted dead on at 100 yards. Then it is just a bit low at 300 and he aims a bit high—about 2.5 inches—at 15 yards or less to account for the mechanical offset.
I was replacing a barrel on an upper with a carbine barrel and wanted to run the piston system in the gun. It was a personal defense carbine, and I only wanted a rail for my light and one on the bottom of the front end for my sling to attach to.
I went with the Magpul MOE handguard because it was lightweight plastic and I could put a rail right where I needed it and not have to grip rails where they were not needed. This handguard is not a free floater, but for a CQB carbine it was much lighter and cheaper than an aluminum free floater. It pops right back in just like the original plastic grips, but rail sections can be attached to it.
The installation was very easy thanks to instructions on a CD for an installation guide. They were easy to follow and the system is simple in design. The gas block that comes with the system is a top-rail gas block.
If you are replacing an A2 sight tower from your old gun and need to have the front sight, I suggest ordering a clamp on the front sight when you order the system. I put a set of Daniel Defense front and rear sights on the carbine I built to back up the Aimpoint red dot sight I planned to mount on the carbine.
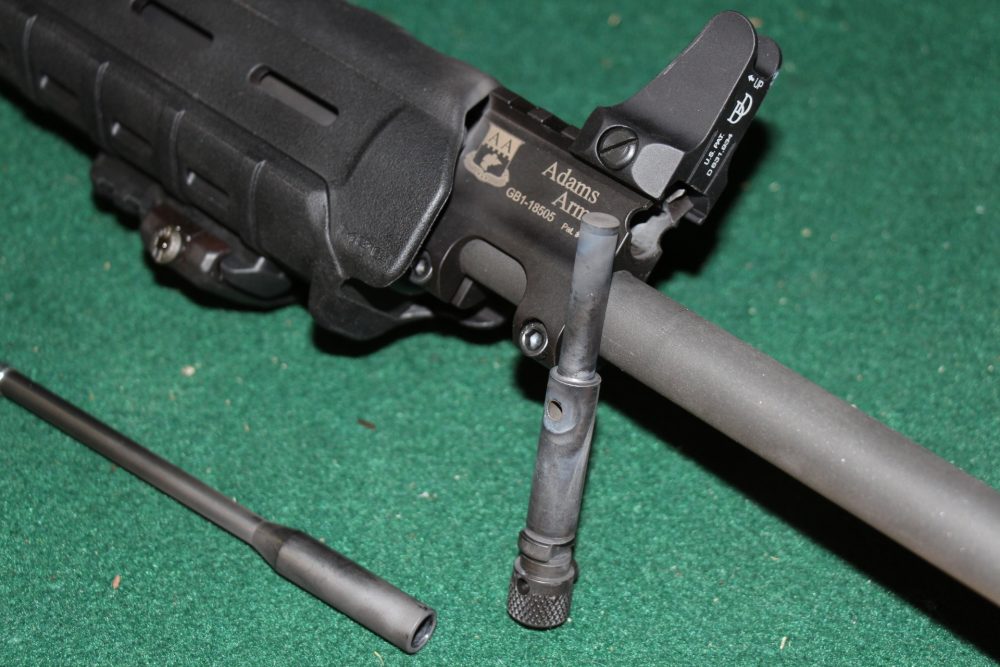
Piston and gas block taken out the front of the rifle. This makes for easy maintenance. Gas block has a rail on top for a sight tower if you want back-up iron sights for your optic.
INSTALLATION
After unloading the rifle and separating the upper from the lower, the first parts to come off are the military-style handguards. They should knock a few bucks off the cost of the carbine and just leave these off, as I don’t think anybody uses them anymore. A handguard tool makes this job much easier. The flash hider should come off next and it might be on very tight. Clamp the barrel in a vise with a set of barrel jaws near the flash hider and take it off with a wrench.
The gas block comes off next and, if it has an A2 sight tower gas block, the pins holding it on will have to be driven out. These pins are sometimes hard to get out. They are also tapered, so make sure you remove them from the small end (left to right). Once they are out, the gas block twists off and comes off the front of the barrel. The gas tube comes out with the sight tower. You do not need these for the install, so set them aside.
Unless you are going to change the handguard to a free-floating type, you do not need to take off the barrel. There is a bushing that needs to be installed in the tunnel through the upper where the gas tube passed through. This bushing keeps the rod from wearing on the upper tunnel and wobbling. The kit comes with a tool for driving in this bushing and helps keep it straight when putting it in. This is the hardest part of the install and it is very easy. Just make sure it goes in straight.
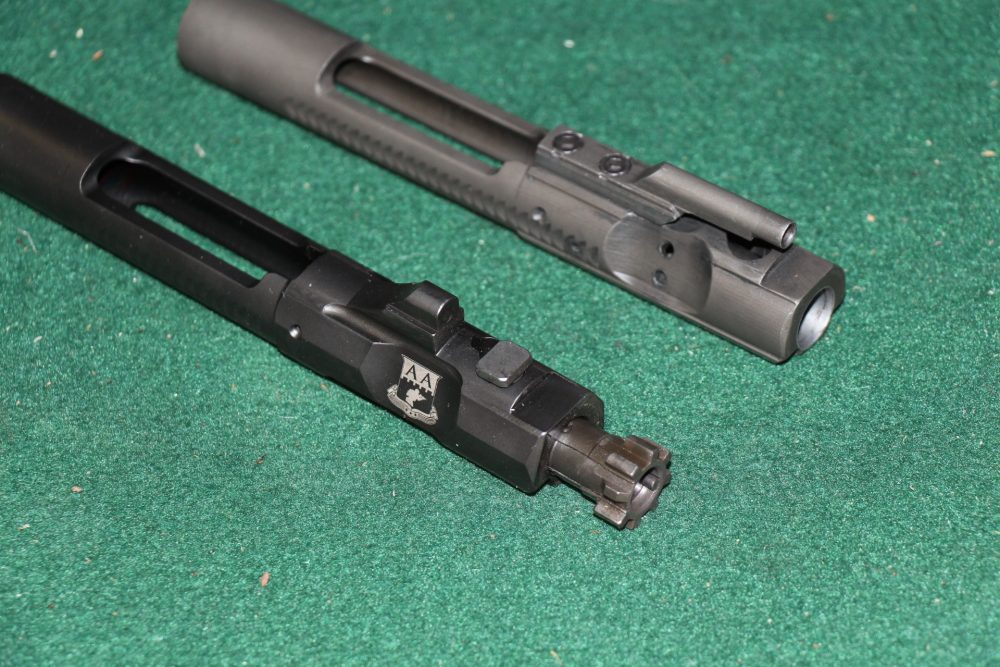
Front: Adams Arms bolt carrier and bolt. Rear: direct impingement bolt carrier. After 100 rounds, Adams Arms carrier is still as clean as when author put it in.
Next, put the upper in an Upper Receiver Action Block and clamp it in the vise. This isn’t a must, but it’s easier to work on the upper while it’s clamped in the vise, and this keeps the vise from crushing the receiver.
The gas piston gas block slides in place over where the old sight block was. It is held in place with screws on the bottom. Torque them to the recommended specifications.
The rod, piston, and lock knob all go in front of the gas block and are held in place with the knob. A small spring on the rod rests against the barrel nut at the tunnel where the rod passes through the bushing. Don’t forget to put the flash hider back on. Once the flash hider is reinstalled, the bolt carrier needs to be changed.
The kit supplies a bolt carrier that is modified with the carrier key for the piston rod. I took the bolt out of my carrier and put it in the piston carrier. Once the bolt is in place, install the bolt carrier and charging handle and put the upper and lower back together. Now your buddies will have to have what you have.
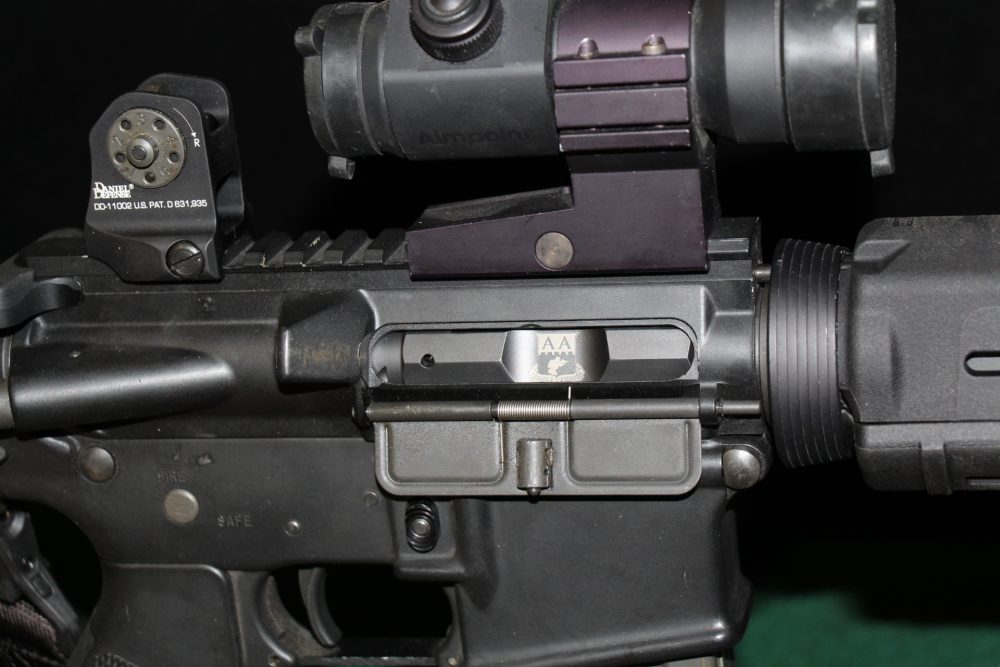
Adams Arms gas piston bolt carrier and system in the AR.
FUNCTION CHECK
I took the gun out and fired about 100 rounds though it to check function and reliability. It worked flawlessly. I can’t say I noticed the claims of less recoil and more accuracy, but I will say the bolt carrier region of the rifle was clean and without fouling.
I like to run my guns a little wet, especially in competition, and the lube was still as I’d left it when I put the gun together—wet and clean. The heat of shooting hadn’t dried out the lube.
Like I said, this was a defensive carbine, but I like to shoot competitions with my defensive tools. With ammo so expensive (if you can get it), it makes sense to use in competition and training the same rifle that protects the home.
ACCESSORIES
The only accessories I like on my defensive gun are a light and an optic, so I added a Streamlight TLR light and an Aimpoint. I like the pressure switch attachment on the TLR, so I can put the switch right behind the light on the handguard. The switching system on the TLR is user friendly, but if I go to weak-shoulder shooting—because sometimes in a gunfight you have to—I use the support-hand fingers instead of the thumb to activate the light. It is quicker to just squeeze than try to activate the light with fingers in an awkward position. The TLR puts out 600 lumens, which can illuminate a target 100 yards downrange. It has “knock you over” brightness in a room doing CQB.
The Aimpoint I carry doesn’t have any magnification and, for the rifle’s purpose, I don’t believe it needs any. Out to 300 yards on a man-sized target, center-mass hits are not difficult, and that’s as far as I envision using it. Up close and personal, the Aimpoint gives my old eyes much quicker target acquisition with both eyes open. Aimpoint was a quality red dot 25 years ago on our CAR-15s and still makes about the best quality red dot there is.
I also have a set of irons on the carbine for sighting. I believe unless the rifle is fitted with a scope, it should have backup sights. They can be employed quickly if the red dot goes down.
Another reason is a bit more dismal. If I have to operate the rifle with my weak arm because of injury to my strong side, I don’t have to try to turn on the sight and set the brightness for the occasion. I just use the irons, because I can see them right through the Aimpoint.
The same goes for the Streamlight. My first rechargeable flashlight was a Streamlight. It seemed as big and heavy as my PR-24 baton and was a formidable club. Now they’re one-eighth the size, ten times as bright, and still made with the same high quality I’ve seen in their products over the years.
Yes, other products on the market are equal in grade to these, but naturally I’m recommending brands I have used for years and have come to trust. As for the gas piston system, I think it is an improvement over direct impingement. For a little money, your rifle can be converted and shoot cleaner and cooler.
Dave Morelli is retired from the Las Vegas Metropolitan Police Department. His duties there included being a Patrol and Field Training Officer as well as a member of the LVMPD SWAT team both as an operator and sniper.
SOURCES
AIMPOINT INC.
(703) 263-9795
www.aimpoint.com
ADAMS ARMS
(877) 461-2572
www.adamsarms.net
BROWNELLS INC.
(800) 741-0015
www.brownells.com
MAGPUL INDUSTRIES CORP.
(877) 462-4785
www.magpul.com
STREAMLIGHT, INC.
(800) 523-7488
www.streamlight.com