 on top of a Type 3 (Double Feed")
In the January issue, we looked at Type 1, Type 2, and Type 3 malfunctions. This month we’ll examine some less common—but more perplexing—malfunctions. As stated before, this is not “the” way—it is “a” way. But understand this. If you use or train to use the weapon as a weapon and not a hobby item, you need to be able to clear malfunctions efficiently.
Malfunction clearance drills are used to get a gun up and running and get you back in the fight. If your job title, MOS, or vocation does not include fighting, feel free to ignore everything here. Bring the broken gun home, use tools, seek the counsel of posters on the errornet, and let polls dictate your course of action.
Table of Contents
STUCK CASE/STUCK CARTRIDGE
While both of these malfunctions wind up inside the chamber, they are completely different in cause and reduction. Understand that a case is expended brass. A cartridge is a live round.

Stuck Case
A fired case that remains in the chamber is a failure to extract. Its cause may be a worn extractor, worn extractor spring, radically worn chamber/throat, or overpressure round.
Execute Immediate Action:
1. Finger straight.
2. Push/pull on the magazine.
3. Rack and roll.
4. Get your head back in the fight.
If this doesn’t clear it, execute Remedial Action (see Part 1, January 2017 S.W.A.T.). If Remedial Action does not work, the gun is out of action until you can get tools to rectify the situation. For a stuck case, you need a rigid cleaning rod.
1. Elevate the muzzle.
2. Hold the bolt to the rear. Insert the cleaning rod and drop it in.
The weight of the rod will take the case out, and the case and rod will contact the bolt face. If you are not holding the bolt to the rear, the impact will cause the bolt catch to release and drive the bolt forward—and the case will go back into the chamber.

Stuck Cartridge
A stuck cartridge is a different animal. In this instance, a cartridge (remember, a live round) is stuck in the chamber. The extractor has control of the case rim, but the bolt cannot be pulled rearward in the conventional manner. The usual reason for this is a defect in the cartridge case; usually a crimp lengthwise down the neck. That crimp increases the dimension of the case, which means it will not fit into the chamber without force. Conversely, it won’t easily extract either.
We have been told that a dirty chamber will cause this, but that has not been our experience. I have several carbines that have gone over 8,000 rounds (one to 9,175 rounds) without ever seeing a chamber brush, and I have not had a single problem with them. Having said that, my guns are run wet, and extractors, springs, and inserts are changed at regular intervals.
As always, when you press the trigger and get a click or mush, execute Immediate Action. In this case, it will be a mush, as the bolt is not in battery.
1. Finger straight.
2. Push/pull on the magazine
3. Rack and roll.
This will be as far as you can go—the charging handle will not move. Remedial Action here will necessarily be different. The solution is called “Mortar.”
1. Take the gun off of your body.
2. Close the stock (if you have a collapsible stock). This is not an absolute—it is done to prevent damage to the stock. While the gun will fire just fine with the toe of the buttstock cracked off, neither will it make life any easier for you.
3. Elevate the muzzle so the barrel is vertical.
4. With your strong hand, unlatch the charging handle and exert pressure on it rearwards.
5. With your support-side hand, slam the rifle down sharply. The cartridge should come out.

A while ago, a student had a stuck cartridge early on the first day of training. This was before the malfunction class, so I decided to talk him through it. When it came to the part where he had to slam the buttstock on the deck, he became extremely agitated. He was horrified to think that a carbine should be treated this way.
Here’s a news flash: The M4/M16 is a fighting gun—not a Perazzi shotgun. It is meant to be used. It can even be abused, and is on a regular basis.
If your particular weapon/optic cannot stand something as benign as a Mortar Drill to unstick a cartridge from your chamber, you need to get a new gun/optic, or maybe just a major attitude adjustment. I fear a lot of people have unrealistic expectations as well as a warped sense of reality. While we all know that most who own guns rarely (if ever) shoot them, a lot who actually do press the trigger have a skewed outlook on what goes on. This is best exemplified by errornet forums where once a month someone complains that the brass deflector is getting marked by fired cases. Twenty others will respond with their “fixes,” ranging from covering the brass deflector with electrician’s tape to Velcro, etc. Sigh…

It’s not just those who live sheltered lives who are clued out. At a recent Trident Concepts class, a Marine suffered a stuck case. Another Weapons Training Bn Marine stepped off the line, retrieved a large rubber mallet, and proceeded to wale away at the charging handle at the cyclic rate. When I asked him if he carried the mallet in combat, he told me, “Yes, we have one in every vehicle.” When I showed him the Mortar Drill, he stated he had never seen it before and it was not authorized.
The bottom line is this. We can solve this malfunction with remedial action—executed by the shooter—in less than a minute. Or you can remove yourself from the fight, hunt down a rubber mallet carrier, who will find the time to rectify your problem, assuming you have time in the middle of a gunfight to do something like this.
Square-range TTPs may have little relevance on the two-way range.
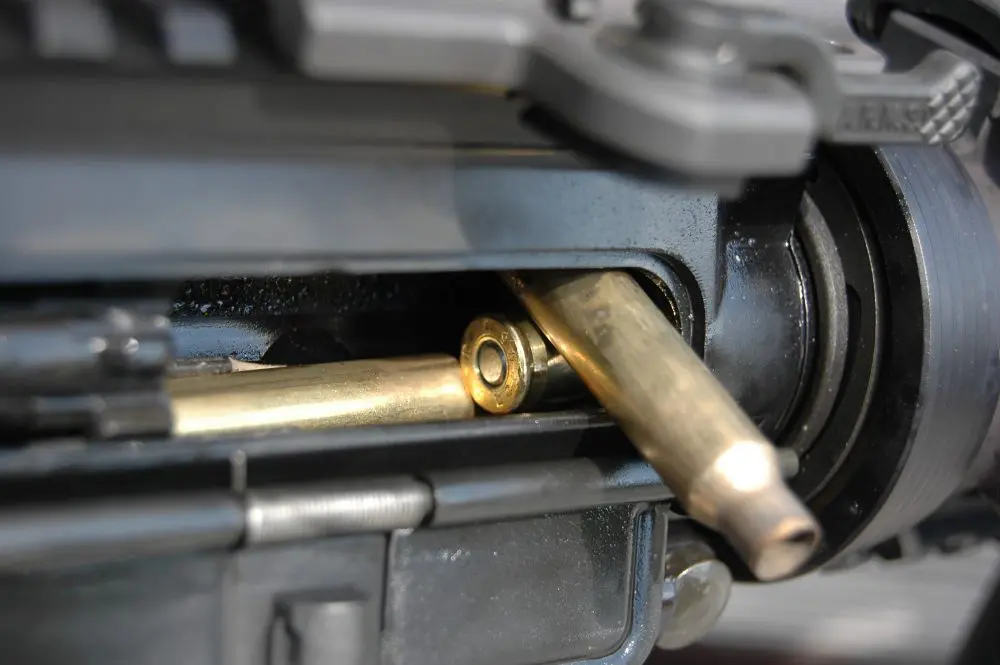
TYPE ATE MALFUNCTION
One other type of malfunction that occurs less often—but is not uncommon—is the Type Ate, as in when you get ate up (we use a more indelicate term in class). A Type Ate occurs when the extractor loses control of the case and the new round coming off the magazine bumps it up so the base of the case winds up on top of the bolt, between the bolt and the charging handle.
Execute Immediate Action. If this fails (it will), attempt Remedial Action. This will not work, and will require that you look at the gun to diagnose the issue. Your tactical situation will dictate if and when this can be done.
We need to understand the mechanics of this situation before we jump in and start using physical tools. The base of the case is wedged between the charging handle and the bolt. Pulling back on the charging handle will not solve anything, and Mortaring the gun can make it even worse. Pulling the charging handle to the rear will not accomplish anything but aggravation.

In order to clear this efficiently, you need to relieve the pressure on the case. Do that by moving the bolt, and bolt only, to the rear. This can be accomplished in two ways. If you have fingers of steel (and that are long enough to reach), insert the strongest finger into the mag well and press back on the bolt face.
At the same time, place your support hand on the charging handle and exert slight pressure to the rear. It is important that the charging handle moves rearward only with the bolt. When you feel the system unlock, vigorously push the charging handle forward and the case will fall out. Depending on the barrel orientation, it may fall out the mag well or into the chamber.
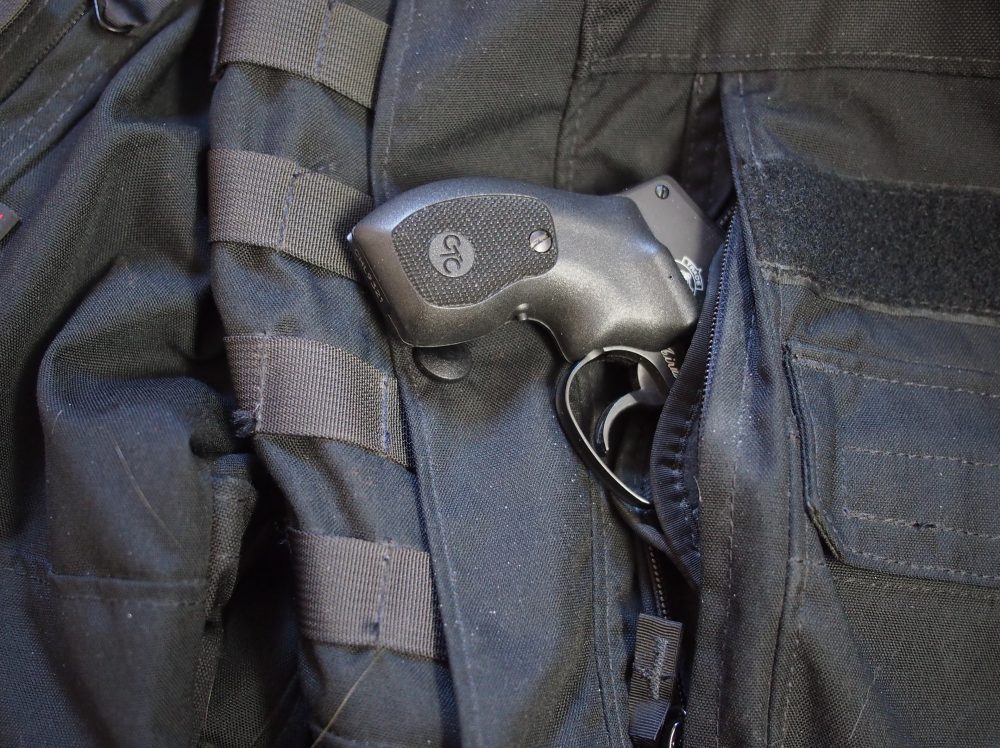
For those who have weak and stubby digits (like yours truly), an alternative method is to use a fixed-blade knife in lieu of the finger. Please note that I said (and mean) fixed blade, not a folder. A folding knife may fold on you and traumatically amputate your digits, causing pain, blood loss, a feeling of hopelessness, and a general loss of morale. Save yourself the grief and use the right tool for the job. I carry a Strider DB on my holster shroud just for this reason, and I use it pretty regularly at class.
Place your fixed-blade knife’s spine (the non-sharpened part) toward you, into the ejection port. Place the knife against the bolt face and press the bolt backward while exerting slight pressure on the charging handle rearward. When you feel the system unlock, push the charging handle forward and voila, success.
This beats the snot out of using knives to tear apart the case, pliers and hammers to beat it into submission, and the like.
Other problems do crop up, but we have covered the most common. Good initial and constant sustainment training will keep you sharp and more likely able to handle the malfunction efficiently and hence more likely to prevail in a fight.
We see a lot of weapons issues at class. Some of them are worn guns, bad ammunition, and worse magazines. Some of them are due to manufacturers of hobby guns cutting corners, and a lot of them are shooters who are clueless about lubrication and maintenance.
Whatever the cause, clearing the stoppage is in your hands.
At the end of the day, nothing made by man is perfect. Weapons—any weapon—can fail, and generally will do so at the worst possible time.
You can clear the malfunction and get back in the fight. Or you can look at it, befuddled, and die in place. Two different courses of action with two completely different outcomes.

PREVENTING MALFUNCTIONS BEATS CLEARING THEM
Anytime you fire a weapon, you cause wear. Eventually that wear causes parts failure and contributes to mission failure. Good preventive maintenance helps you avoid issues down the line, but it starts with buying a quality gun. The wants and needs of a competitive shooter are different from a plinker, and both of those are different from those who FISH (fight in someone else’s house).
Guns that are built to a standard make a good start. Hobby guns, on the other hand, do not have to meet a standard and cut corners to save money, and not to make the guns better.
Dean Caputo teaches a Two-Day Diagnostic Course that covers more information than one could normally absorb, but he uses the acronym MEAL to define those areas that need attention.
M: Magazines
E: Extractor assembly
A: Ammunition
L: Lubrication
If you pay attention to using quality in the above, you have gone a long way to keeping things on track.
Back to the first paragraph. Parts wear with use, and the harsher your firing schedule, the faster the wear. Consider what follows to be guidelines—your requirements may be different than mine.
Bolt Carrier Group
The bolt may start to exhibit cracks around the locking lugs much earlier than previously thought. Naval Surface Warfare Center, Crane, states in an Engineering Bulletin to consider swapping the bolt out at 6,000 rounds, and definitely by 10,000 rounds.
Understand that these are bolts that meet the TDP (technical data package). I have seen aftermarket bolts crack at the cam pin hole in as few as 500 rounds.
I change my bolts no later than 10,000 rounds. I keep them well lubricated in use, and use only MPI bolts. I have never broken one.
Extractor/Extractor Spring
I change the extractor/spring/insert at 5,000 rounds. However, we see aftermarket guns with extractors that are bad out of the box, or fail at a very low round count. Some carbines come with a four-coil extractor spring and a blue insert, which is the spec for the M16 rifle. The carbine requires a five-coil extractor spring and black insert.
The Crane Engineering Bulletin issues a Reliability Parts Set #2 that includes the proper carbine five-coil extractor spring, black insert and “O” ring (some early sets had a flat “D” ring) as well as bolt rings. These parts are available from Bravo Company USA as well as other vendors.
Bolt Rings
These may wear in as few as 1,200 rounds. I replace mine at 3,000 rounds unless I have problems earlier. Crane recommends replacement every time you clean your carbine. For me that is 3,000 rounds. Your mileage may vary.
Action Spring
This is one of the more commonly overlooked items on the gun. The service life of the action spring is unknown to me, but we see springs on service guns wearing at 7,000 to 10,000 rounds. Action springs on aftermarket guns generally have a shorter life.
We measure the action spring when we clean the gun. According to TM 9-1005-319-23&P, the length of the action spring for the M16A2 Rifle is 11¾ inches minimum to 13½ inches maximum. For the M4 Carbine, the length of the action spring is 10 1/16 inches minimum to 11¼ inches maximum.
[This article first appeared in the January 2009 issue of S.W.A.T.]
SOURCES
BRAVO COMPANY USA, INC.
(Bolt reliability kits, extractors, and more)
(877) 272-8626
www.bravocompanyusa.com
TACTICAL SPRINGS LLC
(Action and extractor springs)
(866) 515-2715
www.tacticalsprings.com