There was a time when painting a firearm was considered heresy. I remember the strange looks I received from my fellow deputy sheriffs when they saw my Mini-14/GB painted tan with splashes of gray and OD.
That was a long time ago, and now it is not unusual to see as many painted rifles at a training course as those wearing “basic black.”
There are several reasons for painting a firearm, the first and most common being camouflage. There are few things in nature, save the odd Angus bull, that are solid black. Given that, along with a very recognizable profile such as an AR-15/M16, it only makes sense to break up the outline of a firearm.
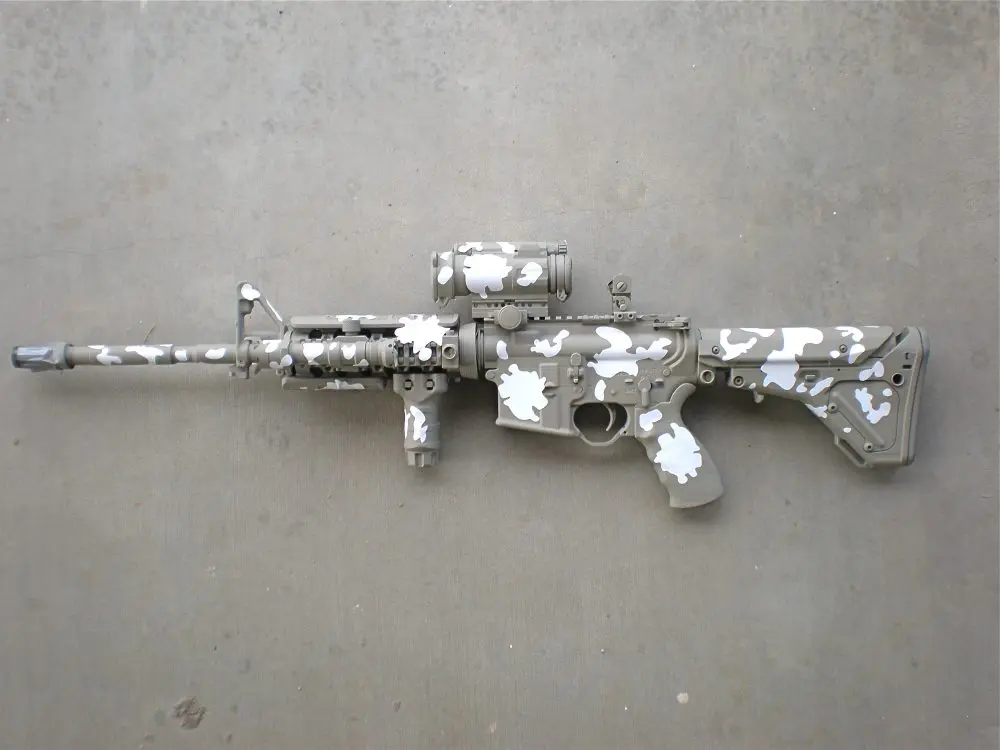
Stencils, step 1: After applying the first base coat—allowing the paint to dry as per manufacturer’s instructions—apply stencils, being sure to rub out any air bubbles. Apply the second coat, wait for the paint to dry and apply more stencils. Repeat until all colors/stencils have been used.
Another reason is personalization. We Americans are nothing if not individualists, and what better way to make a personal statement than painting your firearm the way you want it? A personal paint job is a way of shouting from the rafters, “This is my gun and you’ll never mistake it for anybody else’s.”
Next is protection from the elements. Being from Arizona, where humidity is not much of a problem, I thought stainless steel and special finishes were gimmicks—until I attended a tactical course in Florida one summer and I swear I could see my well-worn, blue 1911 and its magazines rusting before my eyes.
The last reason is just plain fun. Hey, it’s your smokepole and if you want to do something offbeat, I say go for it.
For this article I used eight firearms—six ARs, one 1911 pistol and one Remington 870 shotgun—to illustrate what is possible using different techniques. While the finishes on all eight will protect the guns from the elements, five of the ARs and the shotgun were finished for functional reasons, one was for fun, and the pistol was to personalize it.
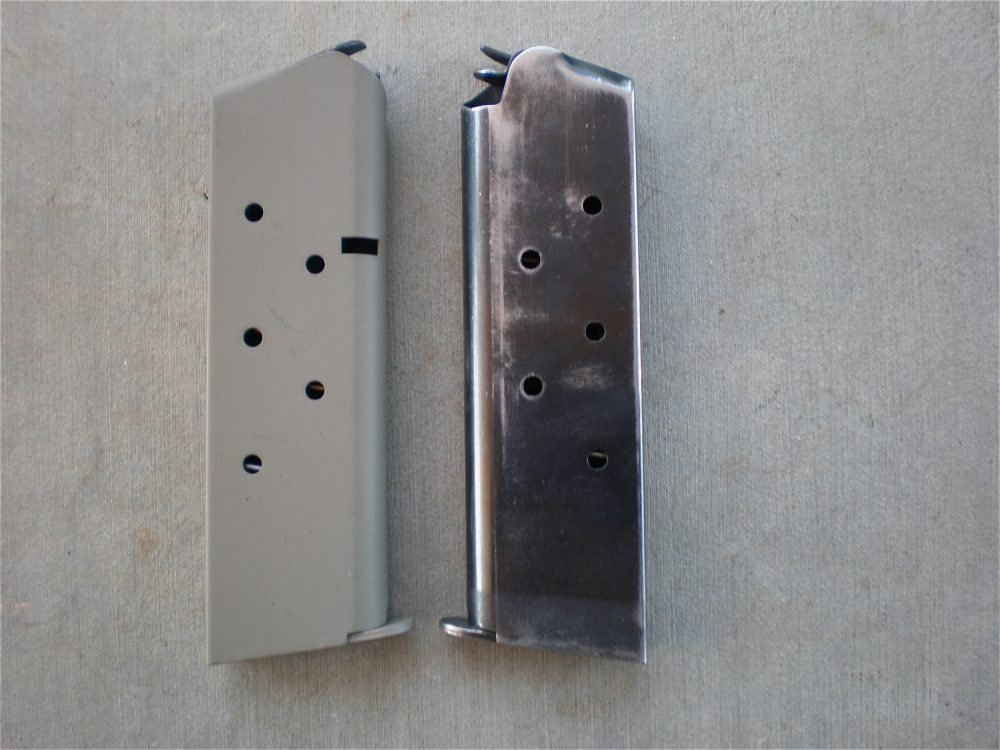
Worn, shiny magazines can be given new lease on life with Brownells’ Baking Lacquer. This is especially important in areas that experience high humidity, where bare metal will rust easily. Color shown is Coyote.
Table of Contents
GENERAL GUIDELINES
Regardless which of the following methods you choose, there are a few general guidelines that should be followed.
First, have a place prepared to hang the parts while the paint cures between coats. Small parts are usually no problem, but a full-length rifle needs a bit more thought. On AR-type carbines, I run a wire through one of the slots on the flash hider to hang it from.
Next, the weapons should be thoroughly degreased so the paint will adhere to the surface. My two favorite products for this task, which are commonly available, are Simple Green and Dawn Heavy Duty Degreaser. If equipped with an optical sight, remove the optic and douse the firearm with the degreaser. Don a set of rubber gloves and rinse the firearm thoroughly. If available, I prefer to use compressed air to make sure all moisture is displaced.
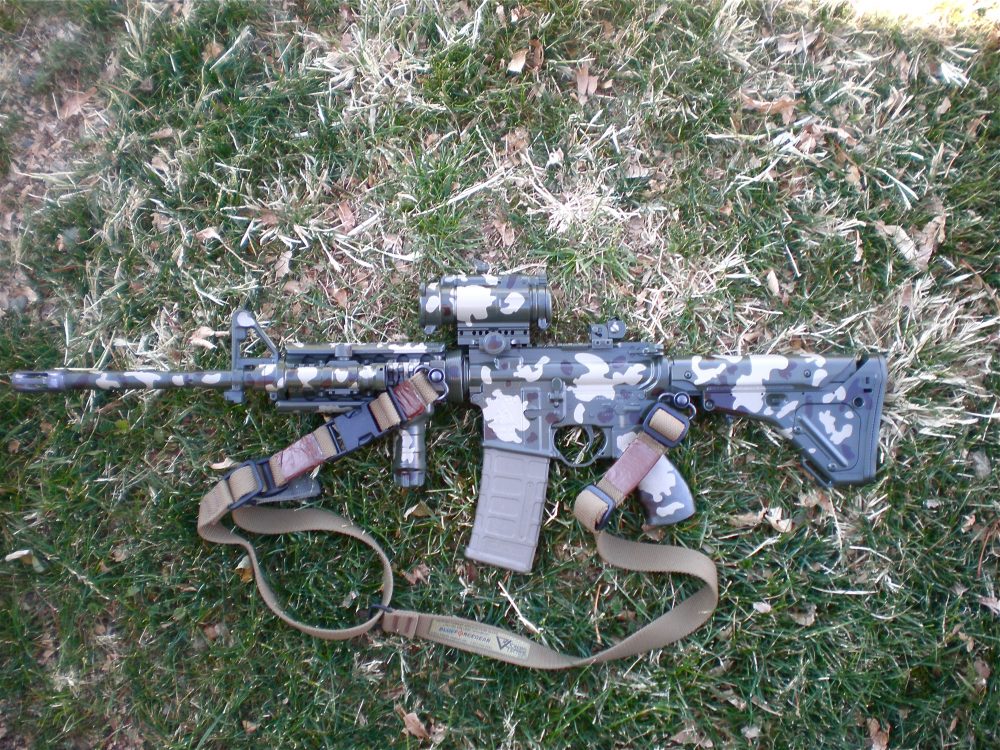
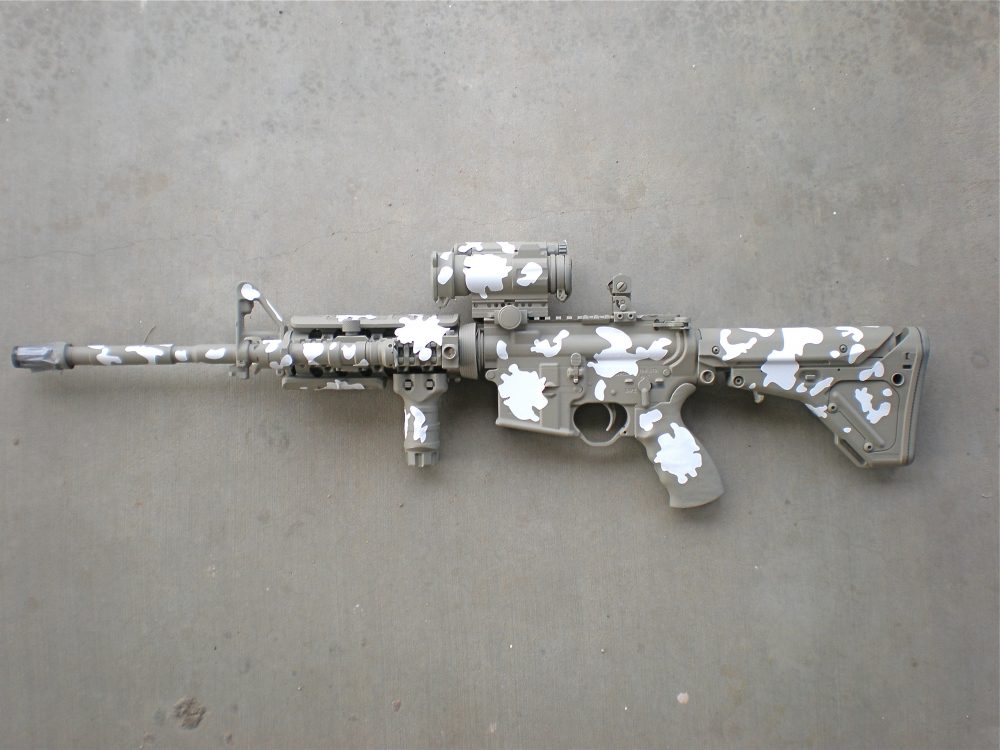
SLR15 rifle completed using Krylon Camouflage aerosol paint and Bulldog Arms Flectar pattern stencils obtained from Brownells. Rifle has Magpul stock and P-MAG, TangoDown rail covers and vertical foregrip, Aimpoint M4 optic, SureFire Scout Light and Blue Force Gear/Viking Tactics sling.
Now turn your attention to the optic, being as careful as possible not to totally submerge it. While I realize that a quality optic should be capable of being submerged in water, I simply don’t want to take the chance of compromising the internal parts, especially if it is an electronic device, e.g., Aimpoint or EOTech. When finished, put tissue paper over the lens, close the lens covers or mask them off, and remount the optic to the firearm. If the lenses are masked, blue “painters tape” works better than regular masking tape, as it will leave less of the sticky adhesive behind.
Earlier I mentioned wearing rubber gloves. The reasoning for this is simple: the oil from your fingerprints may be enough to keep paint from adhering to any parts touched with bare skin.
Finally, make sure all painting is performed in a well-ventilated area and away from any open flames.
For the purposes of this article, I have broken down painting into four categories: Adding Furniture, Freehand Spray Paint, Stencils and Spray Paint, and Bake-On. I will describe each and attempt to define the pros and cons of each method.
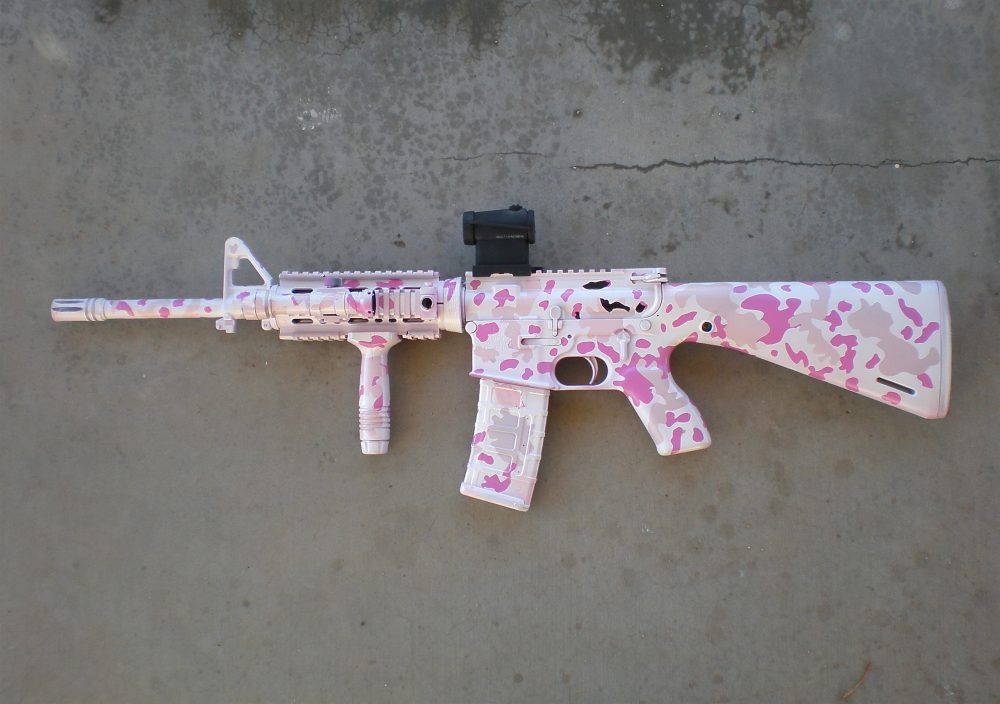
Author’s daughter’s carbine: Built on a Cavalry Arms receiver, “Pinkie” now sports “tactical pink” camo finish, Aimpoint T-1 optic and SureFire Scout Light. Like Hansen’s SLR15 carbine, Bulldog Arms Flectar stencils were used, showing the versatility of this pattern.
ADDING FURNITURE
Some individuals, whether for personal reasons or policy, may not want/be able to paint their firearm. While not the same as painting, changing the furniture of an existing firearm—stock, pistol grips and forend—is a simple way to break up the outline of the gun.
In addition to basic black, many manufacturers offer the above parts in olive drab, dark earth, foliage green, etc.
The downside is buying additional parts that are already on the firearm—but having extra parts is not a bad thing.
FREEHAND SPRAY PAINT
This is the easiest, quickest and least expensive of all the methods. Simply degrease the firearm, choose what colors you want to use and go to it, just making sure each coat has dried before applying the next. I like the dedicated “camo” colors from Krylon.
In addition to easy, quick and cheap, this method also gives the user the ability to change the color scheme quickly depending upon the environment he will be working in. This factor is probably more important to those in the military, whose area of operation will change more than most police officers or private citizens.
The downside is that most spray paints are not as durable as bake-on finishes. To help the paint wear longer, a final coat of matte clear may be used.
Author’s wife’s carbine: This Bushmaster carbine was finished using Brownells’ Baking Lacquer and Aluma-Hyde®. It has Vltor stock, TangoDown rail covers, pistol grip, vertical foregrip and PR-4 sling mount, LaRue fixed BUIS, and EOTech 552 optic.
STENCILS AND SPRAY PAINT
For a more “professional”-looking paint job, one may want to consider stencils. Stencils can run the gamut from using local vegetation/leaves to commercially manufactured stick-on types.
I have never had much luck using natural vegetation because it is so light that it invariably blows away when the aerosol hits it. Another option is plastic vegetation that can be found at craft stores.
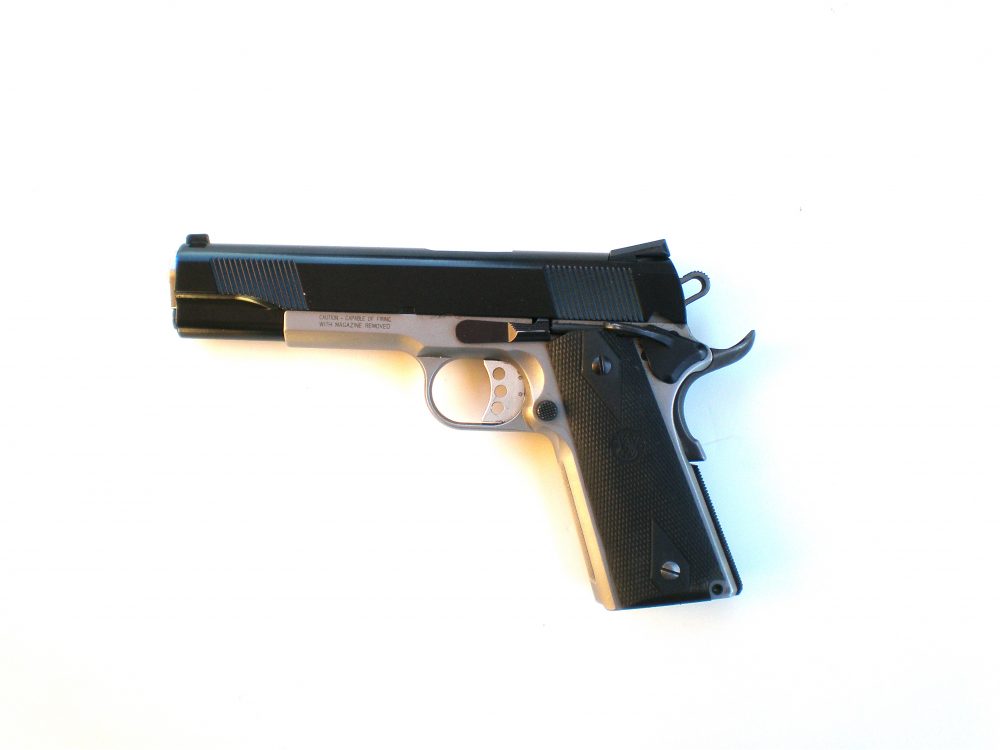
This stainless steel Smith & Wesson 1911 was given a bit more personality by using Brownells’ “Gun Metal Blue” Gun-Kote™ bake-on finish, creating a two-tone effect.
To use the commercial stick-on stencils, first apply a base color, wait for the paint to cure and then apply the stencils. Repeat until all colors/stencils have been used, wait for the paint to set up, and then remove the stencils using the point of a sharp X-Acto knife.
Brownells carries several stick-on stencil patterns from Bulldog Arms, while Bulldog has others available on their website. I used the “Flectar” pattern on two ARs and achieved radically different looks just by changing the colors.
While stencils—especially the commercial types—give a very good-looking finished product, the downside is that they will add another $10 to the cost of the project ($17 if the heat-curable types are purchased.)
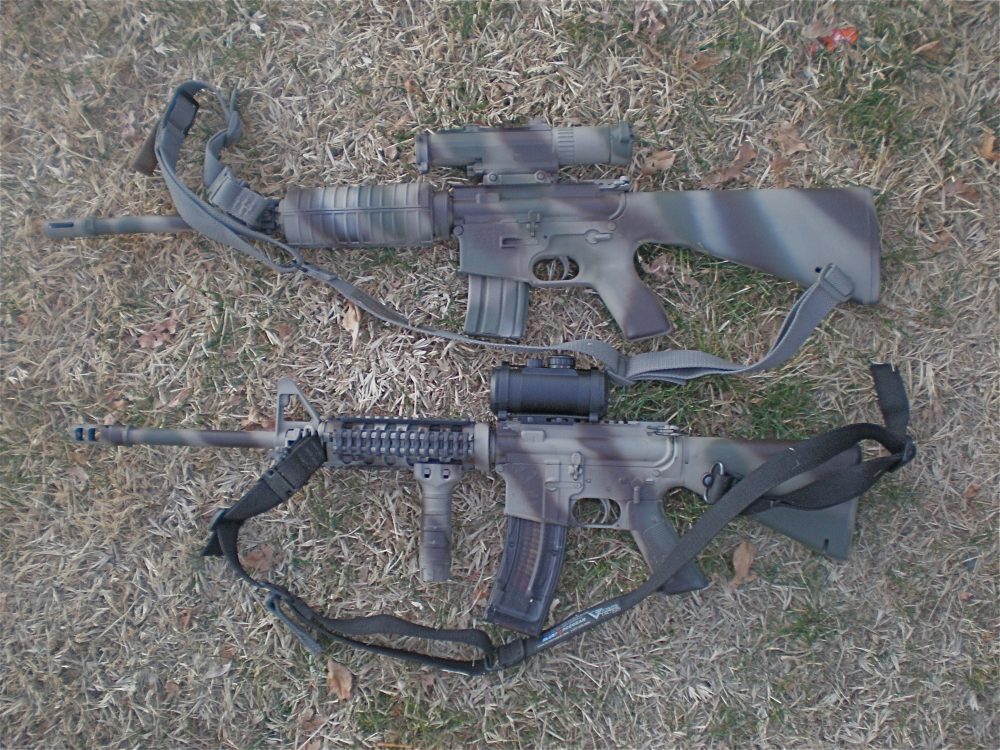
Both of these carbines were finished freehand using Krylon Camouflage aerosol paint. Top: “Thumper” is .450 Bushmaster upper on Cavalry Arms lower with Leupold CQ/T optic. Bottom: Olympic Arms .22 “Partner” upper on Stag lower with Simmons red dot sight. Both have Viking Tactics slings.
BAKE-ON
Bake-on finishes, such as Brownells’ Gun-Kote™ and Aerosol Baking Lacquer are the most “difficult” and costly to apply. For best results, the firearm should be completely disassembled and each part individually bead blasted before painting and then baked in an oven. This makes it too time-consuming for some, and beyond the ability of others.
However, in my experience, durability of the finished parts is off the charts when compared to regular spray paint, and there is no need to apply a clear coat over the top. I finished a Kimber Warrior in a two-tone “desert” finish years ago. While the Aluma-Hyde® finish on the SureFire X200 that is attached to the pistol’s rail has worn, the frame and slide look as good as the day it was finished, after hundreds of drawstrokes from a Kydex holster. I chose to finish the 1911 shown here with Gun-Kote™ for exactly that reason.
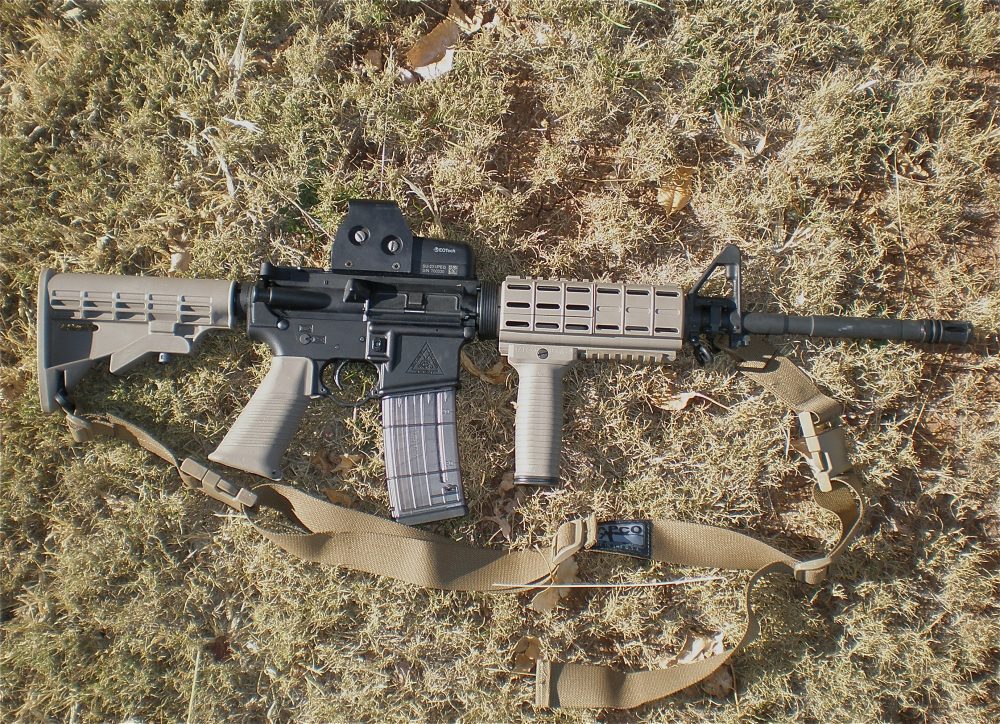
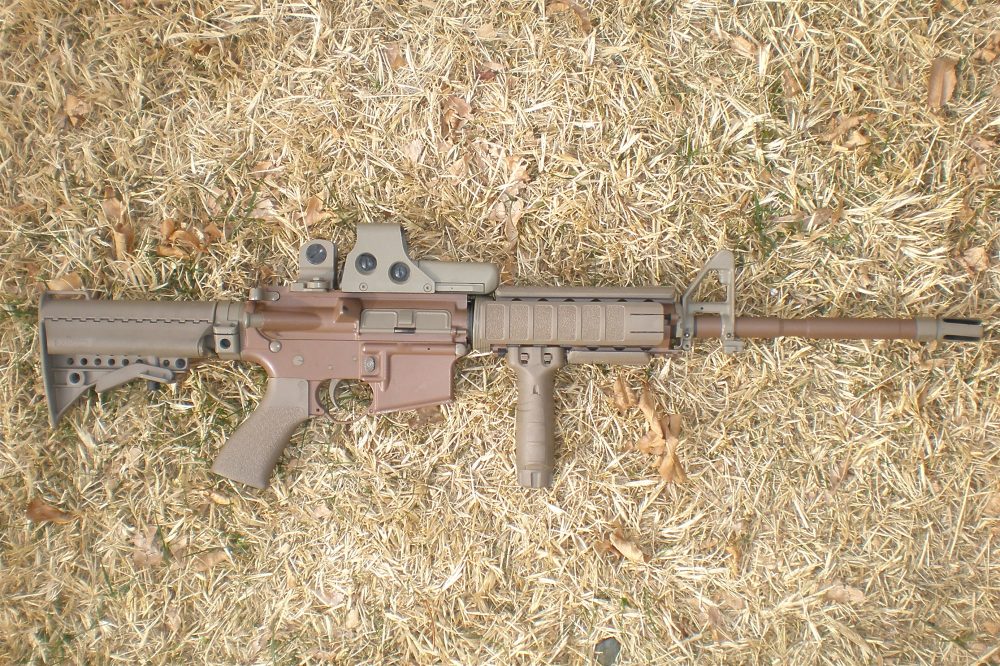
For those who are reluctant or forbidden to paint their firearms, simply changing the furniture can help break up the weapon’s outline. Stock furniture on author’s grandson’s SLR15 carbine has been replaced with TAPCO’s new Intrafuse Handguard, SAW pistol grip, vertical foregrip and buttstock in Dark Earth color. Sling is TAPCO’s new Sling System. EOTech 553 optic, Lancer Systems translucent magazine.
SUMMARY
So which method/technique is best? There is no simple answer to that, because each individual may opt for durability over cost or vice versa, or need the ability to change the appearance of the weapon as the mission dictates. Some finishes offer more benefits than others, such as Brownells’ Teflon/Moly Gun Finish, which, as the name implies, has Teflon and moly in the liquid to add lubricity—something not possible with spray paint.
Whatever method/type of finish you decide on, gather the necessary supplies and don’t rush through the job. Have fun and use your creativity. In the end you will have something that is unique to your own tastes and/or needs.
SOURCES:
Aimpoint Inc.
Dept. S.W.A.T.
14103 Mariah Court
Chantilly, VA 20151-2113
(877) 246-7646
www.aimpoint.com
Brownells Inc.
Dept. S.W.A.T.
200 South Front Street
Montezuma, IA 50171
(800) 741-0015
www.brownells.com
BulldogArms.com
Dept. S.W.A.T.
1444 Carl Avenue
Rapid City, SD 57703
(605) 484-1346
www.catalog.bulldogarms.com
Bushnell Outdoor Products (Simmons Scopes)
Dept. S.W.A.T.
9200 Cody
Overland Park, KS 66214
(913) 752-3400
www.simmonsoptics.com
L3 EOTech, Inc.
Dept. S.W.A.T.
1201 E. Elsworth Rd.
Ann Arbor, MI 48108
(734) 741-8868
www.L-3Com.com/Eotech
Lancer Systems
Dept. S.W.A.T.
7566 Morris Court, Suite 300
Allentown, PA 18106
(610) 973-2600
www.lancer-systems.com
LaRue Tactical
Dept. S.W.A.T.
850 County Road 177
Leander, TX 78641
(512) 259-1585
www.LaRueTactical.com
Leupold & Stevens, Inc.
Dept. S.W.A.T.
P.O. Box 688
Beaverton, OR 97075-0688
(503) 526-1400
www.leupold.com
Magpul Industries Corp.
Dept. S.W.A.T.
400 Young Court
Erie, CO 80516-8440
(877) 462-4785
www.magpul.com
SureFire, LLC
Dept. S.W.A.T.
18300 Mount Baldy Circle
Fountain Valley, CA 92708
(800) 828-8809
www.surefire.com
TangoDown
Dept. S.W.A.T.
1588 Arrow Highway, Unit F
La Verne, CA 91750-5334
(909) 392-4757
www.tangodown.com
TAPCO
Dept. S.W.A.T.
P.O. Box 2408
Kennesaw, GA 30156-9138
(800) 554-1445
www.tapco.com
Viking Tactics, Inc.
Dept. S.W.A.T.
3725 Heatherbrooke Drive
Fayetteville, NC 28306
(910) 987-5983
www.vikingtactics.com
Vltor Weapon Systems
Dept. S.W.A.T.
3735 N. Romero Rd.
Tucson, AZ 85705
(520) 408-1944
www.vltor.com