Targets are one of the least understood and misapplied tools in the trainer’s toolbox. Used correctly, targets can assist the shooter in reaching a specific training objective more quickly and efficiently.
Targets can range from random household or office excess such as paper plates or index cards through traditional NRA competition targets and into exotic electric- or pneumatic-powered reactive steel. Unfortunately, despite an incredible variety of available target material, most programs do not tap the potential of this training tool.
The following tips and truisms are meant to assist in getting more from your targets to improve your training, while debunking a few counter-productive myths that might be holding shooters back.
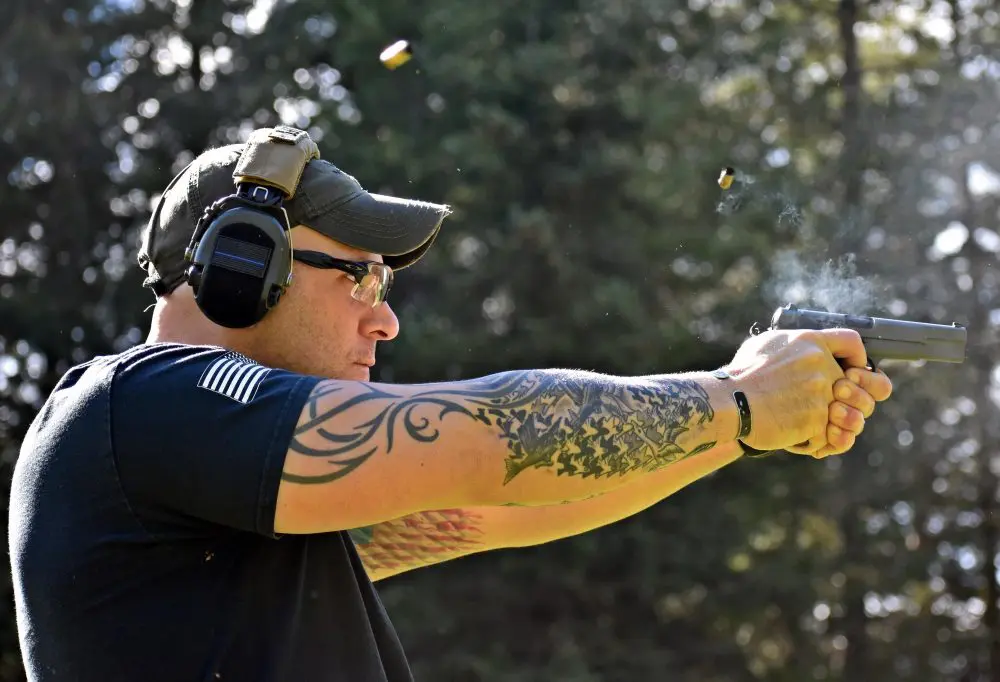
Shooter will use every square inch of the target he is provided and feel satisfied that he is “hitting the target.” Consider this when choosing targets. Photo: USMC/MSgt K. Milks
Table of Contents
TIPS
Know Your Target’s Purpose
Each target out there has a purpose. Commonly these are to serve as a distinct aiming point, replicate a real-life target or desired impact area for hits at a certain distance, or compare shooter’s performance against a certain criteria.
For example, the ubiquitous NRA 25-yard repair center (B8) does two of these things: Compares performance via arbitrary scoring rings and serves as a solid aiming point for target sights with its 22 MOA black circle. It has been the primary pistol target for many, many shooters for the bulk of the smokeless powder era. It does well at its intended purpose, which was and is bull’s-eye target competition. Using it as a tactical training aid may be less than optimal, unless one desires a 5.5-inch (the bull’s diameter) vital zone.
Targets are often chosen with little to no thought as to what they accomplish for the shooter. They are often selected at casual glance and estimation of what may be “easy” or “fun” to hit. In an organizational setting, they are probably purchased in bulk and the same target used for training and qualification. That target may or may not suit each training objective.
There is a difference between an aiming point and a desired impact zone, although few differentiate between the two.
For example, if a shooter’s training objectives are to isolate accuracy and specifically work on getting a solid read off of the front sight upon each shot breaking, a plain, full-body silhouette such as a military E type would be ill suited because the target has an overly large impact zone and lacks a distinct aiming point. If another shooter is attempting to boost his speed in recovering to the second shot of a pair at 10 yards, an ideal aiming point of about 2.5-3 inches would be too small of an impact area to meet his goal.
Speed is best accomplished on a relatively plain target that has an impact area sized to emphasize speed at the largest acceptable zone. Scoring rings just get in the way when what you want to know is if you did or didn’t hit the zone.
Accuracy is best accomplished when the target is sized to make a distinct aiming point. Trainers must then accept that all shots may not fall within the confines of that aiming point and may need to scribe the outline of the desired impact zone, which needn’t be visible from the shooter’s perspective.
Scenarios may be best trained realistically using photo or cartoon targets, but these are poor for emphasizing accuracy.
Reactive targets are great for building speed and reducing time lost to evaluating and repairing targets, but do nothing to show the shooter where their missing impacts went so they can diagnose the problem.
Each target has a distinct purpose. Trainers must evaluate whether their target’s purpose is serving their training objectives.
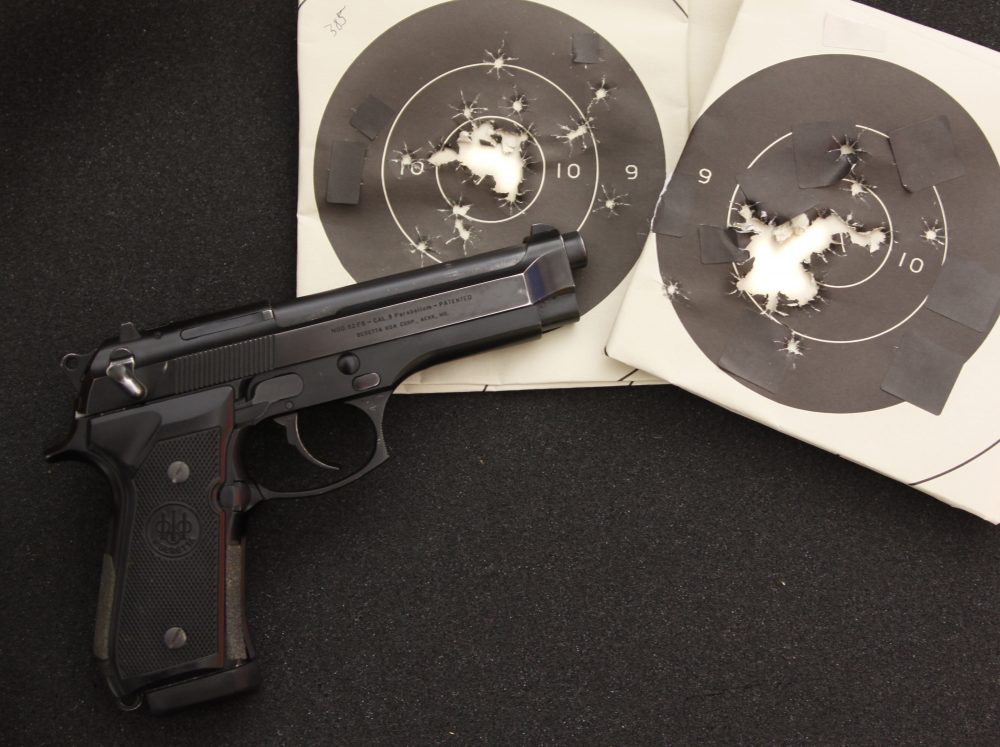
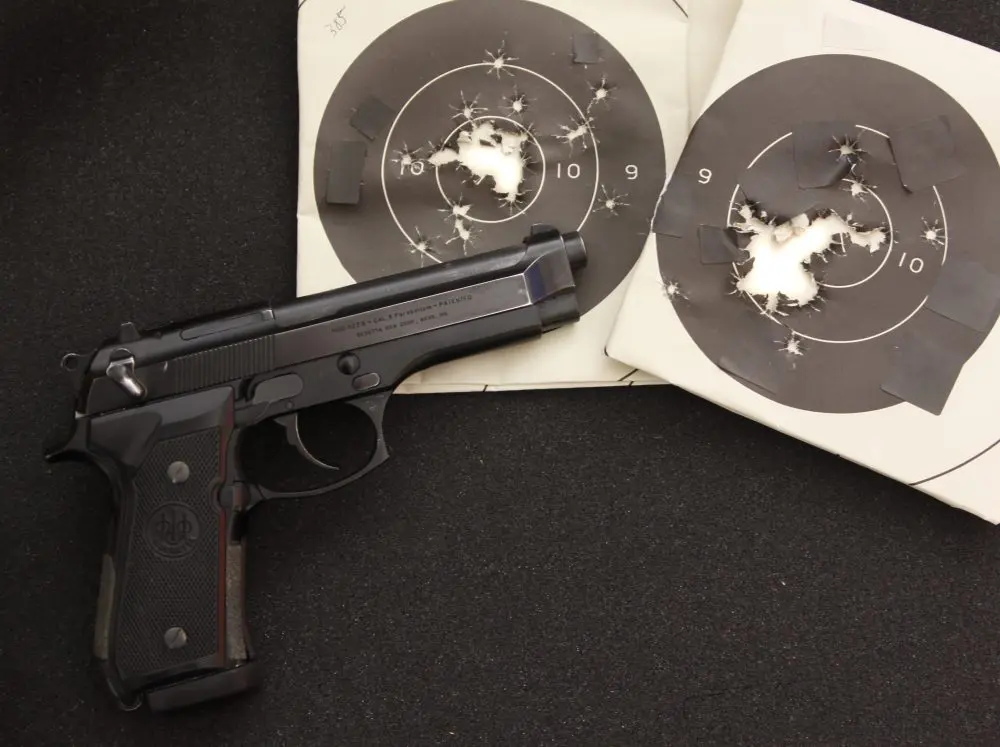
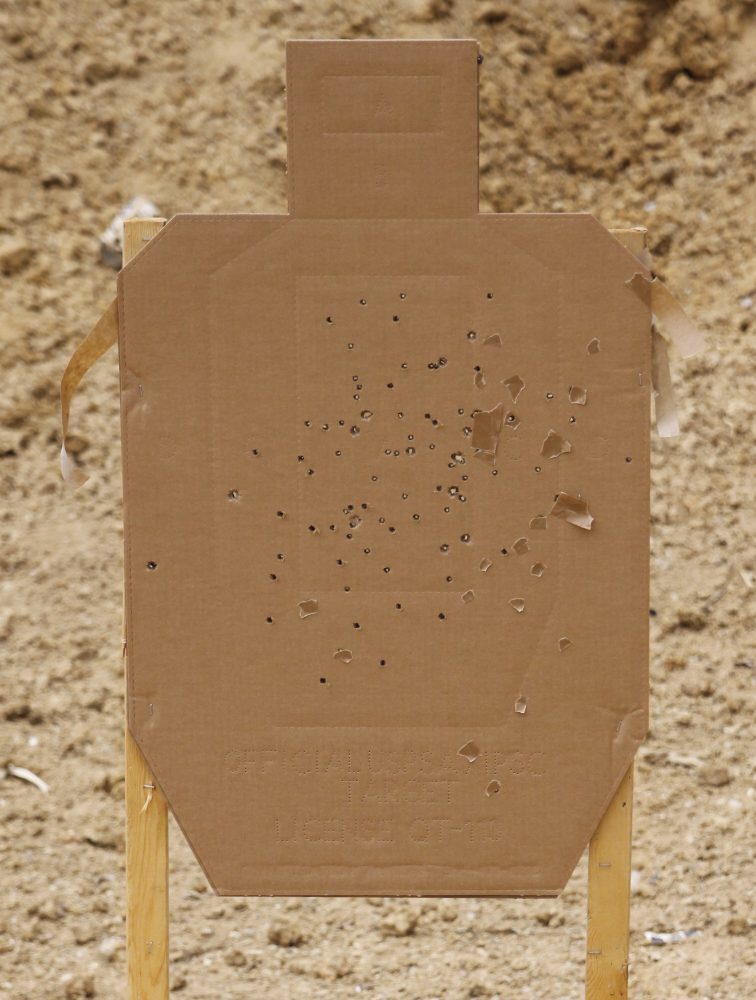
Shot holes tend to pull their following brethren in close, and once a group forms, shots are sucked in, even if the group is not placed correctly. Trainers can use this to advantage.
Pick a Multi-Function Target
For individuals, it can be frustrating to have to wait for the line to be cleared to go and switch targets after one target has been shot up, leading to using a less than ideal target for other drills rather than waiting to change the target. For organizations, multiple targets mean more money and the hassle of keeping a supply of each. They also mean down time for the trainer as the students spend valuable training time switching or repairing targets. There are a variety of multi-function targets on the market, but many are crowded, confusing, and serve poorly.
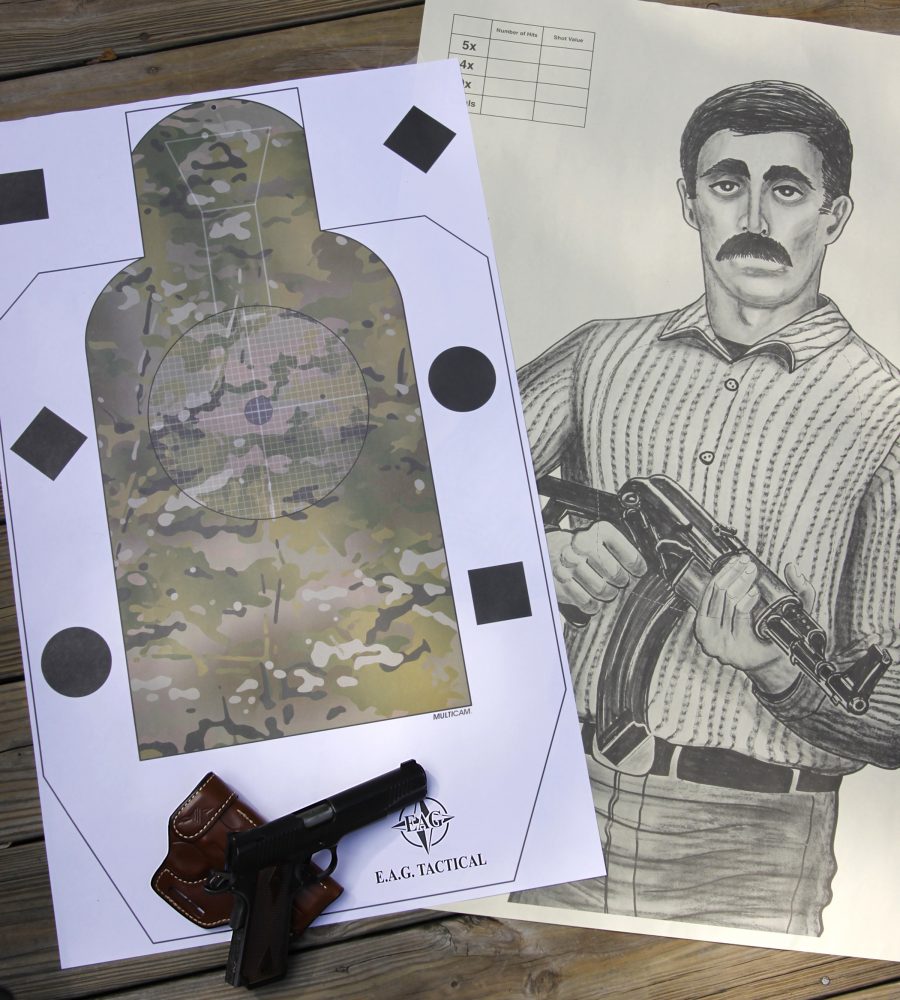
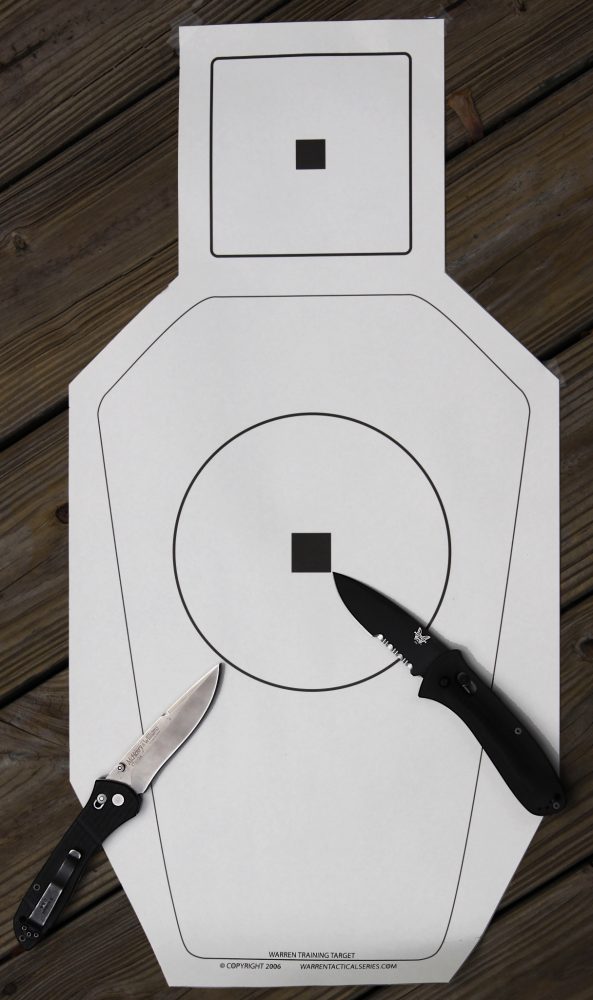
Two personal favorites are the Warren Tactical Training Target and the EAG Target.
The entire Warren Target approximates a frontal torso with appropriate outlines demarking sub zones of five inches (head) and seven (body). There are aiming points in the center of each of these that measure ¾” and one inch respectively. This allows one target to be used for precision practice (square aim points), speed at several levels, and the entire paper focuses hits within a reasonable zone.
Likewise, the EAG Target has a MultiCam® shaded center that approximates a frontal torso/head. The center of it has an eight-inch circle with a faint ¼-inch grid to assist in obtaining a 50-yard zero with a carbine. An anatomical spine and ocular window are faintly outlined as well, allowing two levels of precision in the head. The outline of a full IPSC silhouette is stenciled around the camouflage center, and the margins have multiple two-to four-inch shapes that serve as precision targets for close-in pistol work, aiming points for iron sighted carbines or red dot sights (50 yards) or optics (100 yards), or shape reaction/discrimination drills up close. With each target, there are multiple levels of speed or precision available in one sheet, and they focus the shooter on a realistic representation of a vital target zone.
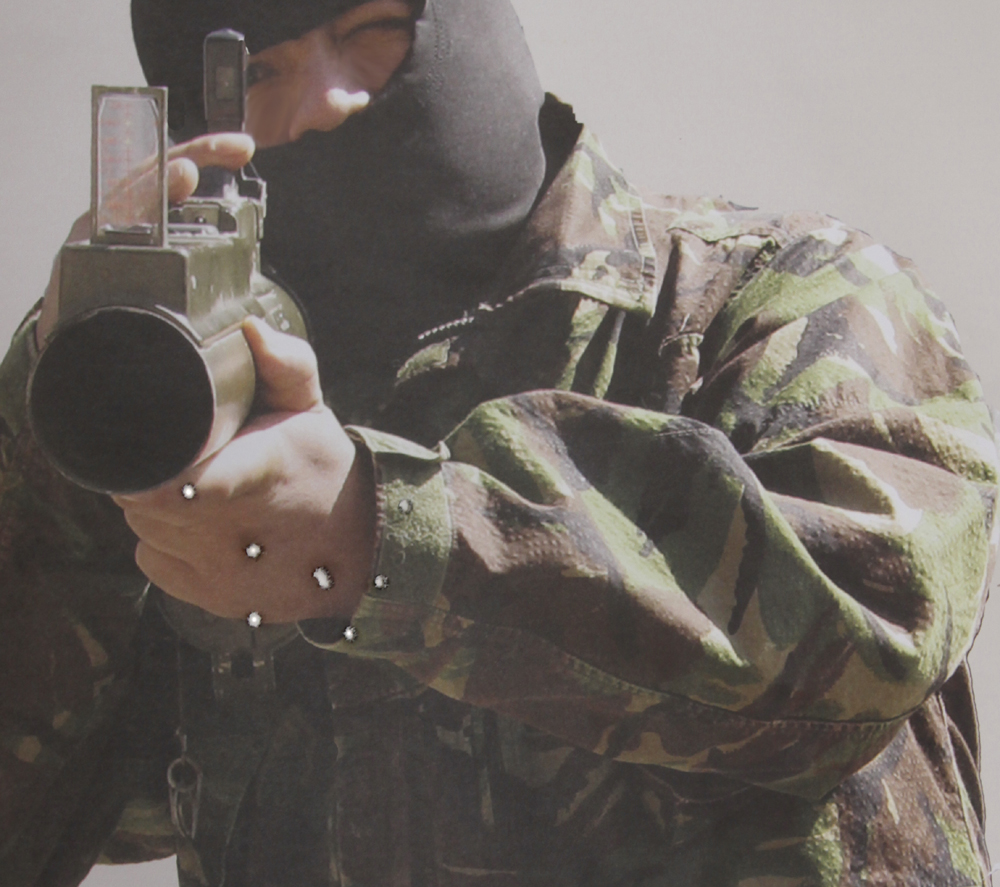
High contrast of light-colored hands and dark rocket muzzle serves as more distinct aiming point than actual muted vitals, and pulls shots in.
Reduce the Zones in Practice
There was a facility that had an unacceptable failure rate with the marksmanship phase of their CQB program. The standard amounted to a 10-inch circle at different distances. Without making a single change to the instruction or program, they boosted the graduation rate way above historical averages by having the students practice on eight-inch circles throughout the marksmanship portion. Guess what the average groups looked like? About 8½ inches.
On test day, out came the 10-inch stencils and life was good. This is the same principle that many-time IDPA champion Scott Warren used when he designed his training targets, which have zones correspondingly about an inch smaller than the official IDPA target. Skeet shooters who practice with the .410 and compete with the 12 gauge are using the same concept.
Want to increase your qualification scores? Train at 80-90 percent of the standard for size and then do the drills on the full value target at the same percentage of the time limits. Be careful not to take this approach too far—most trainers will not dip below 80 percent.
Light Attracts Sights
The standard black target is probably costing you some level of performance unless you are shooting a stainless pistol or red dot sight-equipped carbine. The black bull is a throwback to the 25- and 50-yard emphasis of traditional bull’s-eye pistol competition, providing a clearly defined aiming point at distance for competitors. The close range where most practical training occurs allows significant leeway in choosing the color of targets.
“Equal light/equal height” relationship of the front sight to the rear can be tough against black. Shoot a white 3×5 card and a similarly cut piece of black paper and see which yields the stronger results. Light targets with a printed/stenciled boundary to denote the impact area are easy to align the sights against, particularly indoors. Black targets are not always easy, which leads to poor sight alignment or six o’clock holds and resulting training scars. Simply placing an index card over the center of a black target may provide the cure, if that is all that is available.
This same principle occurs on photo targets. The hands and face of Caucasian subjects are much lighter than the usual field jacket or dark hoodie of threat photo targets, and shots tend to stray there, even if the shooter is trying to avoid getting visually locked onto the subject’s weapon.
Ensure You Can Call the Shot
Another area the light-colored target mentioned above excels in is allowing the shooter to call the shot and verify the hit. Where hits can hide in black targets, especially past seven yards or indoors, light-colored targets show them clearly. A shot that cannot be verified is a wasted learning opportunity unless the shooter is strong enough to always be on or inside of the call.
If the shooter or organization prefers traditional bull’s-eye targets, then consider Shoot-N-C or Caldwell Orange Peel targets, which leave a visible splash around the shot hole.
This also speaks to refacing the target or pasting the shot holes at regular intervals. As you keep your shooting log and switch drills, the target should be repaired. Targets are the least expensive component of firearms training and the first where many shooters and trainers cut corners. Repair or reface more often than you think you need to. For those using index cards, small bull’s-eyes, or similar targets, consider covering the entire backer with a large target or moving paper to hide existing holes. The training will get better results when every shot counts and is counted.
Incorporate Photo Targets
Photo targets have important training value. Watch a shooter who has demonstrated consistent speed and accuracy on the standard training target shoot a photo target for the first time. He invariably shoots slower and less accurately. A decent percentage of shooters often react quizzically or reluctantly to shooting pictures of people.
Photo/cartoon targets provide an important technical link to force-on-force exercises and ultimately to real fights. The shooter must discriminate the threat, think about anatomy, place his shots accordingly and resist the temptation to get sucked into bright/high contrast areas or the center of the paper. If you follow David Grossman’s models on preparing for confrontation and overcoming the resistance to interpersonal violence, then there is also a psychological benefit to photo targets.
However, there are some pointers to using photo targets. As mentioned before, they are less than ideal for isolating either speed or accuracy, so introduce them once the shooter is dialed in and performing to the standard. Importantly, do not use just one cartoon over and over. Shooting “Izzy” or the old “Hairy Knuckles” (DSQ1A or the B-60) over and over has diminishing returns. I find that after several drill repetitions on one photo, I have pretty much doped the needed hold or found an alternate aiming point. After too many drills, the photo loses its representation and becomes just an irregularly shaped training target that shooters tune out the features of.
About the best way I have seen them incorporated was where every target point had a different image. After a sequence of repetitions of a certain skill/drill, shooters would tape their target and then rotate to the next firing point. This way there was a constant change in stimulus, and the full effect of the target was achieved.
If there are 30 reams of Izzy in the target locker and the boss won’t buy others, fold them creatively to expose different amounts of the threat or use paint to simulate cover.
TRUISMS
A Shooter Will Use Every Square Inch of the Target Provided
Don’t give a shooter a full silhouette at five yards and expect tiny groups. He will stress test the cardboard from hip to shoulder unless you refocus him. On the other hand, the shooter will work extremely hard to get his or her impacts within whatever appears to be the desired zone. Give that same five-yard shooter a three-inch circle and you can expect him to attempt to produce about three-inch groups.
For those using bull’s-eye targets and trying to get the shooter to hit within certain rings of the black—forget it. Most shooters see the target as the whole black and cannot/will not contain their impacts to the ten-ring or whatever. It is too hard for them to focus on the front sight as directed and then pick out a circle within the circle.
Organizations stuck with a single overly large silhouette for training can use a stencil or index cards to step down what the “target” actually is, but try to keep it to a clearly defined aiming point and a scribed boundary of the impact/vital zone.
Bullet Holes Have Their Own Gravity
Ever notice how, when a nice group gets started, it tends to suck the proceeding shots into it, even if the group is not in the right place? This is because bullet holes seem to have a relative gravity that comes from the distinct aiming point and high contrast a tight group provides.
Don’t believe it? Take two plain white targets. On the first, have the shooter shoot an initial drill as fast as possible, which should ensure dispersed hits. Now follow that drill with the desired drill and note the hits, which are probably loose.
Next, have the shooter shoot a single shot on the second, clean sheet, as perfectly centered as he can make it from, say, three to five yards. Have him follow that one with a precision slow-fire group using that first bullet hole as aiming point. This should result in a nice cluster or possibly a rat hole of touching shot holes. Now shoot the desired training drill and note how much closer to the group the hits will be. Often they may even fall within the same group.
This can be used to your advantage when coaching accuracy-challenged shooters. When the target gets ugly, with hits outside the desired impact area or black, reface it instead of pasting/taping to remove the “pull” from the poor hits. Then shoot an initial “seed” group slow fire and center from fairly close, before moving to the objective drill and distance. You may leave the best center hits exposed and watch them start to pull the rest of the hits closer.
MYTHS
Shooting Steel Makes Better Shooters
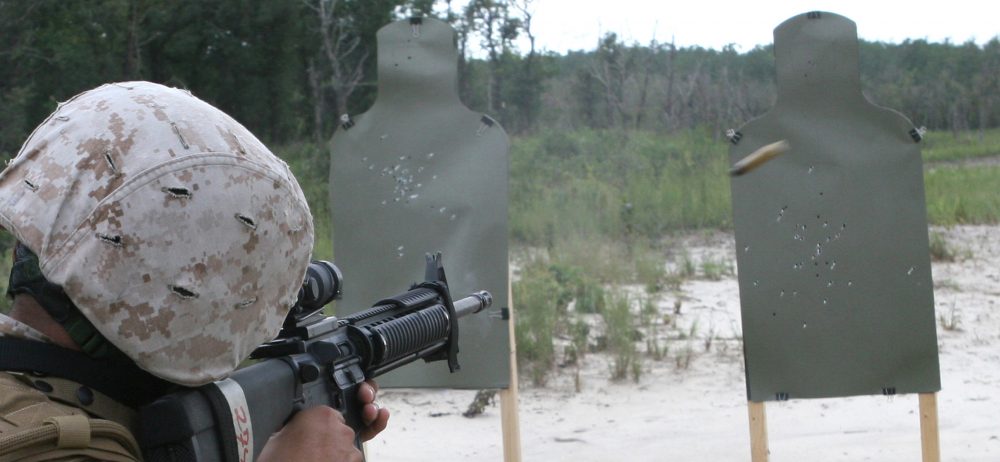
Done right, reactive targets have great utility and benefits. However, many training programs struggle to incorporate steel targets well. Done only occasionally or beyond the comfortable capability of the shooter, steel targets can lead to snatching the trigger or abandoning the follow-through to look for the target’s reaction. These tendencies can be trained through with the right approach.
Instructors must stay right on the shooter and emphasize proper timing, trigger press and follow-through. The drills should be structured to help accomplish these things. The minimum safe distance for shooting steel, generally accepted as around 10 to 15 yards, can put plate racks or pepper poppers on the edge of the average shooters’ on-demand capability. The stereotypical miss, re-align/miss, miss-miss-miss-miss of steel shooters can be counterproductive if allowed to proceed down that road repeatedly.
Steel is excellent at making shooters work exceptionally hard to get the hit, which can be used to motivate some shooters. Silhouette-style steel is perhaps the single best way to learn shooting on the move or at max speed. It gives feedback instantaneously, so the shooter can see just how fast he can move or what level of sight picture is required.
The Best Targets for Accuracy Are Circular
Square up the front sight. Some shooters will shoot better against a square target. I know, “But the eye finds the center of a circle … blah, blah, blah.” A physics professor who is an expert on light, vision and color once told me that, while the eye finds the center of a circle, it struggles mightily to determine the exact edge, whereas the edges of a square are distinct. Thus, when focusing on the front sight tip, the eye is referencing the top of the circle to gauge height. And since it cannot easily resolve the edge when zoomed in to the end of the slide, accuracy may suffer.
As an aiming point, a square that appears to be sized similarly to the front sight makes for a very precise shot. For me, the difference between square and round targets is significant. Whether shooting one-inch pasters of either shape up close or 4×6 cards and 25-yard bulls at distance, I tend to get groups that average 20 percent smaller on squares. If a shooter has aging eyes or astigmatism, the difficulties with notch/post sights and circular targets may be even more pronounced.
TIPS
SUMMARY
There is an old adage that states, “Beware the man with one gun; he probably knows how to use it.” I would like to add, “Beware the man with one target; he probably isn’t training at peak efficiency.”
Explore the possibilities of targetry. Stock the target shed with a variety of targets that focus the shooters on certain things. Look at bull’s-eye targets with their rings as relics of the glory days of wadcutters, and start focusing on skills mastered rather than scores. Ensure your shooters know the purpose of each drill and how a target reflects that objective. Decide if and where an aiming point may be more appropriate than an impact zone. Incorporate photo and reactive targets as links to more advanced and realistic training.
Regardless of your training objective, there is a target suited to getting you there.
SOURCES:
Cartoon/Photo Targets:
Law Enforcement Targets
Dept. S.W.A.T.
8802 West 35W Service Dr. NE
Blaine, MN 55449-6740
(800) 779-0182
www.letargets.com
EAG Training Targets:
TangoDown
Dept. S.W.A.T.
1588 Arrow Highway, Unit F
La Verne, CA 91750-5334
(520) 888-3376
www.tangodown.com
Orange Peel/Shoot-N-C Targets:
MidwayUSA
Dept. S.W.A.T.
5875 West Van Horn Tavern Rd.
Columbia, MO 65203-9274
(800) 243-3220
www.midwayusa.com
Warren Tactical Training Targets:
Warren Tactical Series
Dept. S.W.A.T.
PMB 230, 5171 Waterway Dr.
Montclair, VA 22025
(703) 856-3677
www.speedshooterspecialties.com