CAMPERS, backpackers, hunters, and outdoorsmen alike are using small, portable devices to heat up dehydrated food, boil water, cook, and even keep warm with. These devices are known by many names and are sold commercially or home-made. Variously called twig stoves, natural fuel stoves, backpacking stoves, and bio-stoves, they are made by a plethora of companies, though it started out as more of a cottage industry.
The home-made version is generally called a hobo stove.
Imagine in any wilderness setting an almost endless supply of fuel, such as twigs, pine cones, dry leaves, dry grasses, larger sticks, dry mosses, and even paper. Much of what can be described as litter or anything combustible is potential fuel—yet another reason this type of device is called a hobo stove.
Table of Contents
MAKE IT
The purpose of a hobo stove or storebought twig stove is to have a small, effective, yet controlled fire to cook and boil over. The shape and simple design take advantage of the hot rising air, as fire travels up when lit from the bottom, although the fire could be lit from the top of the fuel as well.
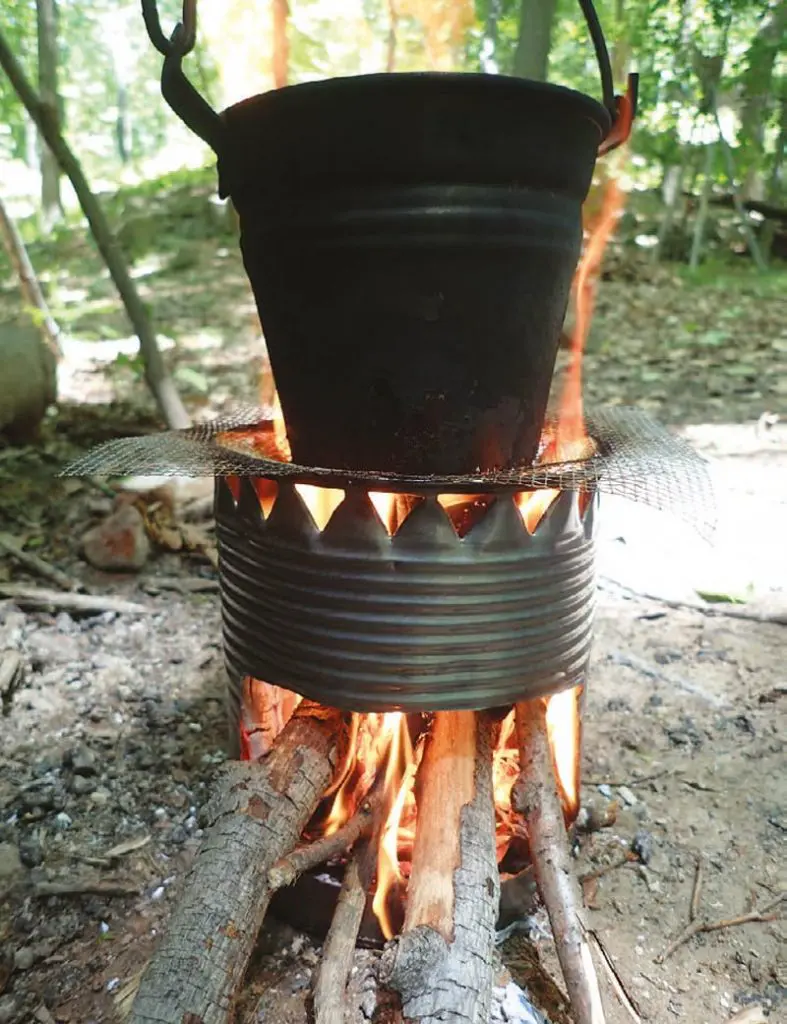
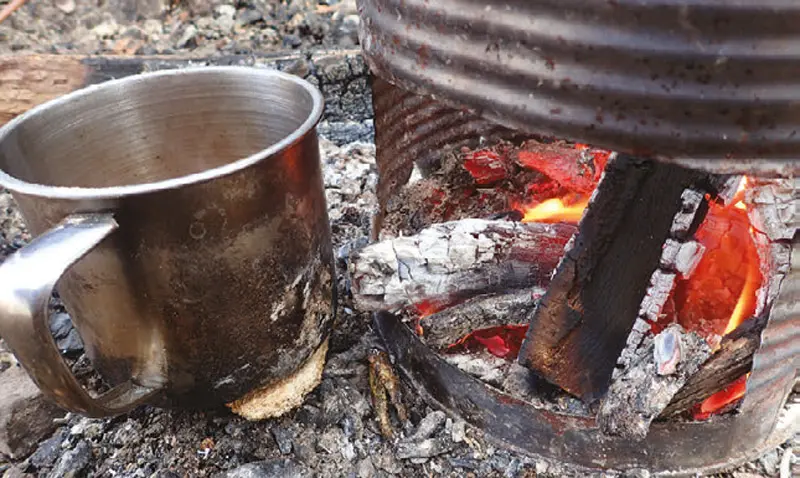
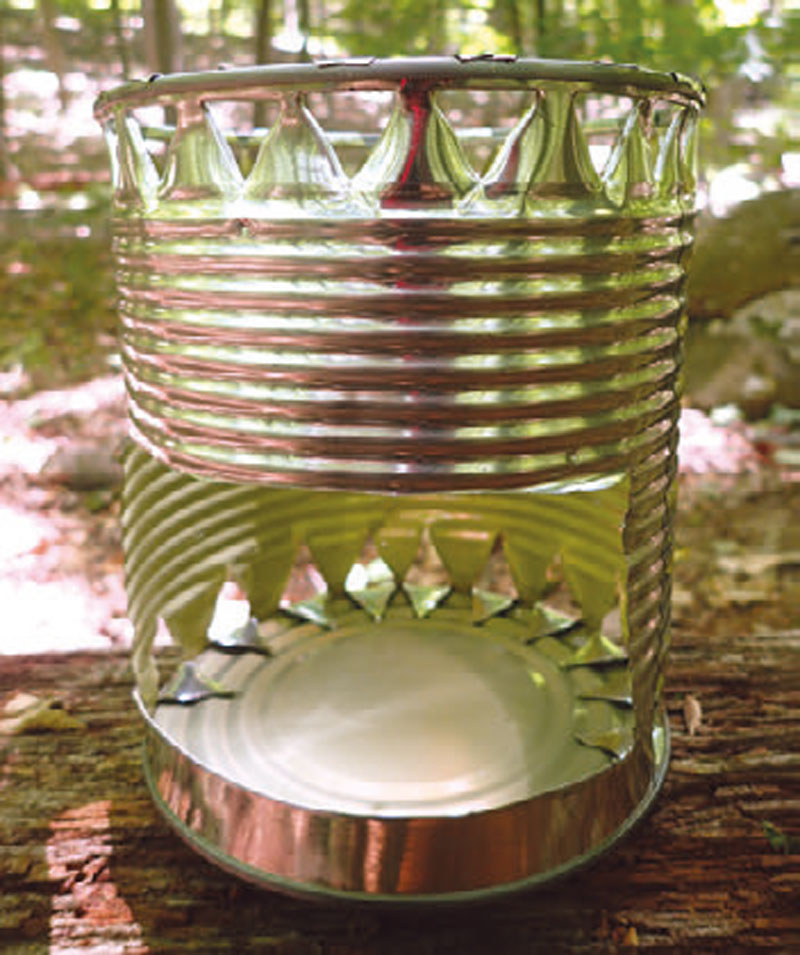
I made my first hobo stove out of a small coffee can with a Swiss Army Knife awl and a can opener that leaves a triangular hole. It was crude, but it worked. To make a hobo stove, a metal coffee can or tomato paste can is needed. The larger ones are about 100 ounces when full, while the smaller are almost a pound with coffee. But any metal canister that isn’t too small will work.
I used the triangular can opener to first make holes around the top and bottom of the can for ventilation. You can also use a drill or Dremel tool.
Next, cut a large panel out of the bottom to make a fuel port, which also serves as another vent. Heavy-gauge tin snips are good for cutting this section out, but other tools, even a knife, can work.
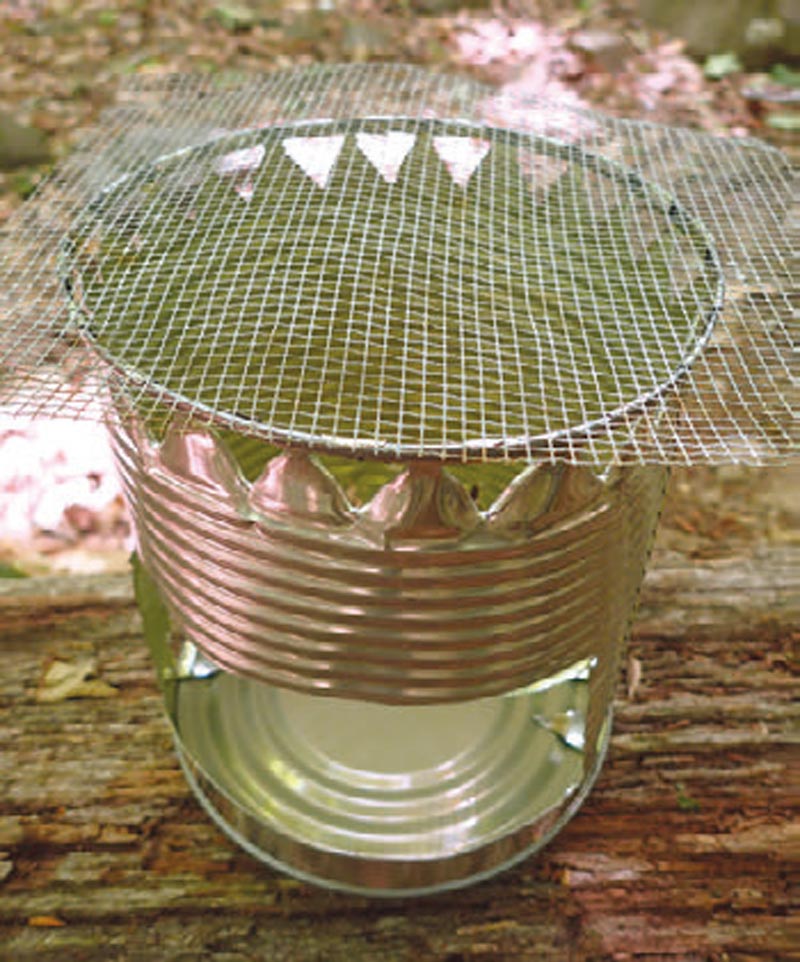
The top is the open section of the can, where the flame will come out and where metal pans and kettles can be placed, but anything smaller in diameter than the top of the can needs to be supported.
I used a heavy-duty piece of chicken wire mesh and eventually moved onto a stove-top grill as a support. Steel tent stakes can also be used by sliding them into the top vent holes to hold a small pot.
USE IT
I always start loading my hobo stove with dry twigs about the diameter of pencils or smaller. Around the perimeter, I stuff some finger-thick pieces and maybe some a bit larger in diameter, just to get it going. Once the smaller stuff burns in the middle, the larger pieces will fall into place. Shredded poplar bark, birch bark, Pine Fire Shop products, and fatwood are all frequently used tinder in my camp.
Once it is ignited from the bottom, the confined space and air flow make it all work. The vents provide one of the most important elements to a hobo stove and fire in general—air!
A helpful tip for getting the most out of a hobo stove is to have a couple of sticks that can be used to move and turn the larger vent/fuel port toward the breeze. This will kick it up a notch and prevent you from having to fan the flames when the wind direction changes. On the other hand, if you want it to simmer or just start to cool down, keep it faced away from the prevailing breeze.
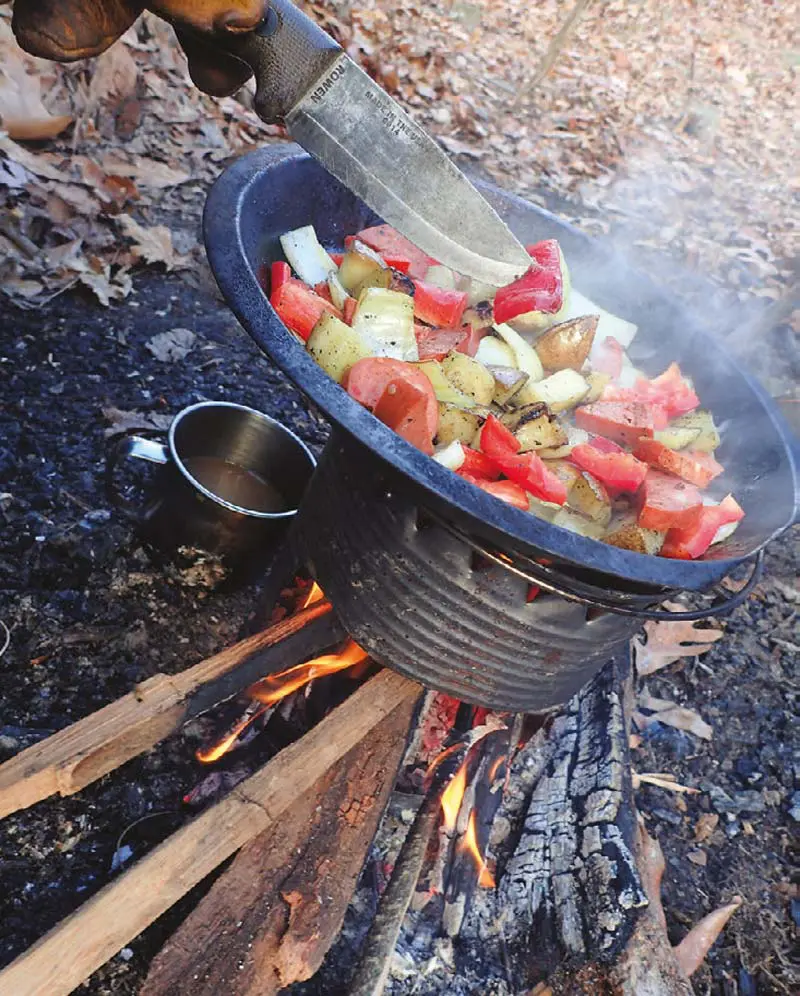
While establishing heat and cooking coals, stuff in larger diameter wood from the top and feed it until you have a sustainable flame or coal base. I always take advantage of this part, not only to warm myself during the cold winter months and late nights/early mornings in the warmer seasons, but to boil a kettle of water over the high flames by constructing a Burtonsville Cooking Rig.
The Burtonsville Rig suspends a pot or kettle over a flame and is adjustable, varying the height of the cooking apparatus rather than adjusting the flame. Using this method for warmth and a good boil is achieved while building heat and coals in the hobo stove. This is also a good opportunity to dry larger pieces of wood on top of the stove or down around the base of the stove.
When it’s time to cook on the stove, feed the fire from the large vent port with hard wood, if possible. Maple, oak, hickory, and walnut are the best fuel, as their BTUs are higher and less fuel is needed to cook or boil.
SUMMARY
When you want a smaller, more manageable cook fire or warming fire, a hobo stove just can’t be beat. It takes less fuel and wastes nothing that gets put inside, as it all burns down to a pile of ashes that is easily disposed of.
Making and using a hobo stove is a cheap way of obtaining something sold commercially that is on the pricey side. Although it isn’t as portable and doesn’t fold up, it can still be used in fire pits, established camps or hunting camps, and put in a pack with other cookware nestled inside it. Using a hobo stove is actually safer than having an open fire, especially in windy or dry areas.
For added safety, I recommend always using leather gloves when handling a hobo stove, as the hands are just too close to the flame and hot metal stove itself.
You need minimal tools to make a hobo stove, so make different sizes, and use two at a time for different types of cooking. The best thing about using hobo stoves in my camps is that I can practice my fire skills.
Properties of wood, finding and making useable tinder, as well as proper fire-building techniques are all pluses in my book when it comes to using a hobo stove.