The vast majority of us carry a pistol daily in pursuit of our employment as a patrol officer, SWAT or military operator; in an off-duty capacity; or as an armed private citizen.
Whether the pistol is employed as a primary or secondary weapon system, a competent user must be cognizant not only of what environment he is in, but also what condition his weapon is in as it relates to the escalation of the pistol during an engagement.
This article will examine the Five Stages of Escalation in relation to the pistol for tactical operators, as well as concerns for tactical team leaders and tactical instructors.
It is important to note that an operator need not proceed step-by-step through these Five Escalations (Holstered Weapon, Position SÜL, Guard Position, Covering Position, and Firing Position). Just as a skilled craftsman or good mechanic reaches for a specific tool or technique to fix a problem, you too will choose the level of escalation that is dictated to you by the threat you encounter during an incident.
Table of Contents
HOLSTERED WEAPON
Advances in technology—as well as a common understanding that if you are disarmed, your weapon will most likely be used against you—have brought about an influx of holsters with increased retention properties. It is the responsibility of the user to be infinitely familiar with those retention properties.
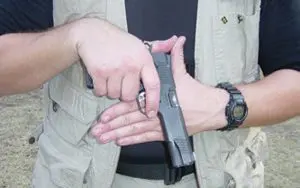
I recently taught a weapons retention course that involved patrol officers with Level III holsters, SWAT officers with Level II holsters, and undercover drug unit personnel who utilized an “in the pocket” holster for a subcompact pistol.
Drills were conducted to establish how long it would take for an assailant to disarm the individual officers. Establishing this time line gave the officers a greater awareness of the vulnerability of the equipment they were using and how critical the situation would be during a disarming technique. It was evident that the officers who had holsters with higher retention levels had a greater chance of survival during the disarming drills.
As a team leader and/or instructor, are you ensuring that your officers have adequate equipment and are using it properly? Often on the range, I see ego and pride interfere with realism as a snap on a Level III holster is not secured in order to get a faster draw when competing against other shooters. The shooters are only cheating themselves in this instance, as the holster most surely would be completely secured in a real-world operation.
I also recently heard of a tactical team intentionally flipping the hood of their retention holster forward to offer a quicker transition to the pistol should a malfunction exist with their primary weapon system.
I seldom use the words “always” and “never,” but I believe that intentionally reducing the retention level of your holster could be described as counterintuitive and tactically unsound. As a team leader and/or instructor, you are responsible for ensuring this does not take place on your range or in the holding area before you execute your mission.
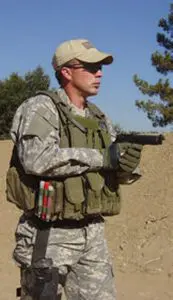
POSITION SÜL
When at Position SÜL (Portuguese for “south”), the pistol is drawn into the operator’s solar plexus, into a close-in ready position, where the muzzle is rotated down and out approximately 15 degrees. The muzzle will be pointed at the ground 12 to 18 inches in front of the operator, with the bore axis aligned with the spine. At the same time, the operator indexes the reactionary hand against his solar plexus as the first knuckle of the non-shooting hand and the middle knuckle of the shooting hand make contact. Depending on an operator’s flexibility and dexterity, the two thumbs may make contact as well.
This position was developed by Alan Brosnan of TEES (Tactical Energetic Entry Systems) and Max Joseph of TFTT (Tactical Firearms Training Team) as a team tactic to be used when operators are in close quarters or stacked on other members of the entry team. This position allows free-flowing CQB movement without the danger of an operator sweeping another operator with his muzzle.
There are three occasions when Position SÜL is used:
- When you are in transit and you are not the cover man.
- When friendlies are crossing in front of your sector of fire or arc of coverage.
- During the domination of crowds.
Note that covering threats, clearing corners, or weapons manipulation is not the stated mission of Position SÜL. I emphasize this because in the past, I have seen Position SÜL inaccurately portrayed as all three.
As a team leader or instructor, it is your responsibility to ensure that the TTPs your operators or team are adding to their tool box are presented to them during a proper period of instruction. In addition, it falls on you to ensure these TTPs are executed properly not only in the physical sense, but also in the context of the scenario your team may confront.
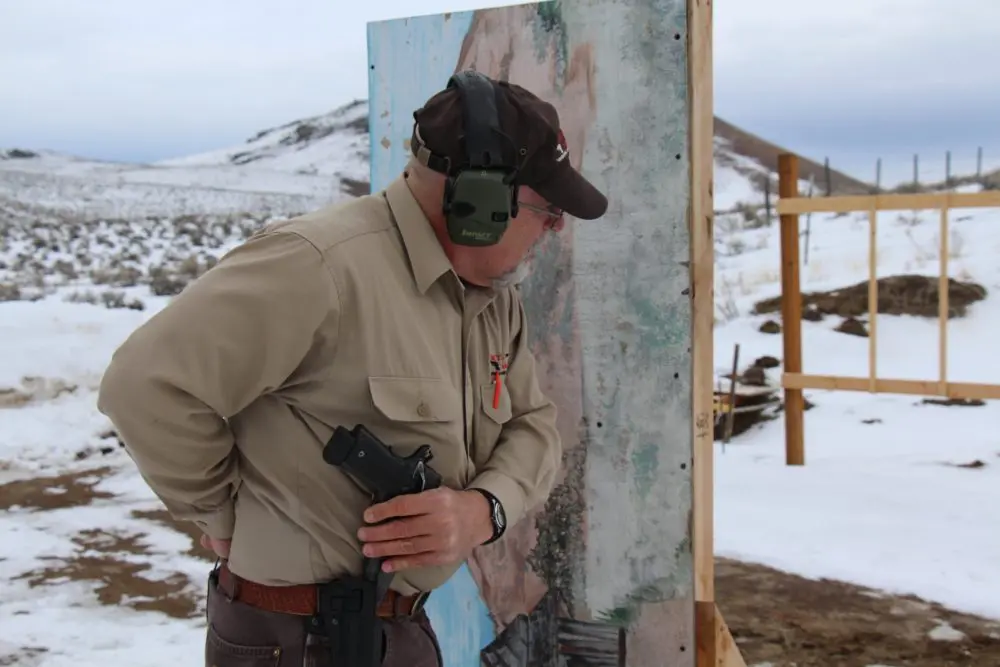
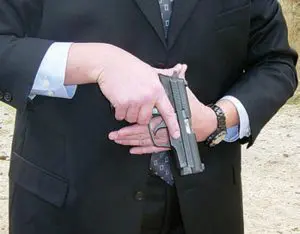
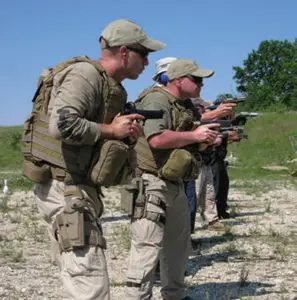
GUARD POSITION
The Guard or Close Guard is employed when we need to protect our weapon yet keep our muzzle directed toward the threat. The pistol is drawn and pointed in the direction of the threat (or possible threat), held at chest level, and drawn into the operator’s chest, parallel to the ground. This position can be used to cover an area for an extended period, as an operator is approaching a fatal funnel, or after standing down from an engagement. In essence, the Guard Position is used when in close proximity to combatants and danger areas, and as a position of weapons control and retention during contact with non-combatants, or if a hostile attempts a disarmament technique.
During fast-paced CQB, an operator may switch among Position SÜL, Guard and Covering Positions numerous times within split seconds. It is your mission to keep your weapons system oriented properly in relation to the proximity of other team members, noncombatants, and hostiles. Full-team CQB is really nothing more than a long series of small interconnecting problems. Only through numerous repetitions and the inclusion of stress inoculation will you be able to have the total awareness needed to be proficient.
During range evolutions (both static and dynamic), the team leaders and instructors should emphasize moving to the Guard Position after operators have stood down from their engagement. During this phase, the trigger finger is out of the trigger guard and the weapon is decocked, or put on safe. The muzzle continues to be directed toward the threat until it is deemed safe to approach utilizing a cover officer.
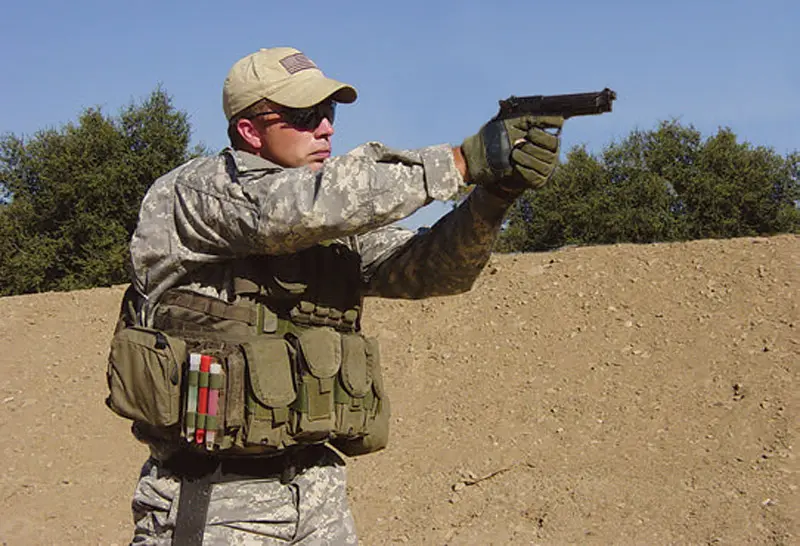
COVERING POSITION
When not in close proximity of combatants or danger areas, the pistol can be fully extended and focused in the direction of the threat or possible threat sectors. The trigger finger is out of the trigger guard and only placed on the trigger when we are firing or believe that the need to fire is imminent.
Awareness is again imperative, as it is quite possible a friendly will inadvertently cross in front of your sector of fire or arc of coverage during CQB operations, dictating that you drop to Position SÜL so they do not put you in a position where you sweep them with your muzzle.
Any approach to affect an arrest into a danger area where a threat exists (incapacitated or not) must be a coordinated movement among team members. Simple communication, such as an operator requesting a cover officer by verbalizing “Cover!” and the short response ”Covering!” by the cover officer will ensure a deadly force option is present to protect the officer approaching the subject and/or threat area.
This procedure may seem simplistic and mundane while reading this article in a sterile environment, but establishing simple commands and arrest procedures will build the foundation of success when things are going sideways.
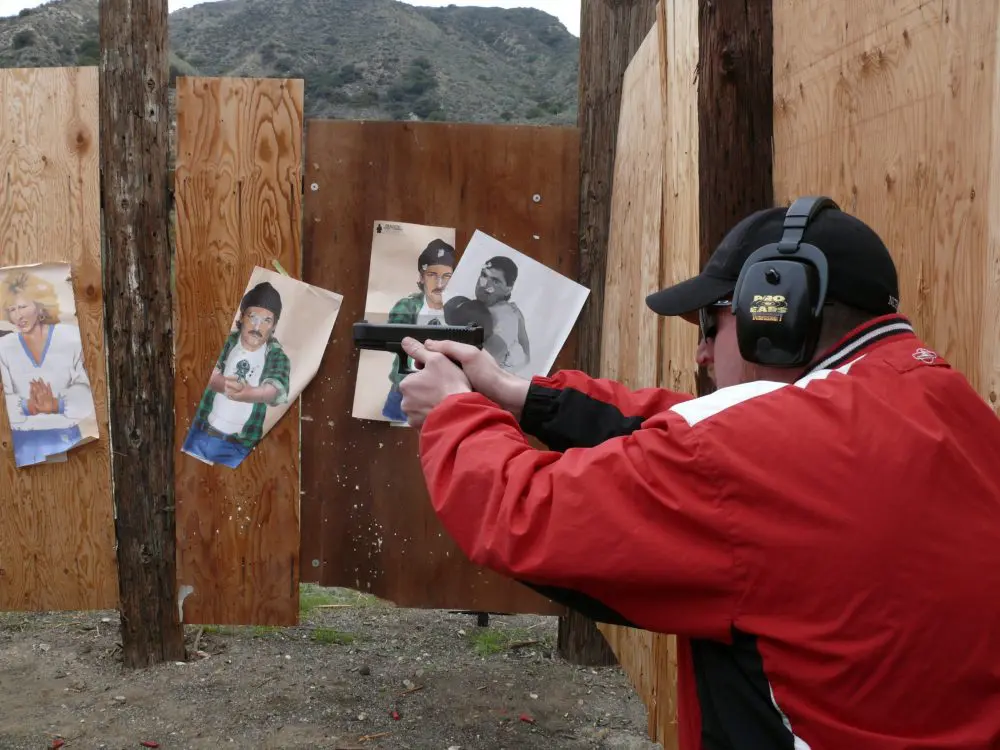
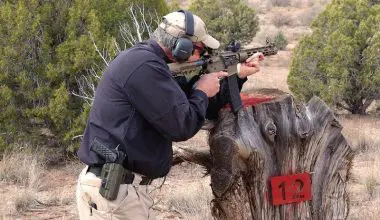
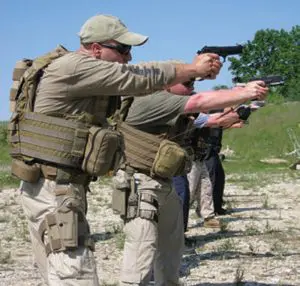
FIRING POSITION
The pistol is brought into firing position after making the conscious decision to fire the weapon and after the justification of deadly force is met. Sights are on the target and the finger is on the trigger. If the pistol has a mechanical safety, it has been swept off, and the pistol is ready to fire or in the act of firing. Firing will continue until the threat no longer exists and proper follow-through has been conducted.
Follow-through is the mindset of keeping the weapon system fixed on the threat area until you are absolutely sure the target has been negated. When engaging multiple adversaries, the weapon must follow-through on all subjects. Never reholster until the fight is over. Ask yourself the following questions: Are they down? Are there any more? How is my ammo?
During Step 1 of follow-through, the finger remains on the trigger and the operator sweeps vertically down and up on the subject while resetting the trigger and looking over or through the sighting system. The operator is asking himself, “Is the subject down?”
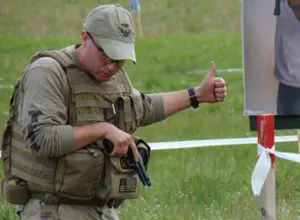
The finger comes off the trigger during Step 2 as the operator sweeps left, right, then left again off the target area for additional threats and thinking, “Are there any more?”
Step 3 completes the follow-through. The finger remains off the trigger as the operator’s scan is completed and he begins to stand down.
The operator then goes to the Guard or Covering Position, depending on the proximity of the theeat.
At this time, the operator decocks, or resets the mechanical safety while asking himself, “How’s my ammo?”
Arrest and control procedures can now begin as the operator starts to stabilize the scene. The follow-through procedure must be reinforced during each range evolution and/or simulation training to ensure that your operators are not just going through the motions without attaching the significance to it that it deserves.
RULES OF ENGAGEMENT
It is imperative that the tactical operator have a firm handle on his department or unit’s use of force policy (rules of engagement), definitions and justification for the use of deadly force, and current case law. When was the last time you, as a team leader/instructor, quizzed your team members on the definition and justification for the use of deadly force? If you do not quiz them, a defense attorney surely will if they get the chance. More often than not, an officer will do the right thing, but it is in the realm of articulation and documentation that they will get into trouble.
The intent of this article was to review and examine the Five Stages of Escalation in relation to the pistol. This article does not replace a qualified period of instruction for any of the previously mentioned TTPs by an experienced instructor. Hopefully this information will provide the individual tactical operator, as well as team leader/ instructor, a heightened awareness of what condition their weapon is in as it relates to the stages of escalation during an engagement.