
It’s rare to find a product that fits your needs perfectly straight out of the box. This is especially true for tactical gear.
Gear is often modified to fit not only personal desires, but also mission needs. This is why items like tactical vests come with MOLLE straps, so operators can pick and choose what pouches they want and where they want to mount them. This is also the case with firearms.
There is a seemingly neverending list of add-ons that can be attached to a tactical rifle. But one thing often overlooked is the color of the rifle itself. Generally, it comes in one variety—black.
For most law enforcement purposes, this is perfectly acceptable and even preferable. Black is generally low profile while at the same time is the universally accepted color for guns, meaning that when pointed at a bad guy, he can immediately recognize what it is and respond accordingly.
Table of Contents
WHY CAMOUFLAGE A RIFLE?
In my opinion, law enforcement should consider applying camouflage to a rifle only for snipers, designated riflemen, and officers in specialized tactical units that operate in rural environments, such as marijuana eradication teams. In other words, officers who need to conceal themselves and their equipment to successfully complete their missions. Other than that, I don’t think applying camouflage to a firearm should be allowed.
Private citizens, of course, can paint a weapon based on personal preference or mission needs. For example, turkey hunters often use full camouflage because birds see a wider spectrum of colors than humans plus a portion of the UV light range.
When camouflaging a rifle, the two major considerations are:
- Where the weapon is to be deployed. A rifle painted in a desert scheme won’t work in an urban environment.
- What the operator will be wearing. Though not a fashion accessory, the rifle needs to match the operator’s equipment. An operator outfitted in a woodland pattern BDU should be paired with a rifle in a similar scheme. Otherwise the rifle will stand out and obviously look like a weapon.
It might be smart to perform a test paint job on an Airsoft rifle or even a toy gun. This affords the opportunity to see what the end product will look like and allow for experimentation in colors and patterns.
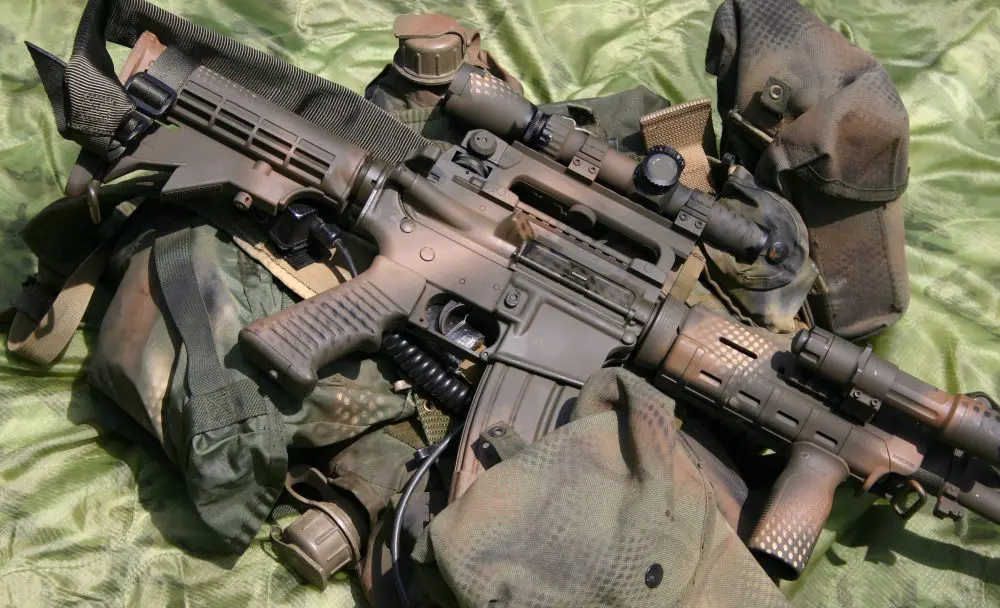
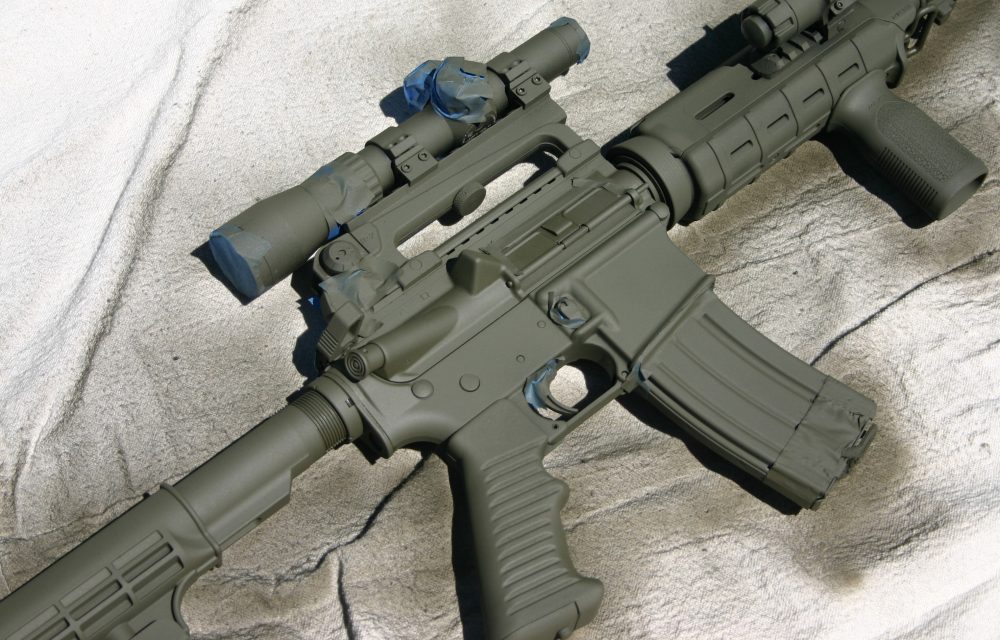
The weapon discussed in this article will be issued to a spotter on a SWAT sniper element. It’s an AR-15 with a Leupold 1X4 optic—a good choice for a spotter. The pattern applied is a basic woodland type consisting of olive drab, brown, tan, and black.
PREP WORK
To prepare the rifle for painting, first ensure the weapon is empty. Then completely wipe down the weapon to remove any lubricants from the surfaces to be painted. Don’t touch the weapon with bare hands after cleaning, to prevent the oil from fingerprints transferring to the weapon. Food handlers’ gloves are a good choice, as a box of 50 costs less than $3.
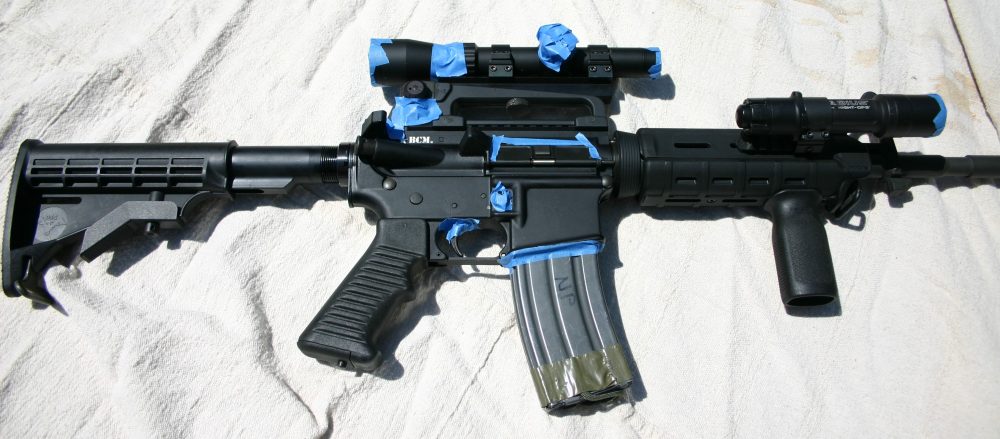
Apply painter’s tape to the areas that don’t need to be painted. In the case of the AR-15, tape was applied to:
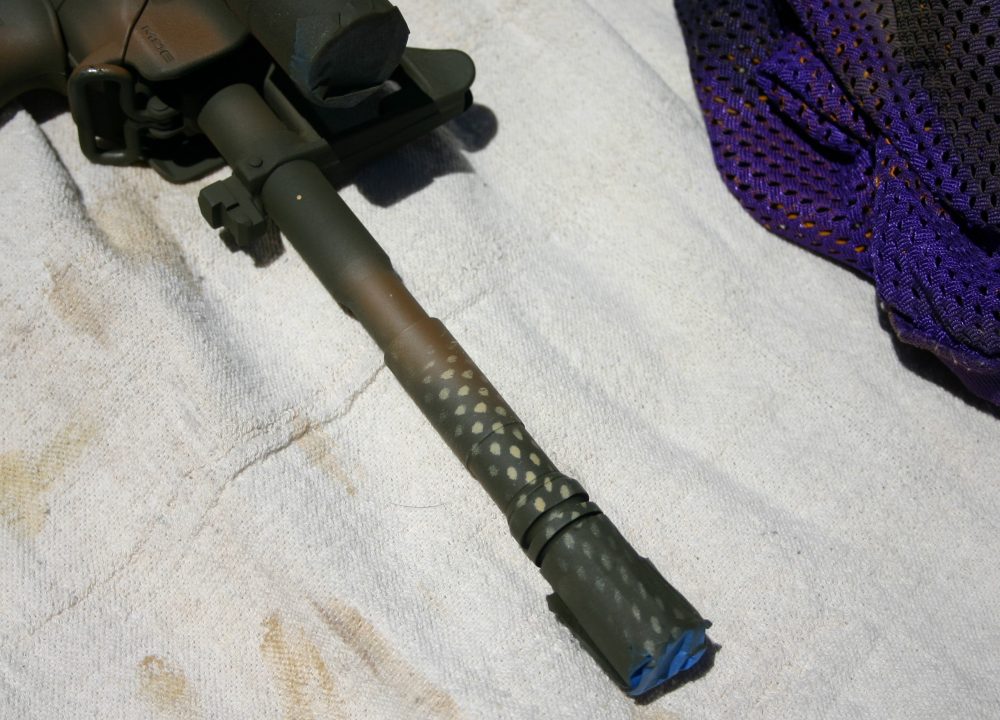
- Flash suppressor/end of barrel
- Ejection port
- Magazine well
- Trigger area
- Gaps around charging handle
- Lenses and controls on optic and light
The general rule of thumb with tape is, the more the better. After the rifle is completely painted and the tape is removed, use a Q-Tip or paintbrush to do touch ups. Parts like windage and elevation knobs on optics will be ruined if painted over.
PAINT
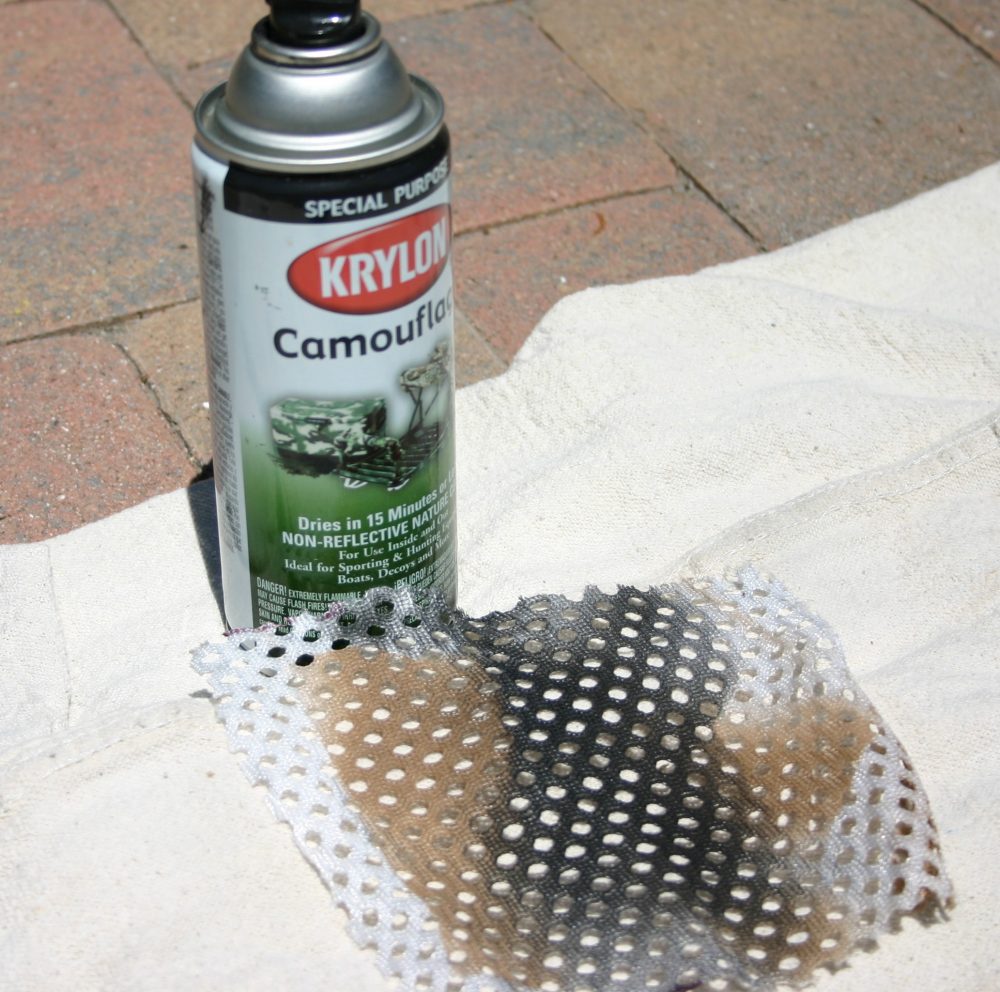
Regular spray paint probably isn’t going to cut it.Krylon Camouflage Paint made with Fusion for Plastic® Technology is a good choice. It stands up to the rigors of field work and extreme heat when firing, and is resistant to most lubricants and cleaning liquids. Ultra-flat and non-reflective, it is available in black, dark brown, olive drab, tan, sand, and gray.
There are different schools of thought regarding the order in which to apply colors. Some opt for light colors followed by dark.
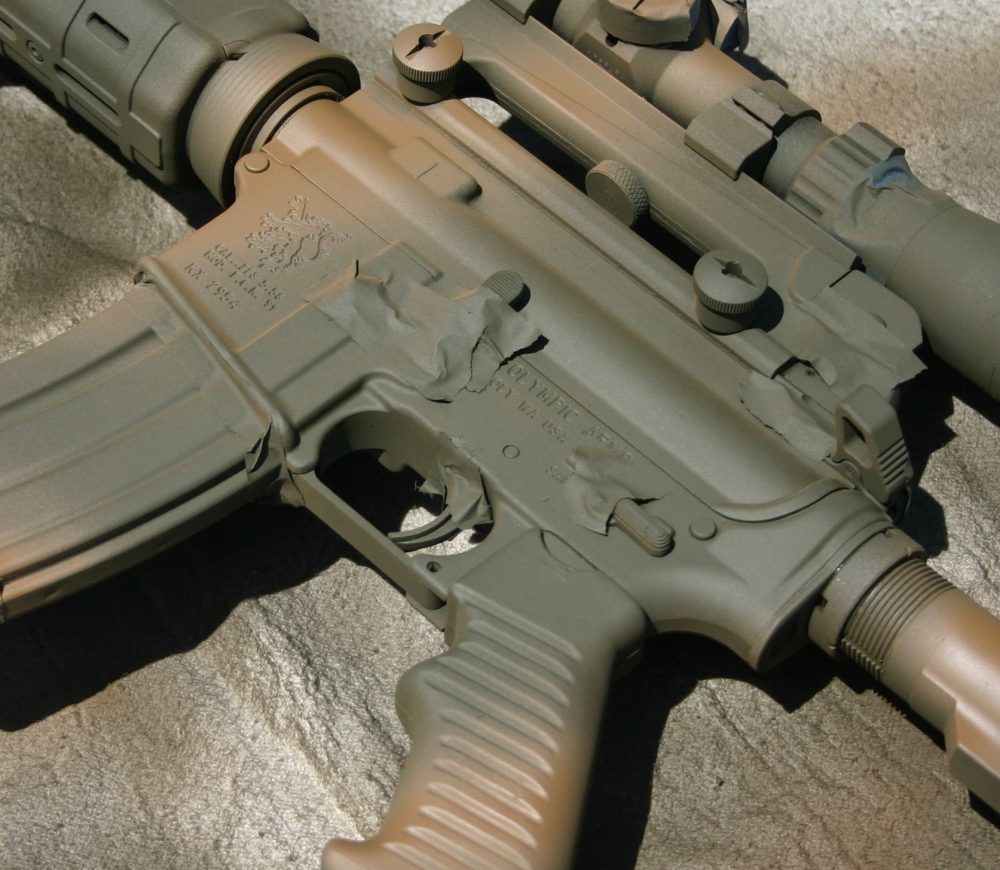
Olive drab base coat is applied first.

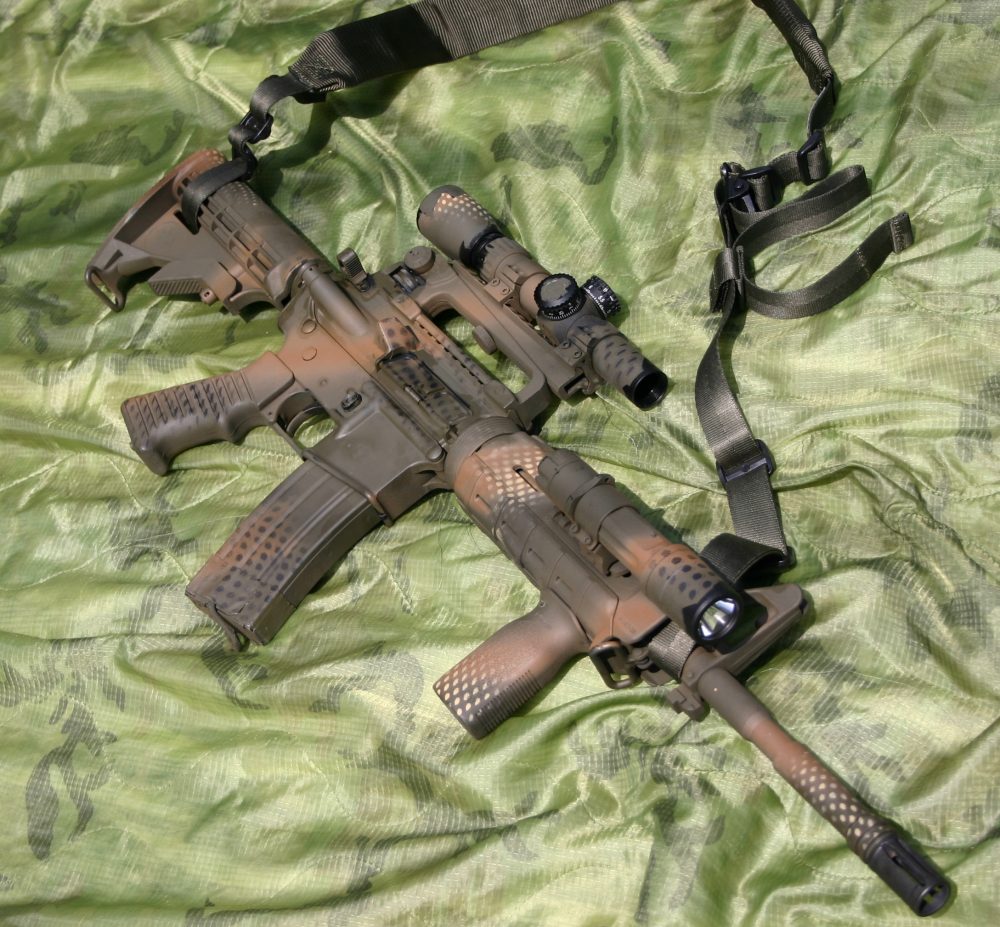
For this project, a dark color (olive drab) was applied first. The entire weapon was painted in that color. This was followed by dark brown. Tan and black were applied sparingly. The can was held about four inches from the rifle to prevent the paint from running.
Make sure the spray can is completely shaken up and functioning properly. Test it first. Spray paint nozzles can be cleaned by soaking them in gasoline or paint remover.
Weapons can be painted on a drop cloth or suspended by a wire run through the barrel, but care must be taken not to damage it.
APPLYING PATTERNS
There are several options for applying paint schemes:
Items like sponges can be used to dab colors on. Sponges can be cut into random shapes, dabbed in paint, then applied in spots.
Use cut-outs or stencils of typical camouflage shapes or leaves from indigenous plants in your area. Carefully applied, commercially available stencils can duplicate almost any camo pattern, including woodland, tiger stripe, and even MultiCam®. Brownells has a large variety of stencils.
Mesh materials—like sports jerseys—can create dot patterns. I utilized this technique for this project to apply the tan and black portions. Different size mesh was used to make spots of varying sizes. Hold the mesh in position with a gloved hand.
Once dry and painted satisfactorily, remove the tape. Touch ups can then be done. I like to use the primary color (in this case olive drab) for touch ups.
Now remove the magazine that was in the weapon during the painting process and paint over the unexposed parts. It’s important to have a camouflage magazine, since an unpainted one will stand out. In fact, it’s a good idea to have several painted magazines.
Once done, make sure all exposed surfaces have been painted. Remember that the purpose of the paint job isn’t to make the gun look cool.
Rather, the point is to make it less visible. So if there are mistakes in the pattern that don’t detract from its overall camouflaging purpose, they don’t need to be fixed.
MAINTENANCE
You don’t have to apply a sealant over the paint. It might make more sense not to in case the camouflage paint has to be removed at some point. If it’s a depar™ent-issued weapon, it might need to be cleaned up when turned in or a new paint scheme might have to be added when operating in a different environment.
Even the strongest paint isn’t impervious to wear and tear. The weapon should be inspected periodically and touch-up paint applied. Receivers and areas that are handled a lot (stocks, grips, foregrips) see the most wear. When doing repairs, don’t worry about making it pretty: The only concern is maintaining the functionality of the camouflage.
Once complete, take a moment to admire your artistic handiwork. Take a few pics and send them to your buddies to make them jealous. Then go to the range to ensure the weapon is functioning properly and that the paint stays intact.
Now it’s ready to go to work.
Nick Perna is a sergeant with the Redwood City Police Depar™ent in northern California. He has been a member of a multi-jurisdictional SWAT team since 2001 and is currently a team leader. He served as a paratrooper in the U.S. Army and is a veteran of Operation Iraqi Freedom. He has a Master’s Degree from the University of San Francisco.
SOURCES
BROWNELLS INC.
(800) 741-0015
www.brownells.com
1 comment