If you have ever worn a plate carrier for more than just a day on the flat range, you may be familiar with the seemingly never-ending evolution of your gear. This is especially true if you have a plate carrier for more than just an emergency scenario, meaning those in the military, law enforcement and other professions where carrying a weapon and going into harm’s way are just parts of the daily job requirements. Having the right set-up with the right items and amounts and positioned to facilitate your tactical needs can be tricky. One must balance mission needs with accessibility and mobility when setting up your plate carrier in preparation for a fight.
The reason setting up plate carriers for tactical work is more complicated than a personal emergency set-up is that those who use theirs for work usually have a lot more gear and equipment they need to carry to support the mission.
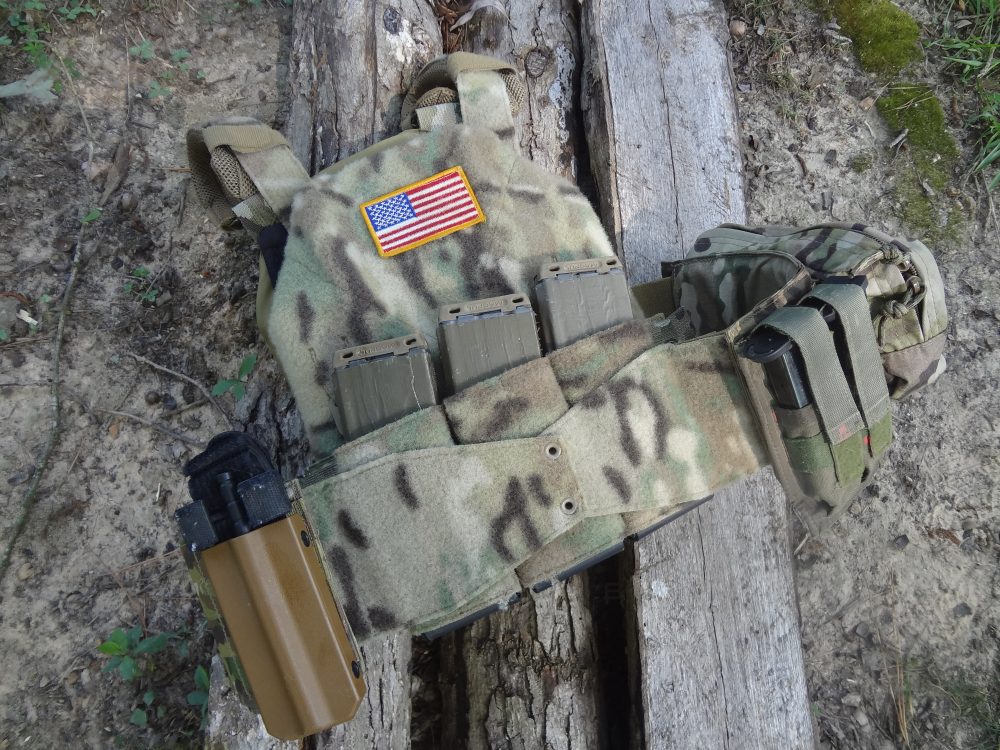
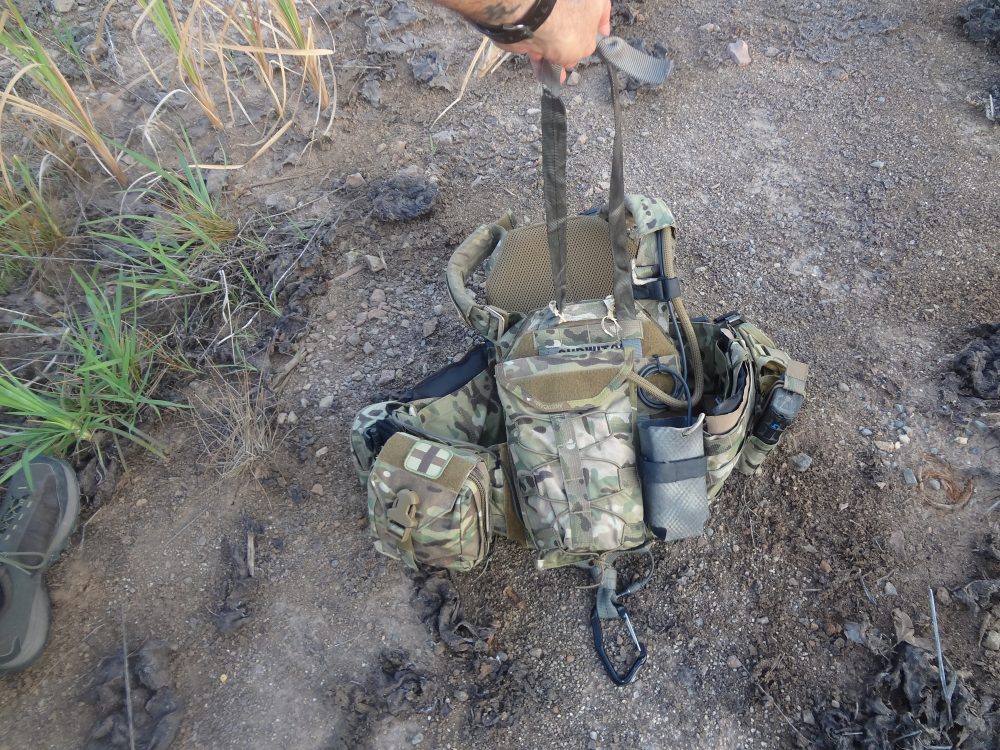
Ready to go with three mags of 5.56mm, two 9mm mags, C-A-T tourniquet, and ATS small utility pouch for IFAK items, Brigandine Plate carrier from Patrol Incident Gear makes a great emergency plate carrier. But author finds it doesn’t have enough MOLLE space for all the items needed for full combat use.
With an individual set-up, the wearer is most often thinking just of what he needs to get through a short confrontation—a few extra rifle and pistol mags and maybe a simple Individual First Aid Kit (IFAK). In setting up their kit, soldiers, law enforcement and other professionals must take into account several factors: the mission, its duration, terrain, and threats, usually for an extended period of time (an all-day call-out or a multi-day operation). Because of this and the fact that they are most likely operating as a member of a team, the gear requirements are generally much more substantial.
Along with extra magazines, IFAKs are required, including tourniquets. Communications via at least one radio (perhaps more for some team members) and specialty items such as breaching tools and pyrotechnic marking devices like smoke grenades and flares. Don’t forget sustainment items like food and water. Depending on the mission and duration, the list could go on and on.
Plate carriers have become popular because their slim, cut-down design offers maximum mobility and comfort while still giving the protection of front and rear ballistic plates. The downside is that plate carriers have a limited amount of webbing and space to mount items on.
The reduced space on your kit makes planning your load-out even more important. You don’t want to be “that guy” in the middle of a mission saying, “Hey buddy, can you reach that pouch on my kit?” and possibly distracting a fellow assaulter from more important things.
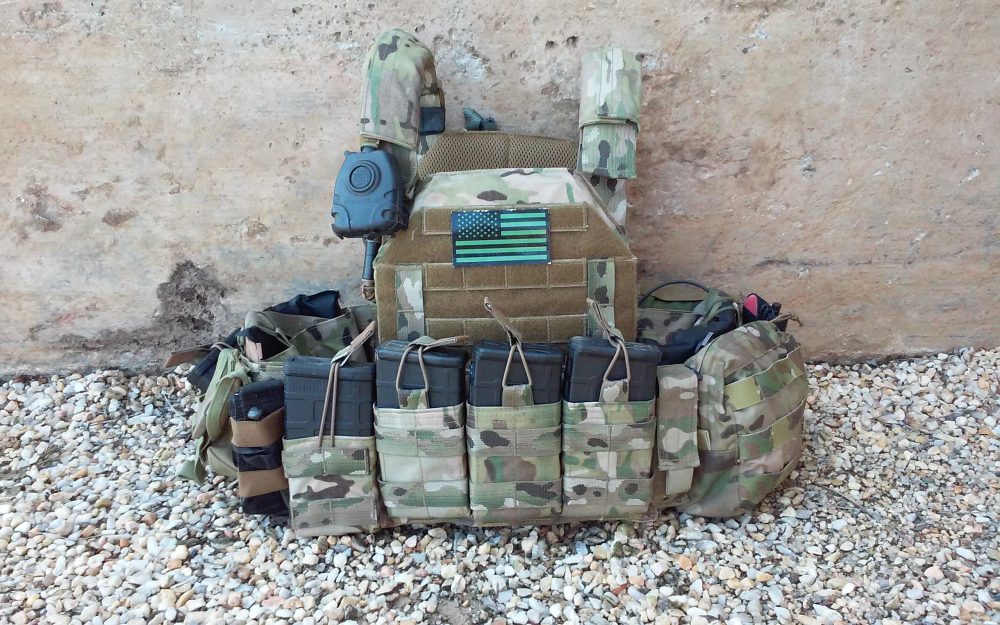
Author’s preferred plate carrier for full mission load-out: ATS Tactical Gear Aegis, loaded here for 7.62mm.
Table of Contents
PLANNING PLATE CARRIER SET-UP
Fighting items up front support items in the back. That is the main rule I follow when rigging up any plate carrier for tactical work. This means I place all fighting items on the front, including all spare magazines and ammo, knives, explosives such as grenades, and anything else I need to defeat a threat.
From there, I place mission support items on the sides, then on the back of the plate carrier. This includes med gear, communications, and sustainment items like water, extra batteries, marking gear, and NODS.
The reasoning for this is your first priority should be to keep yourself alive. Even if you have the best medical gear and communications equipment to call in help, it will do you and your team no good if you are down and out of the fight.
As an assaulter, your first priority is to have the maximum ability to engage threats during a gunfight. For you to be able to do this, you must put your killing items where they can most easily be accessed. You cannot destroy the enemy if you have no accessible ammunition.
I realize this technique might raise questions of, “How do you reach your IFAK to treat yourself or someone else? Or reach your radio to change freqs if they are not on the front of your carrier?” Good questions—both of which I will answer in the exact breakdown of every item typically needed for a full mission roll-out.
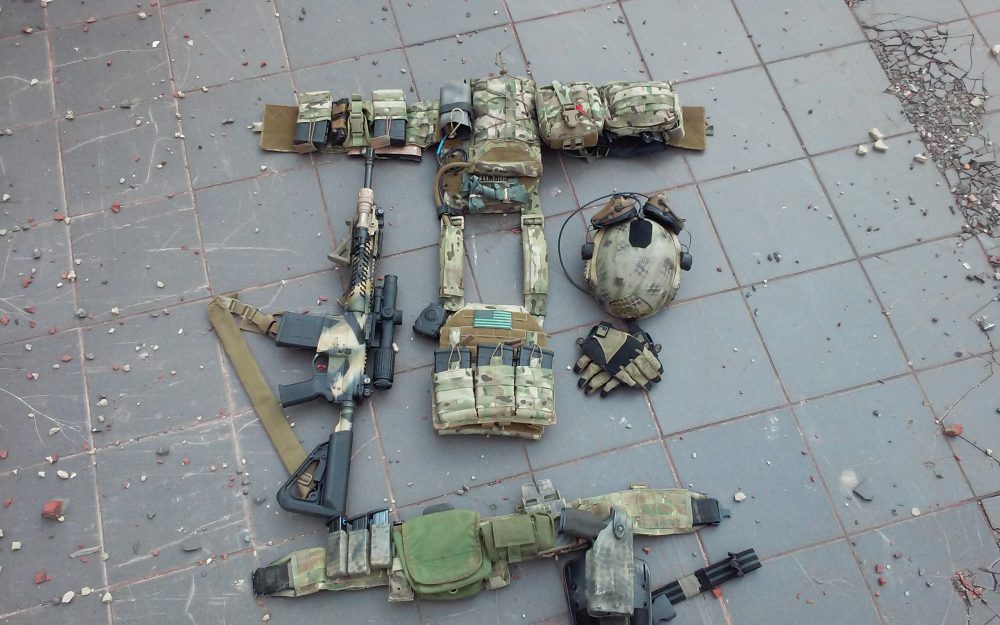
Full load-out for 5.56mm.
FULL MISSION LOAD-OUT: WHAT, HOW MANY, AND WHERE
The first item you need is spare ammunition. The question that always arises is, how many magazines make up a good basic load? One can take any number of approaches to answer this. Look at after-action reports from firefights to see the typical number of rounds shooters fired. Look at the overall weight of the ammunition, though yours may have already been determined by your unit SOP.
Due to my experiences in Iraq and Afghanistan, I have always based my load on weight. I can comfortably carry six magazines of 5.56mm (180 rounds) and five 20-round mags of 7.62mm on my plate carrier for an extended period of time. I can carry this pretty comfortably for 36 to 72 hours over varied terrain. For 5.56mm, the most common caliber, the six-magazine load also coincides with the Army’s basic load of seven magazines total (one in your weapon, six on you).
The Army basic load of seven magazines has been standard since I joined the Army in 1990, though I do not know the exact date the Army went to it. But whoever thought this up seemed to know what they were doing, since this amount was based on the old Alice gear with no body armor factored in. It still works as a good base amount today.
I have rolled out with more on my kit before—up to ten magazines—but that was only on missions with very short movements (less than 100 meters from vehicle to a breech point). But after a few hours, that many magazines with everything else I needed to carry got old pretty fast.
What I prefer to do now—and this matches what a lot of my peers do—is pack extra magazines in small go-bags. Instead of humping around ten magazines on my kit all day, I have the ability to take the bag and leave it staged somewhere. I just have my go-bag packed in my infil platform and if needed have it dropped off or go back to it for re-supply of ammunition.
Full load-out for 7.62mm.
THE HAPPY MAG
When MOLLE webbing first came out some years ago, the first magazine pouches had top closing flaps as the primary method of magazine retention. While this design was great for securing magazines, it did not make for the fastest reloads.
To have at least one magazine ready for an emergency bolt-lock re-load, we would have one magazine pouch with the top flap tucked into the pouch, exposing the magazine. We called this a “happy mag.”
This allowed one magazine available just for a quick reload. We didn’t do this to all the magazine pouches—the top flap being the primary method of securing mags—because there was always a chance of losing mags from running or climbing. Doing it to only one pouch was a compromise between having secure kit and having one magazine ready for an emergency. Today that is not much of an issue, because most magazine pouches being used are of the open-top design that secure magazines through some sort of bungee, elastic tension, or both.
A natural fit for most plate carriers are the triple-shingle types. You can run a single row across your front or double up two shingles to have six mags right there on the front ready to go. I prefer to have the slimmest possible profile, so I only run one row. Two rows of magazines on the front can make for a tight squeeze in some of the vehicles I work in.
Even with the open-top design of all my nylon pouches, I still employ one happy mag in the form of an ITW FastMag holder. I find the hard polymer body of the FastMag provides for a very fast reload if I need it over that of the nylon pouches. For magazine management, I work from my nylon pouches and only draw from my FastMag when I have to reload under pressure and time is of the essence.
If I am just topping off with a tactical reload, I always try to draw from the farthest magazines on my kit first. For me that’s my support-hand side. If that’s not possible due to being deep in it and the focus is on keeping the rifle topped off as fast as I can, I pull via the fastest means from my front shingle of three.
When there’s time—a lull in the action, prior to making another movement, or things calm down—I rotate full mags to the front of my kit and place the partials to the back. I place these partial mags bullet side up so when searching for full magazines, I can do it by feel. Full mags base up, partials bullets up.
To change load-out from 5.56 to 7.62 requires only changing out three pouches.
MEDICAL GEAR
The next item of importance is medical gear. If you are prepping for a gunfight, you must plan for casualties, either yourself or others. The Individual First Aid Kit (IFAK) is the most common solution to this need. As its name implies the intent of the IFAK is for it to be used on yourself if you become wounded, either by treating yourself with it or a fellow operator pulling it off you and treating you with its contents. Because of this, it’s intended for the user to wear on the front of their plate carrier somewhere they can reach it.
I have two problems with this. First, unless you layer it over a magazine pouch, placing an IFAK toward the front usually takes up space needed for extra magazines or other gear you need to fight with. Also even the slim design of most IFAKs sticks out some. Nothing like watching someone try to draw their pistol up and around an IFAK sticking off their carrier. This brings up another good principle to follow when rigging up your carrier: leave your pistol side as slick as possible on your plate carrier, so you can affect a smooth draw.
Back to the IFAK placement issue: the second problem wearing it on the front is what I have the biggest issue with. It is assumed that if you’re wounded, you’re going to fall on your back, positioning your IFAK within easy reach of whoever is coming to your aid. But what happens if you’re wounded and fall lying face down? Or even worse, what if half your gear is burnt or blown off? Where is your IFAK then?
This is where the idea of “the IFAK is for your treatment” I find flawed. Precious time can be lost if the person trying to treat you is digging around in your possibly bloodied-up kit rolling you around looking for your IFAK.
Furthermore, if you’ve been wounded in the torso, the first thing any medical person will do in their primary survey is take off or cut off all your gear to expose the wounded area. That will most likely result in all your gear being thrown off to the side. Someone intent on using your IFAK will have to search through your pile of kit to find it. Again, precious time is lost.
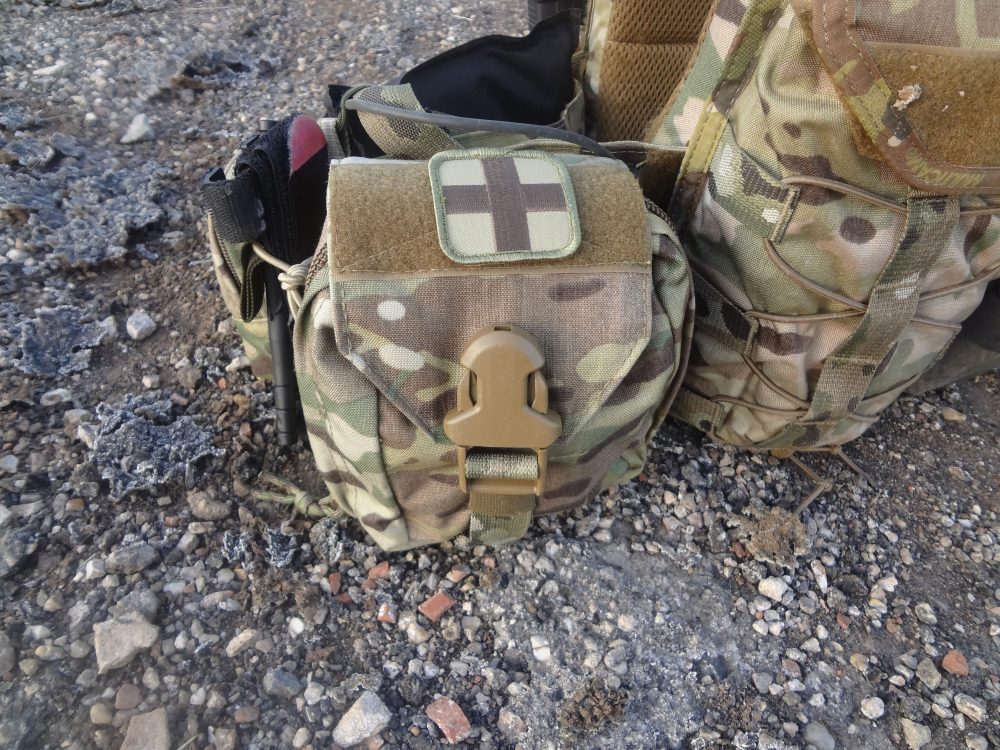
ATS tear-away medical pouch, a great IFAK that supports author’s SOP of wearing IFAK on his back. While kneeling down to treat a casualty, whoever is pulling security for you can pull it off your back and drop it at your feet. This is much faster than digging around in the casualty’s gear looking for their IFAK.
RECOMMENDED IFAK SOP
I have all team members wear their IFAKs toward the back of their kit (on their back plate if they choose). Instead of thinking the IFAK you wear is for you, I prefer to use it on others.
The way to employ it is: when you come upon a casualty and kneel down to assess and treat, whoever is pulling security for you reaches down and pulls out the contents (or pulls off your IFAK if it’s detachable) and drops the contents at your feet by the casualty. Now instead of trying to dig around in their kit—assuming they are face up and their IFAK is still intact—you have all your medical items in front of you at your disposal.
With everyone on the team wearing their IFAKs on their backs, this follows the principle of fighting stuff up front. As a team SOP, this works better than having IFAKs on the front. You still have the option of using the wounded soldier’s IFAK if it’s readily accessible, but why play the odds game that the casualty will fall just right, exposing his IFAK for you to use? Or worse, cause further injury to a casualty because you are rolling him around looking for his medical items?
How does one self-treat with this SOP? Simple. While I do recommend the IFAK be on the back of your kit, keep some must-haves like tourniquets up front. Also I do not limit medical gear just to an IFAK pouch. If your plate carrier has side plate pockets (with or without plates in them), they are the perfect place for storing chest seals and flat packs of combat gauze.
Another great spot I have seen to stuff combat gauze or small dressings is in between your plate carrier shoulder straps and shoulder pads. Leave just enough sticking out of the front to grab and pull out if you need to plug yourself or someone else.
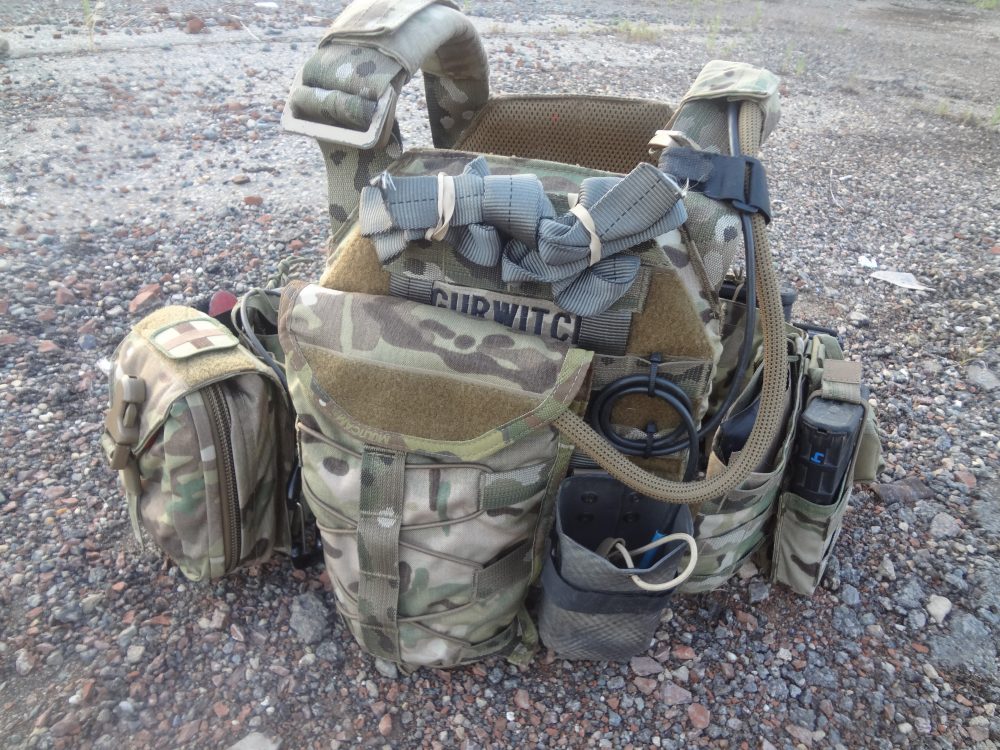
Back of plate carrier. Hydration tube and communications cables are positively secured. Also on the back are custom Kydex radio pouch and one-liter hydration bladder carrier.
TOURNIQUETS
If you’re expecting combat, tourniquets are a must-have item on your carrier. I always carry at least two, one on the front of my carrier and one on the side or in the IFAK. Be able to reach and pull off the one on the front with either hand. This way if you are wounded in one arm, you can still treat yourself. Or wear one on both sides of your plate carrier for the same reason. I recommend having multiples because it may take more than one to stop the bleeding, and if you treat someone else with one, it still leaves at least one for you.
Furthermore, tourniquets can break. If the ones you carry have a plastic tensioning rod, exposure to the sun and elements can weaken it over time, causing it to snap when you try to torque it down. If they have the plastic rod, replace your tourniquets between deployments or once a year. With tourniquets, the adage “two is one and one is none” really applies.
Tubular nylon on back of carrier is a trick of the trade developed by the Direct Action Resource Center. It is a pull-out casualty drag handle to replace most plate carriers’ built-in handle, which tends to pull up and sometimes off the carrier while someone is trying to drag a casualty. Clip the snap link at the bottom to the belt while you wear the carrier. Because the carrier is snap linked into your belt, your carrier won’t ride up, plus it pulls up on your hips, making you easier to drag.
COMMUNICATIONS AND SUSTAINMENT ITEMS
Place communications gear like radios out of the way on the back of the plate carrier. If it’s mounted up front, it takes away from space you can use for more magazines and fighting gear. This only works if you can control the radio via a remote cable or device you can get to yourself. If you do not have a remote device that lets you change frequencies and volume, you must position your radio within reach on your carrier to where you can operate from your kit.
Another must-have for any full kit set-up is water. Because of the cramped spaces in some military vehicles, some soldiers (especially drivers) opt out of wearing a water bladder on their back. Their solution is to have water in their go-bags. I personally do not go anywhere without water. I do agree that many hydration bladders and carriers are too big for plate carriers. Multi-liter bladders tend to hang below the back plate.
One solution I highly recommend is the SOURCE Tactical Gear one-liter Kangaroo bladder. It is a very compact hydration bladder that fits perfectly with plate carrier-style body armor. Though one liter is not a huge amount of water, you have the equivalent of one GI canteen’s worth of water on you. Just the right amount for short excursions away from your vehicle or infil platform.
While other great mini-bladders are on the market, the SOURCE brand is unique because of the way you refill it. You can top it off without having to take your plate carrier off or take the bladder out. Using their Universal Tube Adaptor (UTA) accessory, you can pour bottles of water right into the bladder via the drinking tube or hook the UTA to a faucet and fill up without taking off your kit. This makes staying topped off with water very easy. Having used this system downrange once already, I highly recommend it to anyone looking for a hydration pack for their kit.
One more must-have item is a small general-purpose pouch mounted opposite of pistol side. It’s great for carrying additional items such as compasses, GPS devices, signaling devices like mirrors and flares, plus sustainment items like water purification tablets and energy or protein bars. Any small item you think you might need, a GP pouch gives you the ability to have it on hand.
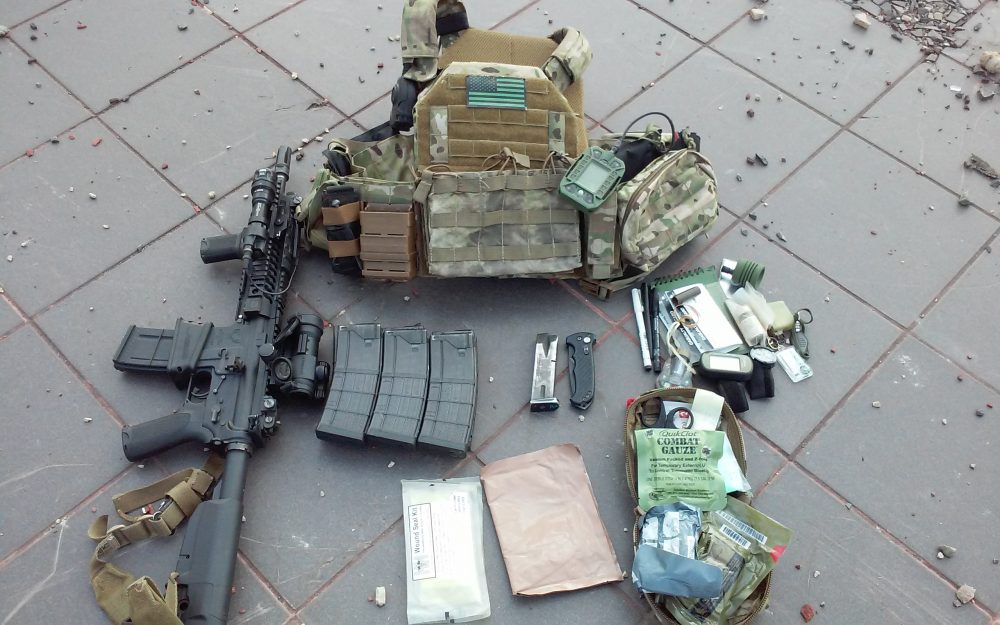
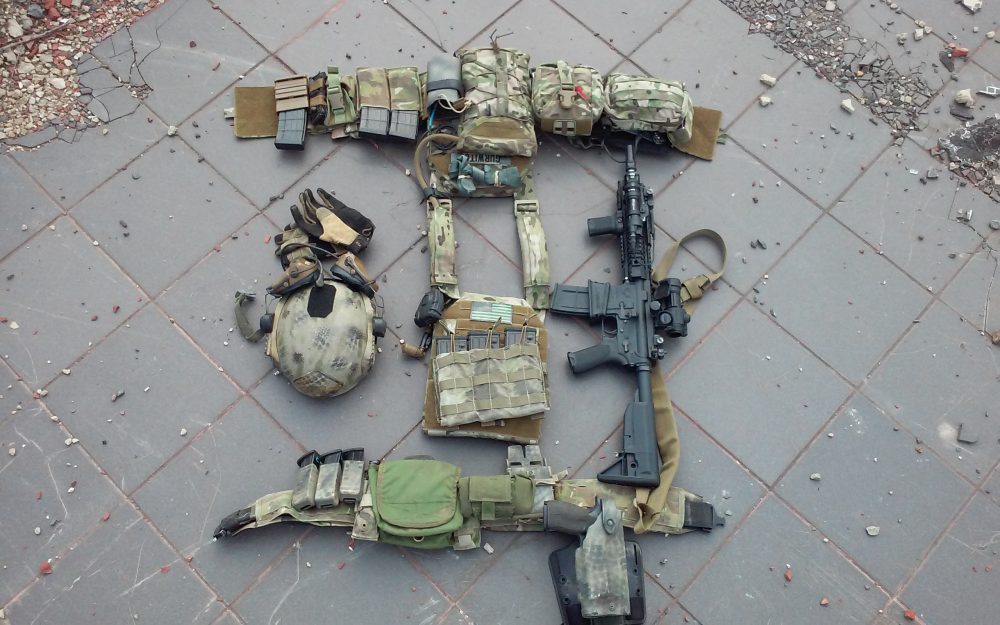
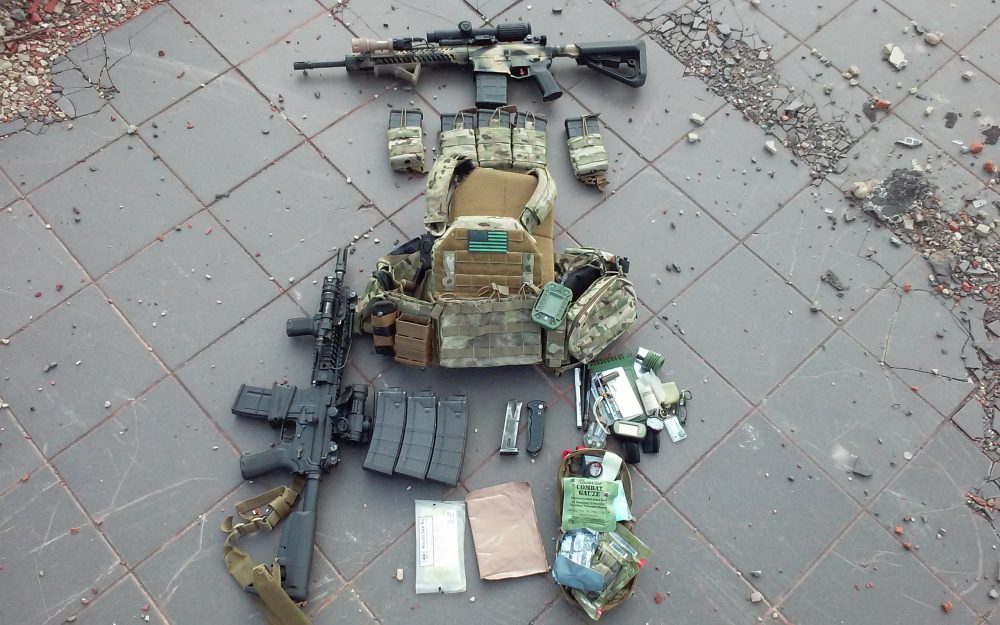
Aside from one hand grenade and a 152 radio, this is everything author typically carries on mission: six 5.56mm mags, one spare 9mm mag, two chest seals (one in each side plate pocket), Gerber knife, one IFAK (complete), two tourniquets, and a remote that controls the radio while wearing it on the back. GP pouch contains SOURCE UTA, GPS, casualty feeder cards, signal mirror, pens, all-weather notebook, wrist compass, small map light, water purification tablets, IR strobe light for helmet, and extra green weenies (plastic tubes to hook detention cord together).
WRAP-UP
Most successful tactical operations can be attributed to extensive planning and preparation prior to the mission. The same extensive planning and preparation should be taken when choosing and setting up your kit.
Having your plate carrier set up with the right amounts of accessible ammunition, medical and support gear—balanced with protection and mobility—is key to keeping yourself and your fellow assaulters on top during a gunfight or other tactical situation.
Jeff Gurwitch has 23 years’ military experience, the past 16 with U.S. Army Special Forces. He served in the first Gulf War, three tours OIF, and two tours OEF. He is currently on his seventh deployment to the region. He has been a competitive shooter for over a dozen years, competing in USPSA, IDPA, and 3-Gun.
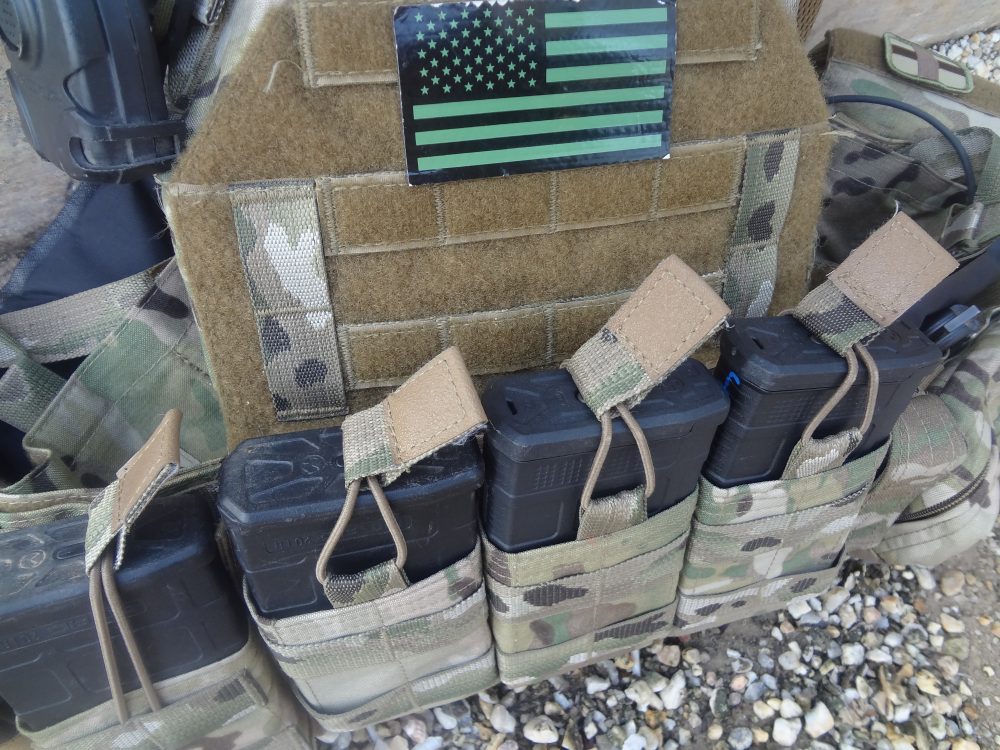
Attention to detail is just one reason author chooses ATS Tactical Gear products. Most manufacturers’ pull-tabs do not have extra friction tape on them. Pull-tabs on ATS triple shingle are called “Slip Not.” ATS goes the extra distance to ensure their gear is shooter ready.
ADDITIONAL SPOTLIGHT: ATS TACTICAL GEAR
My plate carrier of choice is the ATS Tactical Gear Aegis. Michael Lose, owner of ATS, is a former Green Beret with combat experience from Afghanistan and elsewhere in the world. We actually graduated the SF “Q” course together in 1998. Because Mike’s background is Special Forces, he is able to apply his knowledge of how an SF operator uses his gear, and match soldier’s needs to his designs.
Not all Special Operation units operate the same way or have the same gear requirements. To get gear developed by someone with direct experience with what I’m looking for puts ATS Tactical Gear at the top of my list. All ATS gear is 100% American made (something many other tactical nylon manufacturers cannot say).
SOURCES
ATS TACTICAL GEAR
(270) 439-0302
www.atstacticalgear.com
DIRECT ACTION RESOURCE CENTER
(501) 955-0007
www.darc1.com
PATROL INCIDENT GEAR
www.patrolincidentgear.com
SOURCE TACTICAL GEAR
www.sourcetacticalgear.com