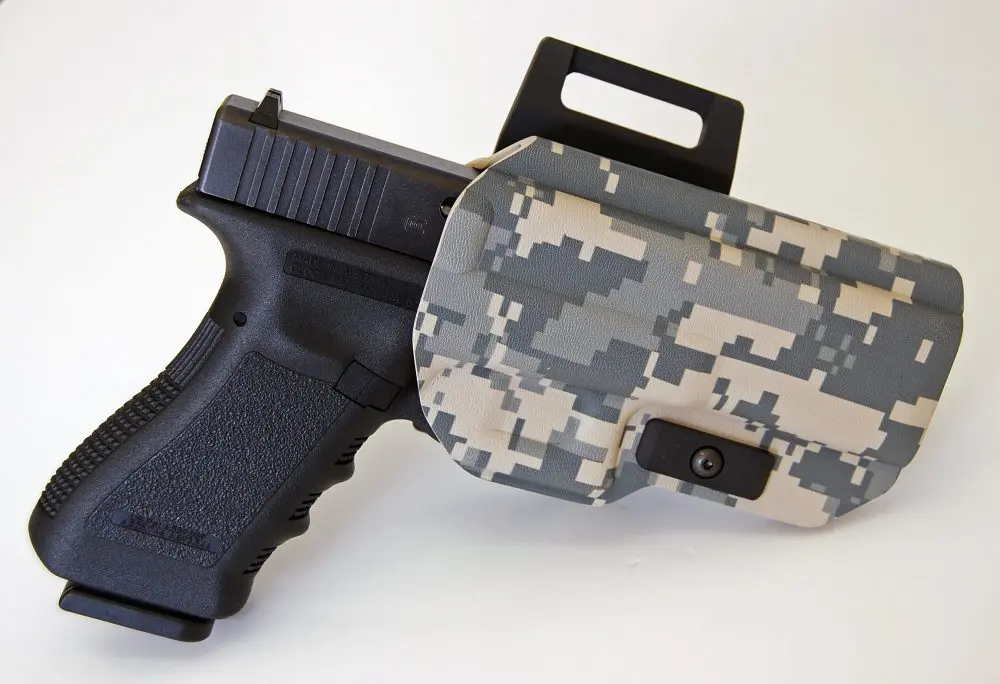
Millions of good citizens across the U.S. have obtained a concealed-carry permit to carry their firearm on their person to protect themselves if facing life-threatening violence.
The firearms, accessories, and training markets have now extended beyond the typical firearms enthusiast and to the everyday American. One of the least discussed elements of self-defense-based training is also possibly the most realistic: the ground. This is the single element that negates all the exercises we learn from some of the most capable shooters in the world.
When I say the ground, I am not referring to the stable platform we are standing on, but the highly incapacitating and limiting element that violent encounters often involve. There is a high probability that, when an attacker engages us with sheer aggression, we fall to the floor sandwiched between the asphalt and the attacker.
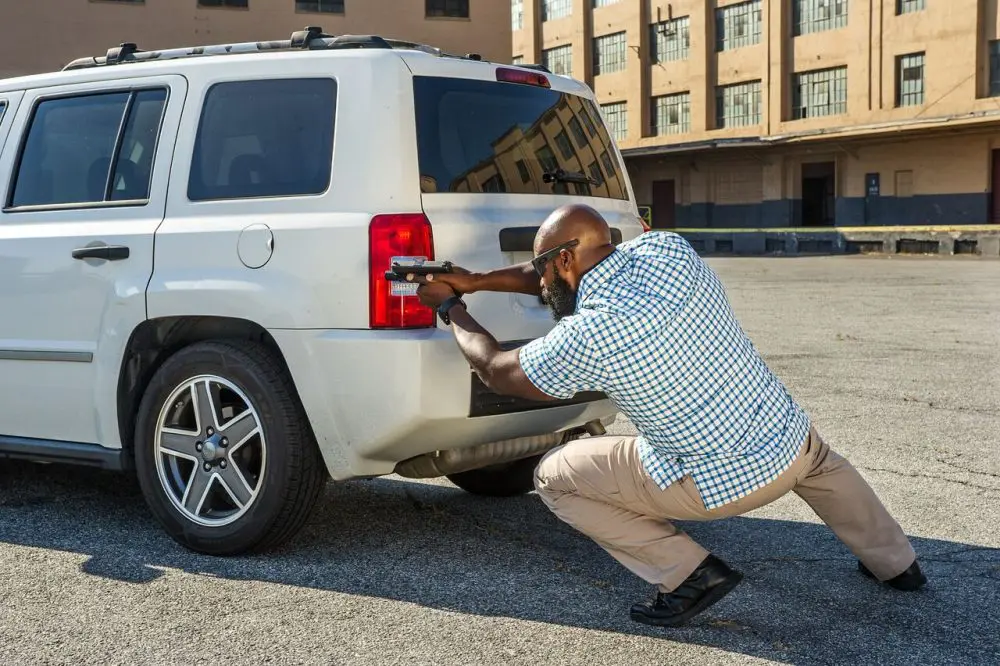
The statistical fact is that over 90% of violent encounters occur within 12 feet and over 75% within five feet. By the time you recognize the threat and reach for your firearm, odds are that you’re under substantial attack and most probably have been pummeled to the floor.
So where do those lightning-fast holster draws, index shooting skills, and speed reloads come into play?
In this article, I’ll cover some fundamental information in an effort to help understand and develop a functional skillset, along with hopefully inspiring some additional thoughts on what training needs to entail.
Before we begin, I will point out that this training should be conducted under proper supervision and using the proper training and safety protocols. Also note that in this article, I provide a snapshot of some variables, but as I teach this information at my training sessions, there is an entire training progression that cannot be encompassed in an article.
Table of Contents
UNDERSTANDING THE GROUND
The first aspect to understand about ground fighting with or without a firearm is the mindset. Although contestants in sport ground fighting/grappling arts can spend all their time on the floor while jockeying for position, the mindset in combative ground fighting is to either a) get to your feet as quickly as possible or b) be able to restrain an aggressor from escalating their attack. There is no room for any other variable!
The second aspect of ground combatives is to have a conceptual view of positioning. By that, I mean understand there are only two kinds of positions: Superior position and Inferior position.
A Superior position allows us to have full mobility, get to our feet, or hold someone down by limiting their mobility. Superior positions are usually analogous with on-top positioning.
On the other hand, Inferior position circumstances limit our mobility and require we have the prowess to navigate the floor.
Finally, understand there is an order of handling business. On the floor, we must first mitigate the immediate threat, which may be a person striking us, smashing us, using a weapon (knife, stick, rock), choking us, or otherwise.
Once we mitigate that threat, we then look for the opportunity or position to help us get to our weapon or move to a Superior position and then our feet.
This point is critical in surviving ground fighting-based attacks! People often panic under the stress of the position and put their fight into trying to get out rather than stopping the actual attack.
I wholeheartedly support having a firearm and the proper training to use it. But a firearm is a tool, and a tool that either may not apply or we may not be able to get to.
That being said, we always want to develop functional skills that are dynamic in a way that affords us the opportunity to utilize every tool we have as we need them. By focusing on the firearm only, we limit our functionality.
CRITICAL POSITIONS
Let’s look at two critical Inferior positions in detail. Why the Inferiors only? Well, if we are in a Superior position, we already have the ability to control, contain, get to our feet, or even get to a weapon if needed. Inferior positions are where people get into trouble.
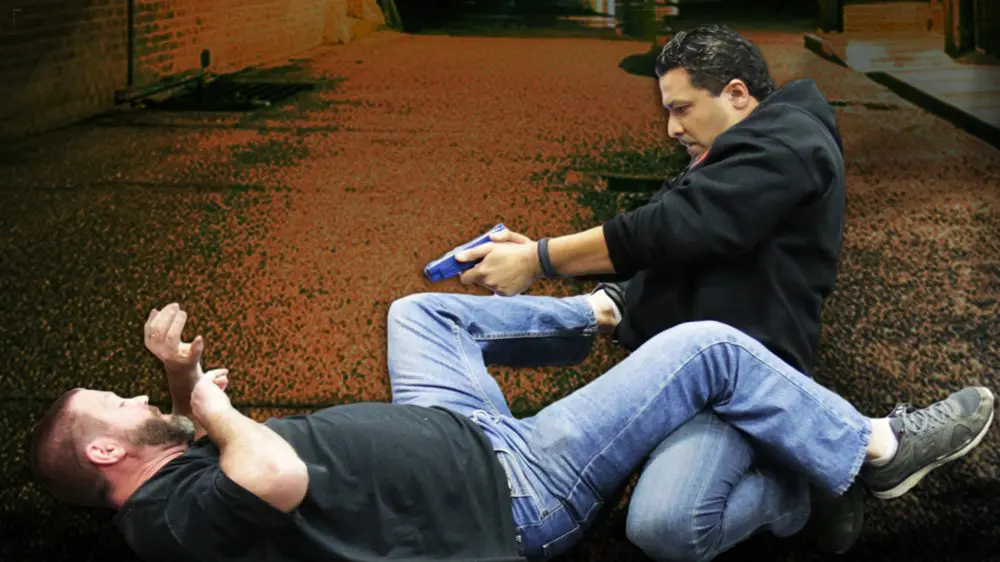
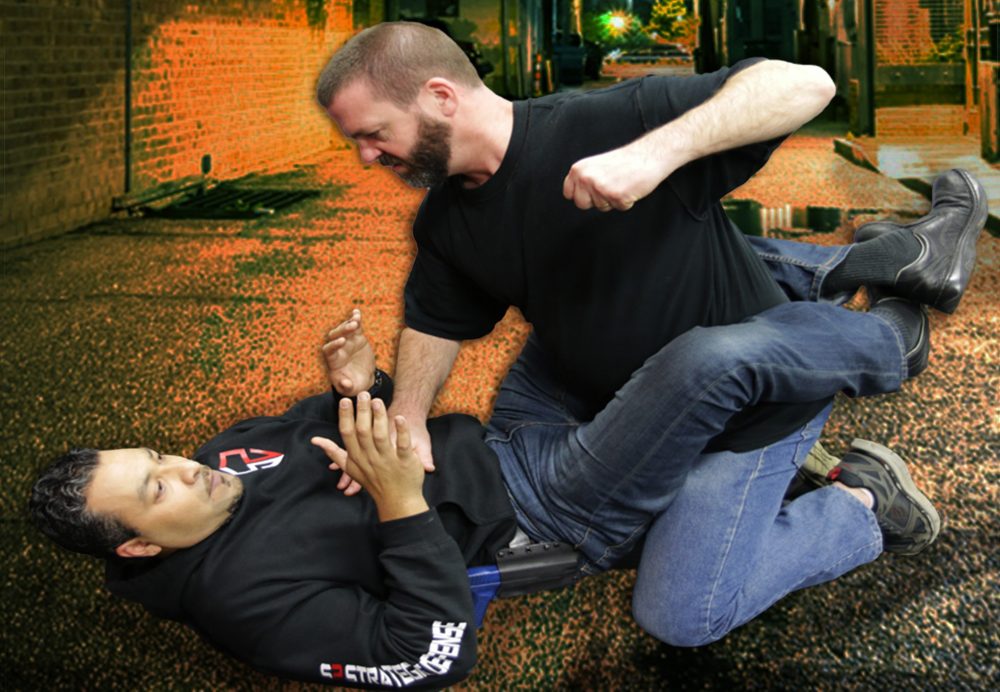
GUARD

The Guard position is a common position in ground fighting, and instructors who teach some ground combatives involving a firearm often show their tactics from here.The Guard position is simply we are lying on our back, and the attacker is in a kneeling position between our legs. Although that is a gross understatement, as the Guard position has many other critical details, for a visual purpose that description works.
The first aspects of the Guard to consider are understanding the immediate threats our attacker can impose, and how to negate those threats from our position. The Guard position affords us the ability to utilize our legs to deflect or create distance between us and the attacker.
We can also utilize the closed Guard position, which locks our legs around their belt line to close the distance between us and the attacker. This is often a good choice to limit the aggressor from their ability to move, and to help prevent the threat of striking or the use of blunt objects as weapons.
As far as weapons deployment is concerned, this position is the easiest of the Inferior positions for getting to our weapon. Our hips are free to move side-to-side, no obstructions are blocking our firearm and holster, and we do not have to bear the opponent’s weight.
For the Guard position, we’ll discuss three basic sequences that you can work on for yourselves at home. Take your time and pay attention to the finer details as you train. I also recommend obtaining a replica training firearm that fits inside your EDC holster.
Sequence 1
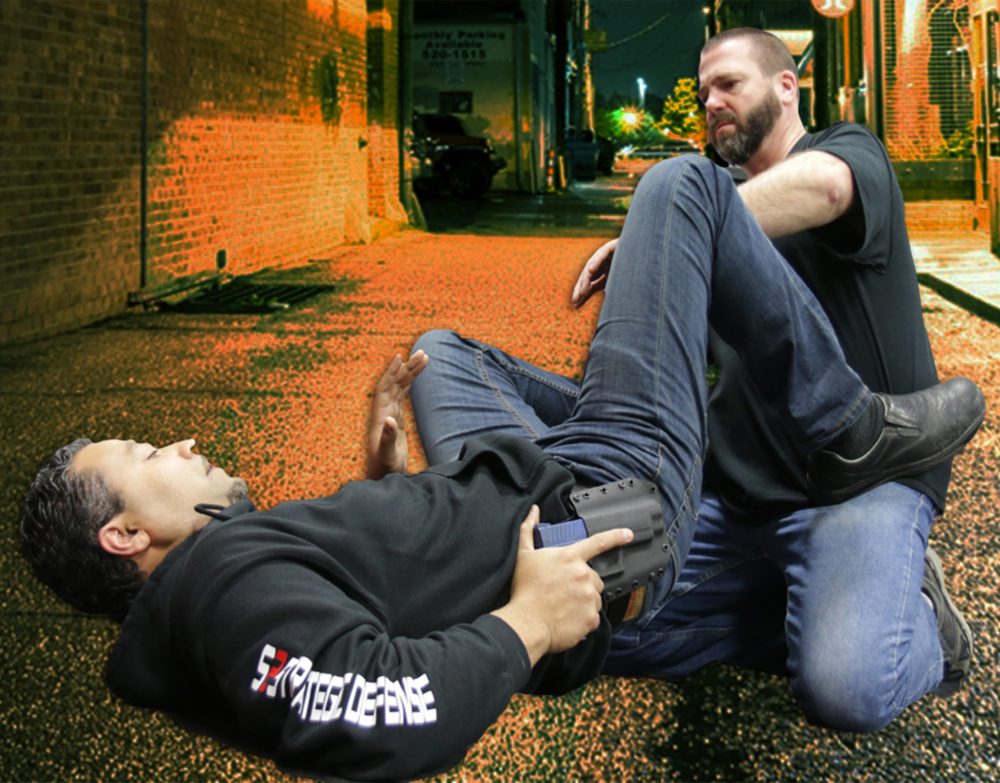
Starting from an Open Guard, we use our legs to deflect and gain distance, by placing our feet against the aggressor’s hips/waist area and pushing off. We can also use this as an opportunity to employ repetitive kicking motions if feasible.
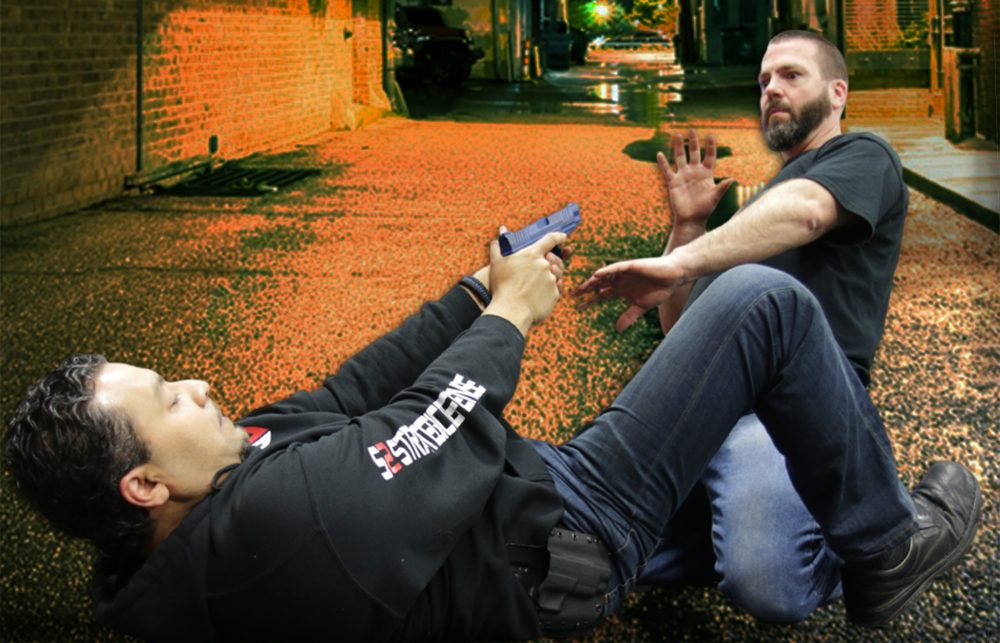
As we get the attacker away, we slightly twist in the hips so our holster side becomes exposed and then draw our firearm. Most often we will take aim from between our legs. Extend the muzzle end as far forward between our legs so we don’t sweep our own leg or groin area.
Sequence 2
From the Closed Guard position, our objective is to quickly entangle the aggressor by locking their head, neck, and one arm into an arm triangle configuration. We achieve this by reaching one arm around their neck, then weaving our head from below the attacker’s opposite-side arm while using our other arm to lock them down.
We then pull and rock backward, which results in our off-balancing the attacker and gaining some control over their upper body. At this point, we can attempt our weapon deployment by using one arm to hold down the attacker and the other to reach for our firearm. I recommend you solidify the position first and reassess if the firearm is needed or even possible to get to. You may have to secure the position for several moments first.
Sequence 3
From the Open Guard position, we place one arm across the attacker’s chest and collarbone in the open spear position to keep them from encroaching the space. Our other arm reaches behind us and acts as a support point for balance. From here we apply the “standing base” technique, which gets our seat off the floor and scoops our legs under us until we can stand up again, back away, and draw the firearm if needed or simply escape.
From these three sequences, we can see how the mobility of our hips and the usage of our legs are key components in ground combatives from the Guard position. We can also see a few challenges that being on the ground in an Inferior position can cause, and why a progressive training method is required.
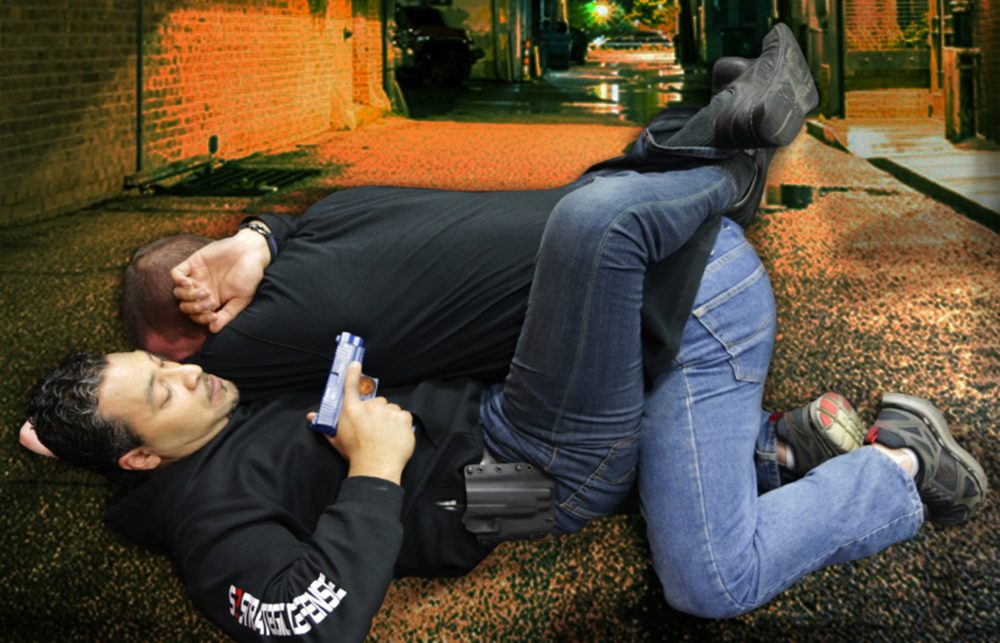
UNDER-MOUNT
The Under-Mount position is the hardest position to deal with: being below someone straddling or sitting on our chest/belly. The Under-Mount position has all the difficulties of being on the ground and also having to deal with someone’s weight and aggression.
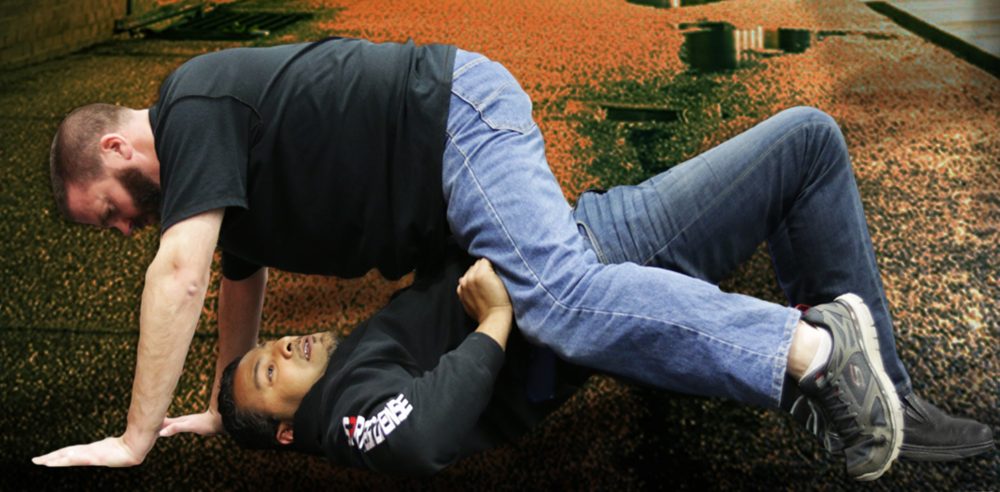
This position is most often used by an aggressor who wants to strike down, or smash our head into concrete, and basically knock us unconscious or kill us by isolating the head. The attacker also has the advantage of keeping his head upright, which negates our ability to reach his head.For weapons deployment, this position is extremely challenging. Not only do we have to deal with the attacker’s weight and aggressive actions, but the placement of his leg becomes an obstruction that prevents us from reaching our firearm. That means we need to respond to his positioning before we can do anything else.
Sequence 1
Learning to “bridge” or arching our back explosively and repetitively is one of the principal techniques from Under-Mount. Here we bridge as high as we can in efforts to off-balance the attacker and pitch their weight over our head.
If our bridge is performed correctly, the top-mounted person will have to reach forward to stop their momentum and prevent face planting into the ground. This is a good thing, as it not only moves their weight but also temporarily stops their striking.While they are pitched forward and our hips are high, we place one forearm across the front of their waist to help prevent them from sliding higher on our chest, and also giving us some substance to push off of.
Next, we slightly twist to seek our weapon for deployment. You will untwist with your firearm in a half-way to high compressed ready position, so either get on the trigger immediately or do not use this technique. You’re still on the bottom and they are still on top and in a good position to wrestle the weapon away, so make your decision early.
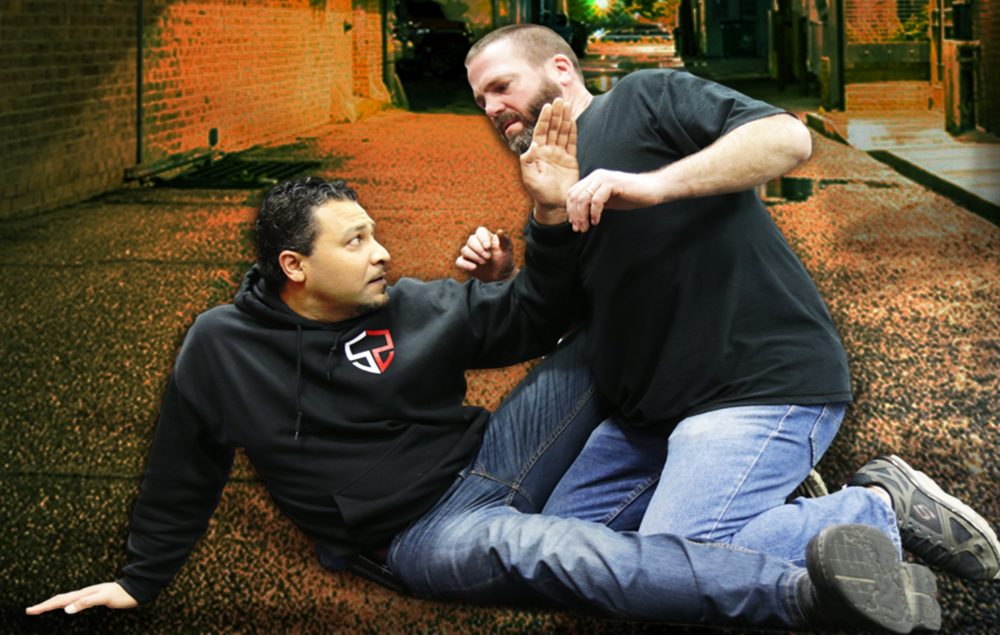
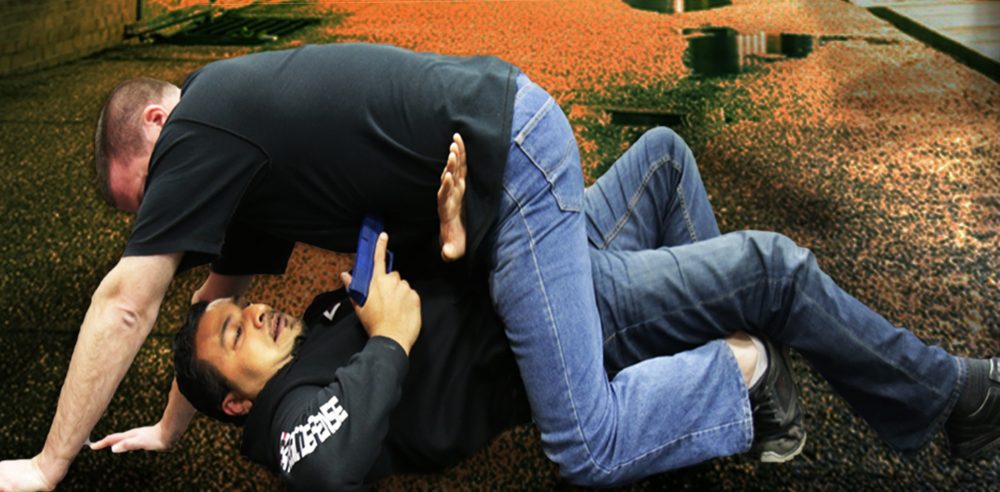
Sequence 2

We again utilize the high bridge technique to get our opponent off-balance and their arms forward. We can aid this motion by wrapping our arms around their waist and pulling as we bridge. This provides extra momentum that can make a real difference!The goal in this sequence is to dominate one side and be able to pivot back to our knees. In order to accomplish that, once we bridge, we drive one shoulder/elbow to the opposite side and leverage against the opponent’s underarm/rib cage area. For example, we drive our left shoulder/elbow to our right side while pushing against the opponent’s body. I personally prefer to place my forearm and tricep high into their armpit for a little extra push.
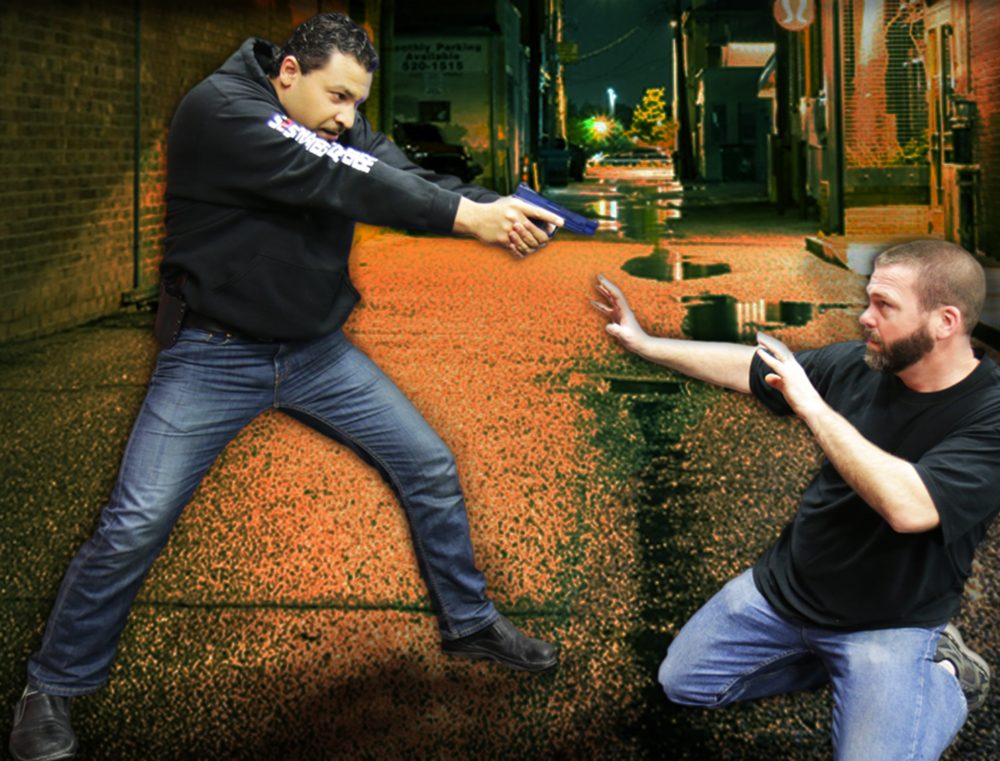
At this point, we need to drive/twist in a manner that brings us to our knees and them to their back. We can assist this by lifting them from behind their knee. Once they roll, we immediately draw the firearm and work our way back to our feet.
This particular sequence is best understood by the photos and is a personal favorite of mine. When we break it down step-by-step, it can seem a bit complicated, but try it just a few times and it becomes intuitive.
CLOSING REMARKS
In any of these sequences, the secret is smooth, explosive, and continual motions. By putting pauses in between each step, you invite failure as the opponent readjusts, and each movement loses momentum.
My recommendation to anyone learning how to grapple/ground fight with their firearm is that they should first spend some time simply navigating the ground tactics with no weaponry at all.
One of the truest philosophies and statements I have heard and experienced is, “The ground is like an ocean. Learning how to swim helps, but being a shark is better.” The idea is that, if you want to dominate that environment, you need to have intimate knowledge of how it works.
Despite covering some techniques, this article is not intended as a “how-to” tutorial. The bigger concepts to embrace are the understanding of ground combatives and the development of training methods to help us all improve in one of the most frightening combative environments we can face.
Train safe, train hard, and stay in the fight!
Nik Farooqui is the CEO and Director of Training Operations for S2 Strategic Defense. He can be found working with law enforcement agencies, corporate personnel, and civilian-based groups around the globe. If you would like to host/schedule his training, contact him at [email protected].
Photos by M. Ortega