THE harsh reality of barehanded survival is that you only have what you can carry.
Are you thirsty yet?
“Survival” implies that whatever task we face, we may be doing it with our bare hands. No problem. Aboriginal people accomplished a lot with their bare hands, not in the course of “surviving,” but everyday living. We can as well, including making critically useful ceramics—an important skill developed by all aboriginal peoples in temperate climes. Archeologists surmise the first use may have been to carry water.
The craft isn’t just cookie jars and high-tech knife blades. It might be you and I sitting in the mud, using ancient techniques to make something crucial to our survival, whether it be a water carrier or a cooking pot. “Ceramic” refers to heating a mixed solid to a temperature where some components melt and fuse the mass together, to the point

that it has a rigid shape when cooled. In this case, clay.
Table of Contents
NATIVE AMERICANS LEAD THE WAY
Although bookshelves have been written on the topic, here our mentors will be the sparsely equipped but highly accomplished Native Americans. When Europeans came, virtually all cultures in North America were making “low fired” ceramics at temperatures you can reach with wood or similar fuel. Techniques varied by culture, available materials, and need, but it largely paralleled what had been done in other cultures in Europe, Africa and Asia. These various peoples probably never met, but everybody does what works, and what worked for one culture usually works for another.
The everyday skill of Native American potters, highly advanced in many areas, was gradually lost because it became easier to just trade beaver pelts or other goods to Europeans for cast-iron cooking pots, and from the Brits on the eastern seaboard, for cheap imported Chinese ceramics. Never learn, do we?
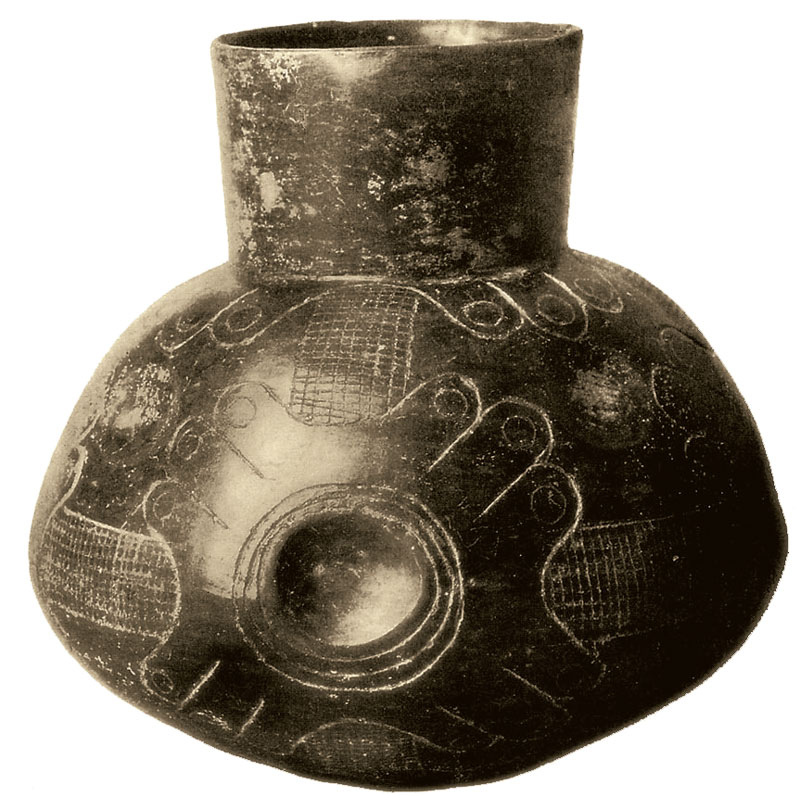
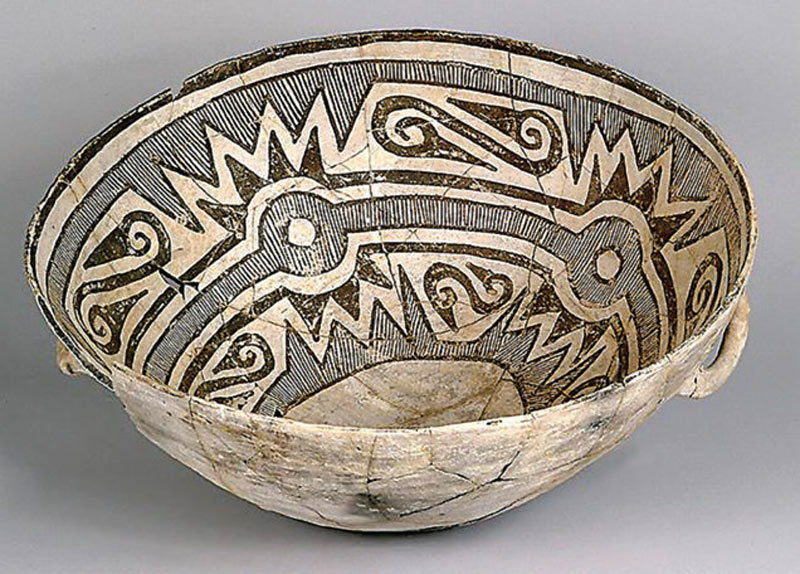
In the deserts of the Southwest, Native cultures were geographically protected from European influences and didn’t have a lot to trade. Here ancient skills not only lived on in everyday life, but continued to develop in forms that are considered high art. By any standard, the work of Pueblo ceramic artists such as Maria Martinez is simply as good as it gets. Her incised blackware today brings thousands of dollars at auction.
NEEDS MUST …
There are two common denominators among all native potters: Whether the Anasazi of Colorado, Hohokam of Arizona, or modern Pueblo potters, this craft that developed into an art form began because somebody needed a cooking pot, needed to store some grain or other food, or needed to carry water.
The other common denominator is that it was all accomplished with skill and artistry: bare-handed and essentially without tools. It was done on-site, with only the materials they had at hand for forming and firing.
Let that sink in. The only tools they had were the techniques they had learned. If pottery will help your survival situation, why not learn the essentials?
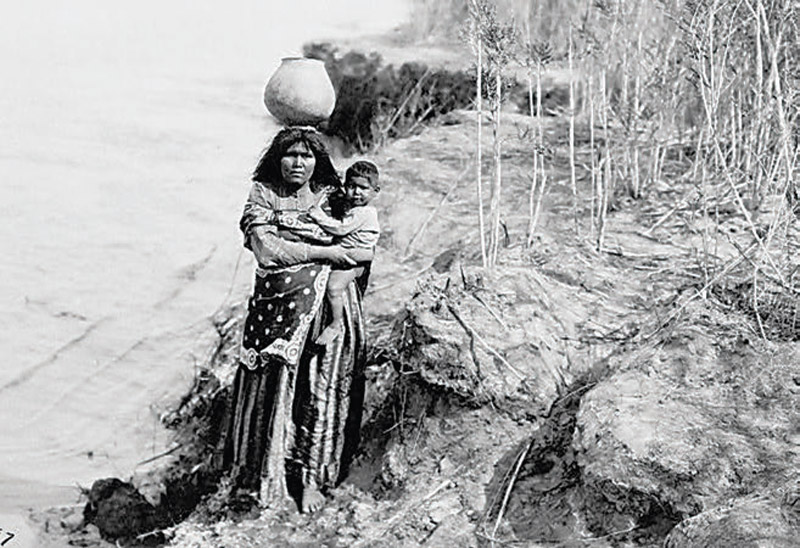
Pre-eminent among useful items to getting home again may be the ability to carry water. Some archeologists believe that the earliest useful ceramics may have come about because clay was used to seal wicker baskets to hold water. Somewhere along the line, some of these clay-sealed baskets were in a fire, which hardened the clay and caused an epiphany that gave man a whole new useful skill.
Suitable animal innards such as stomachs and bladders, and hide from legs, are still used to carry water in some quarters, but they don’t last. Ceramics, although fragile, can last thousands of years. Paleontologists often track prehistoric civilizations or even name them by their ceramics.
Two techniques used by aboriginal potters the world over, including Native Americans, are the “pinch-pot” and “coil” methods. We’ll deal a little later with the properties of usable clay and where to find it, but let’s jump right in and get our hands dirty.
WILL DO IN A PINCH
If you give a wad of plastic clay to a little kid, after they taste it, they will stick a finger into it and begin to form it into a pinch pot. Judging from surviving ceramic artifacts and shards, the “Venus” from the Eastern Czech Republic (dated to 29,000 BC), was the earliest purposeful shaping and firing of clay.
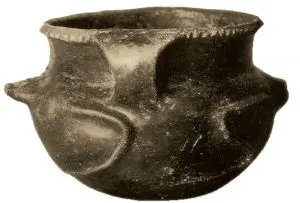
Once you know that clay will harden when fired, it’s a small step from there to taking a ball of clay and pushing an indentation and gradually stretching and forming the sides into a cup-like container. Containers found in China date back to 16,000 BC. I have a prehistoric drinking cup from the “pine-needle” people of Central Europe, so named because they used pine needles to poke decorations in their pots. Interestingly, it has a round bottom. Why not? Paleontologists figure they didn’t have flat tables to put it on anyway.
The “survivalist” technique for pinch pots is to take a lump of clay with enough material to make the cup or bowl you want, and gradually push/ pull/squeeze/stretch it into the desired shape. Clay has to be stiff enough to stand alone, yet soft enough to shape. You’ll need to keep your hands wet so the clay doesn’t stick to them, but not so wet that water gets added to the clay. If the clay gets too soft to keep the shape you have given it, set it aside until it dries some.
Keep the thickness even. Once dry enough to carefully handle, but still soft enough to shape (potters call this “leather hard”), you can gently smooth and burnish the surface with a smooth stone, bone, or piece of wood, which will help fill in pores in the clay, making it more watertight.
The good news about pinch pots is that they’re simple. Anybody can make an ugly pinch pot, and if you keep all the walls the same thickness, it will probably dry (upside down) without cracking, fire OK, and be useful.
The bad news is, nobody ever figured out how to make a big pinch pot, and it’s hard to cook a nice batch of rabbit or squirrel stew in a coffee cup.
SLABS
Somewhere along the line, those who discovered the magic of ceramics discovered that soft moist clay would stick to other soft moist clay, and you could build upon your work to make something bigger. Thus evolved the slab and coil techniques.
The slab technique requires a work surface, which you may not have in the wilderness. I’ve seen native gals form both tortillas and ceramic slabs on the wide part of their thigh, and some did have a good-size work surface, but a flat, clean rock is better.
The idea is simple: flatten out the clay to the thickness you want, cut out the geometric shapes you need, moisten the edges with “slip” (“gravy” made of clay and water) as you would a pie crust, pinch together, and smooth. With a little luck, you can form about a twoquart container this way.
COILS
The coil method takes more time and effort, but the results are better. Round containers of five- to eight-gallon capacity are routinely made by those accomplished in the technique. But start small, make your mistakes small, and learn.
For coil building, start either with a round slab circle, or coil, and form the bottom to the dimension you want. Everything else being equal, the thinner the wall you can build, the better it is likely to dry and fire without problems. About a quarter inch is a good starting point for small pots, up to a half inch for larger cooking pots.
As a rank and untalented amateur, I like a slab bottom to start, because you don’t have to worry about circular voids on the bottom between the coils.
Form the moist soft (“plastic”) clay into pencil-like rods by rolling between your hands or against a flat surface. Lay these on top of the existing work, building up the form you want. Every few layers, stop and smooth the sides together while it is still soft and will stick well. To bring the form wider, lay the coils very slightly outside the existing perimeter. To bring the shape smaller, lay the new coils slightly inside the existing layer.
Be careful not to cover over any voids. Trapped air will quickly expand at firing and blow holes. Even open holes will cause cracks.
Few traditionally shaped bowls, cups and vessels have straight sides. Round is not just a pleasing form to the eye, but also has a structural reason. The rounded urn shape of a traditional pot or vessel is, like an egg, the optimal shape to resist outside pressure or impact.
For a personal water supply, a canteen needs a neck as narrow as you can form it, so it can be closed with a wood or ceramic stopper, and you can add loops for a thong just as Native Americans did.
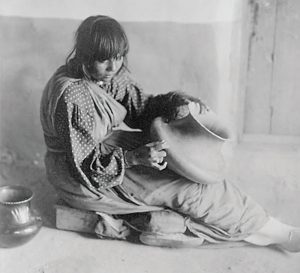
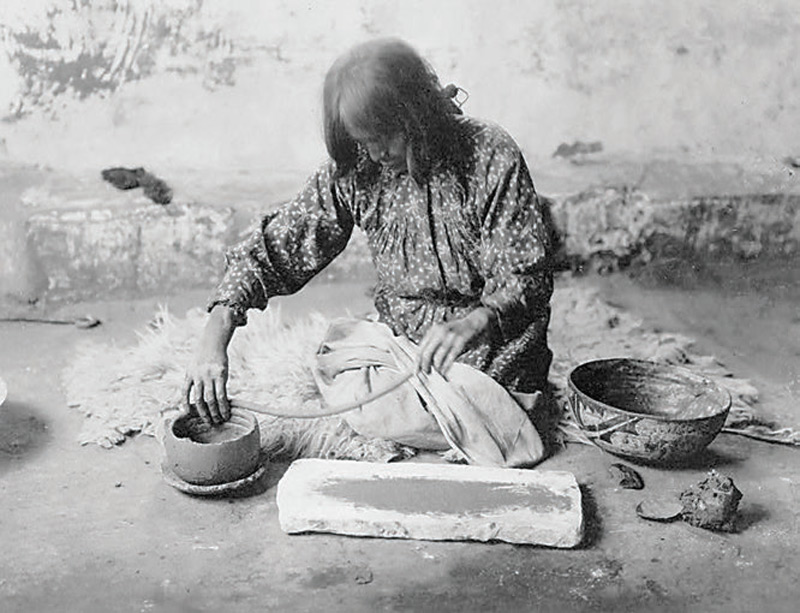
That’s the theory of what you do, and the theory is country simple. Our mentors here are past masters of the profession, the Southwestern Native Americans. Fortunately, the science of photography came in time to record how they had done it since forever. Study these pictures, because they’re worth more than a thousand of my words.
FINISHING AND FIRING
When “leather hard,” surfaces may be gently burnished with a very smooth pebble to close and seal them. When quite dry, they can also be painted with “slip,” which acts as a sealant. Common problems in firing arise from the work-piece not being bone-dry or from organic contamination in the clay. The work may be fired in a firepit or an adhoc kiln built from fired clay bricks, as was common in very early Europe.
Different societies have used different techniques, but the principles are the same: The work-pieces must be bone dry (place near a fire to dry if necessary). Raise the heat slowly, bring it to a bright cherry red, and keep it there for several hours. It must come to temperature and cool very slowly to avoid heat-shock loss. Stockpile your fuel before you start and add fuel gently. When cooking with such low-order ceramics, the same rules of heating and cooling slowly apply.
In Africa, soft-fired red clay is often simply buried in a brush pile, and the pile gently fed. Learning at home, you can punch one-inch holes on about an eight- to ten-inch pattern in a steel drum or old garbage can. Bury the work in dry sawdust, wood chips, or bone-dry manure, light it at the top, and cover.
When burned to white ash, let it cool for several hours with no draft. Although ceramics are “simple,” there is a function of technique learned by doing. Try it ahead of time—it’s fun. If nothing else, next time you have brush piles to burn, make up some simple ceramics ahead of time and have fun with it.
FINDING AND PREPARING THE CLAY
“Clay” refers to a mixture of fine to very fine (.002mm and smaller) minerals, mostly hydrated aluminum silicates, that are plastic when wet and solid when dry, and containing components that when heated will fuse, then harden when cooled.
The mixtures within this definition can vary widely, but deposits are generally washed in by water and, if conditions are very precise, often very homogenous deposits are formed—and a good place to look is along watercourses where old deposits are exposed. In some areas, there are deposits of “refractory” (ceramic worthy) clay hundreds of miles across, overlaid with humus and sod, sometimes exposed.
Clay is common. But within this broad definition and composition, results vary dramatically, meaning that every clay deposit can have a unique firing point, texture when fired, color— and strength. This depends not only on composition, but also the heat and technique with which it was fired.
If properly prepared, most clay will fire for the low-order firing described here. “Preparation” means removing all coarse grains and organic material, such as root fragments, leaves or debris.
Your “refinery” can be no more than a small pit, maybe in the bed of clay itself. With a stick or what you have, dig the pit and use your feet to mix the clay with water to a soupy, even mixture. Coarse grains will quickly settle out, and most organic trash will float to the top. Give it time to stratify, then scoop off all floating material. Let it sit, then do it again until nothing floats. Scoop out all the water, down to the “mud.”
Let what’s left drain and/or dry, until you can hand-scoop it out. The top material will be finer: Dig down only until you feel it getting gritty. Let what you have gleaned dry until it is about like wet pie crust, and on a clean flat surface, knead/pound it into a homogenous mass. Sometimes you get lucky and find easy deposits that are as pure as the driven snow, but if near the surface, always test for organic contamination.
OK, we’ve thrown the gauntlet in the clay. Care to make something out of it?