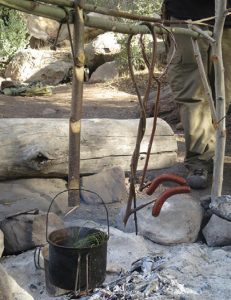
IN the September issue, I covered rustic camp living, with open fires for warmth and cooking using minimal but effective tools like the axe and knife. A cook fire is great, but you need a way to get the food to the fire without it falling in or becoming burned beyond recognition.
Many kettles from yesteryear and today have a bail that allows them to be suspended over a fire or coals. Besides a camper taking along a pot-chain with “S” hooks, there are other ways of suspending a kettle or pot over a fire. This type of woodcraft is usually done with a knife and axe, depending on your style and preference.
In order to suspend pots and kettles over the fire, pothooks must be made out of green wood. A plethora of woodcraft techniques can be used to accomplish this. The best resource I have come across is Daniel Beard’s The Book of Camp-Lore and Woodcraft.
FIXTURES
Pot Claw
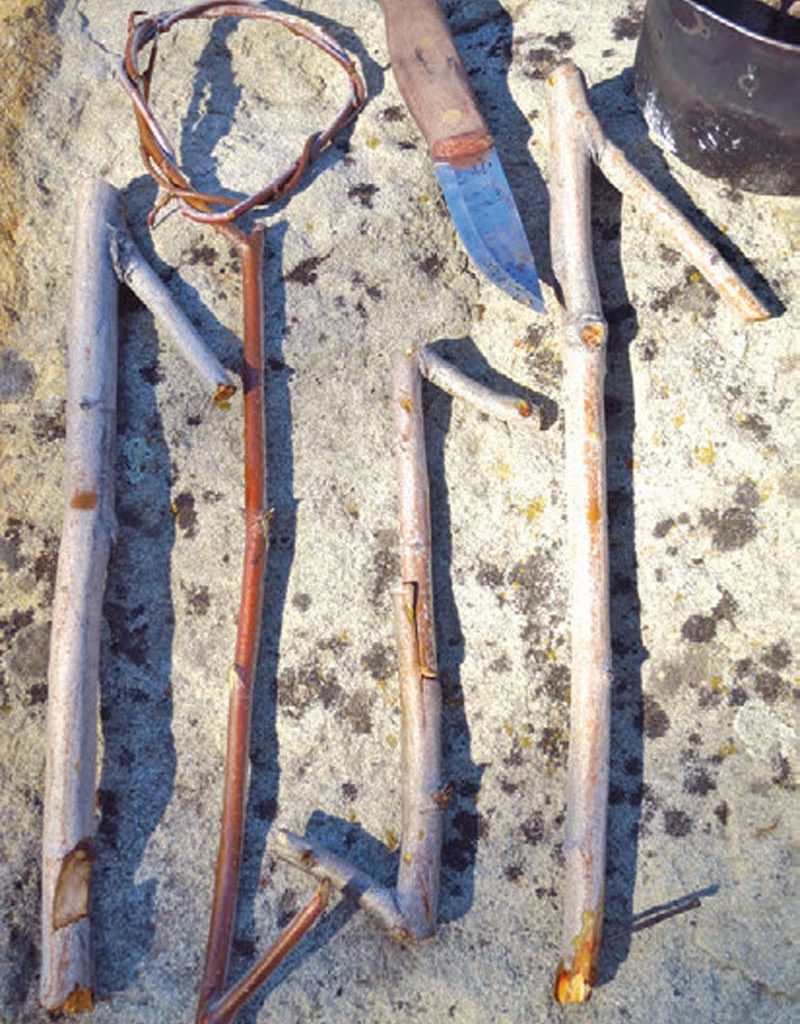
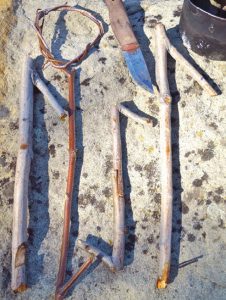
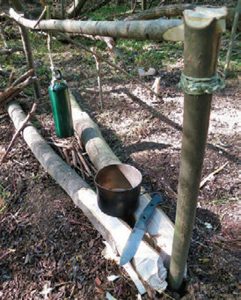
Arguably the most common fixture for suspending cookware is the pot claw. Using whatever green, stout, flexible wood is available, cut a green stick that has a natural fork or offshoot branch about three inches from the junction, and leave several inches of wood lengthwise to hang. The stick is inverted so it hangs on the waugan (cross) stick. At the opposite end of the stick, carve a V notch into the stick by using a knife to lightly baton an X into the green wood about one inch from the end. Carve out the top section, down, so that it creates a bird’s beak shape that the pot bail will hang from.
Hake
The hake is quite simple. It starts off like the pot claw, with a V-shaped green branch that must be trimmed above the junction and inverted to hang down off the waugan stick. Instead of carving a V notch to support the kettle bail, drive a nail into the bottom part of the stick about one inch from the end and at a 45-degree angle. This is a very simple yet effective way to suspend cookware.
Gib
The most time consuming and possibly the most difficult is the gib. Two separate
Section has been flattened for resting
smaller cookware. Split and lashing
technique has been used on flat post
rather than procuring another
Y-forked branch.
green branches with a natural fork or offshoot branch must be sized up, then each flat end notched and split so the two ends fit perfectly together, with the forks facing away from each other. This lets one end hang on the waugan stick and the other end hold the kettle. I have used a nail to join the two parts that have been notched and split, but I like the idea of using an awl or nail to burrow a hole through the green wood, then use a stick as a wooden wedge to hold the two pieces together.
Gallow Crook
This type of pot hanger requires very flexible wood, like willow or mountain mahogany. Trim a V-shaped branch just a few inches above the junction, but this time it will serve as the potholder. The top of the green branch must be left long and have a thin taper. The technique is to bend the top portion of the green stick in a circle, interlocking it to itself. The downside of this fixture is that it cannot be removed easily without taking off or lifting the waugan stick.
SHELTER CRAFT
My favorite piece of literature ever written and that I believe captures the

essence of wilderness living is Woodcraft and Camping by George Sears Washington, known as Nessmuk. He describes the simple construction of what he calls an Indian camp.
A-Frame Brush Shelter
The shelter depicted in his story is an A-frame brush shelter that uses the bushiest possible branches. Starting with a 10- to 12-foot ridgepole (no thicker than your wrist), sharpen one end slightly and jam it into the ground, and the other end into the rough bark of a scraggly tree. Using a variety of different-sized sticks, construct the ribs with dry sticks found on the forest floor and build up the sides until the structure roughly resembles a dinosaur skeleton.
Then with a small tomahawk, hatchet, machete or saw, harvest boughs
from trees that provide large surface area coverage. Pine may be abundant in most places, and spruce, fir, or hemlock if you are in the northern forests. When any of these types of branches are turned over, they have the ability to shed water and snow and deflect wind. Starting at the bottom or foot, lay the smallest boughs at a steep angle and shingle them onto your ridgepole, moving the thatching upward. This makes a sort of bear den, very well calculated to give you a comfortable night’s rest.
Using pinecones (if available), fill the interior of the shelter with pine straw, cones or boughs from trees. It must be two to three feet high so when compressed, it equals at least six inches of loft. This is vital to insulate the body from heat loss through to the ground, which is called conduction.
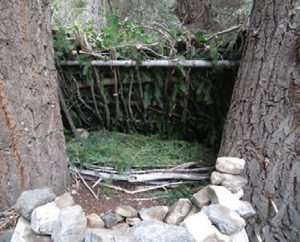
Lean-To Shelter
Another popular traditional shelter is the open-faced lean-to shelter. It is perhaps the most commonly made natural shelter used around the world that utilizes an open fire in front of the structure to provide warmth and protection.
It consists of a ridgepole about eight feet long and no larger than wrist thickness in diameter. Lash the ridgepole between two trees or place it in the crotches of two Y-shaped trees, about shoulder or chest high. Eight to ten poles, no thicker than your wrist and six to eight feet long, should be laid across the ridgepole at a 45-degree angle.
Gather smaller, thinner sticks and weave them in between the diagonal poles to complete the framework for the lean-to. Thatch the framework with boughs starting at the bottom, and shingle the structure so no light can be seen from the inside.
The last step is to pile up enough brush so there are at least six inches of compressed loft. Depending on your weight, this can mean anywhere from two to three feet of branches or pine straw to start with.
Now all that is needed is a long fire about five feet long positioned one good step in front of the lean-to. Use hardwoods such as oak, maple, sweetgum, or hickory because they put out the most BTUs and the least amount of embers will shoot back at you when you are sleeping. Soft wood like pine, alder, willow, hemlock, and birch are great for getting the fire stated, but are like the fourth of July when you’re trying to sleep.
Nessmuk wrote about an Indian camp: “Ten o’clock comes. The time has not passed tediously. You are warm, dry and well fed. Your old friends, the owls, come near the fire-light and salute you with their strange wild notes; a distant fox sets up for himself with his odd, barking cry and you turn in. Not ready to sleep just yet. But you drop off; and it is two bells in the morning watch when you waken with a sense of chill and darkness. The fire has burned low, and snow is falling. The owls have left, and a deep silence broods over the cold, still forest. You rouse the fire…. The smoke curls lazily upward; the fire makes you warm and drowsy, and again you lie down—to again awaken with a sense of chilliness—to find the fire burned low, and daylight breaking. You have slept better than you would in your own room at home. You have slept in an Indian camp.”